Getting Started
Welcome to the user manual of eViewer v7 which is a proficient, competent and result-oriented product. This guide has been designed for the users to understand the software with precision and accuracy. So, we recommend you to carefully go through the guide before launching the product, keep it safely and can be accessed readily for future reference.
Overview
eViewer v7 is a powerful, zero footprint HTML5 document viewer for viewing multiple file formats including MS Office (Excel, Word, PPT) TIFF, JPEG, PDF, AFP, MODCA and many others. It is a high-performance document viewing solution that enables users to view documents and images from a desktop or any mobile device within an internet browser or web application.
Supported File Formats
eViewer v7 supports all of the following file formats:
| IBM Proprietary | MS Office | Document | Image | CAD | |
| MODCA | DOC | EML (with attachments) | PDF (1.0 to v2.0) | ABIC | DWG 2018 |
| IOCA | DOCX | MSG (with attachments) | Password Protected PDF | BMP | DWG 2013 |
| PTK/PTOCA | XLS | CAL | DWG 2010 | ||
| AFP | XLSX | RTF | DCX, DCM | DWG 2007 | |
| PPT | TXT | EMF | DWG 2004 | ||
| PPTX | GIF | DWG 2000 | |||
| VSD | JBG (JBIG) | DWG R14 | |||
| JB2 (JBIG2) | DWG R13 | ||||
| JPG (JPEG) | DWG R11/12 | ||||
| JPEG-XR (HDP) | DWG R10 | ||||
| JPEG-LS | DWG R9 | ||||
| J2K, JP2, JPM, JPX | DWG R2.60 | ||||
| PNG | DWG R2.50 | ||||
| PNM | DWG R2.22 | ||||
| PPM | DWG R2.21 | ||||
| PBM | DWG R2.10 | ||||
| PCX | DWG R2.05 | ||||
| RAS | DWG R1.40 | ||||
| TIFF | DWG R1.2 | ||||
| WBMP | DWG R1.0 | ||||
| WMF | DWF | ||||
| XPM | DXF |
Understanding User Interface
eViewer v7 has a user friendly and intuitive user interface that provides quick access to the user requirements.
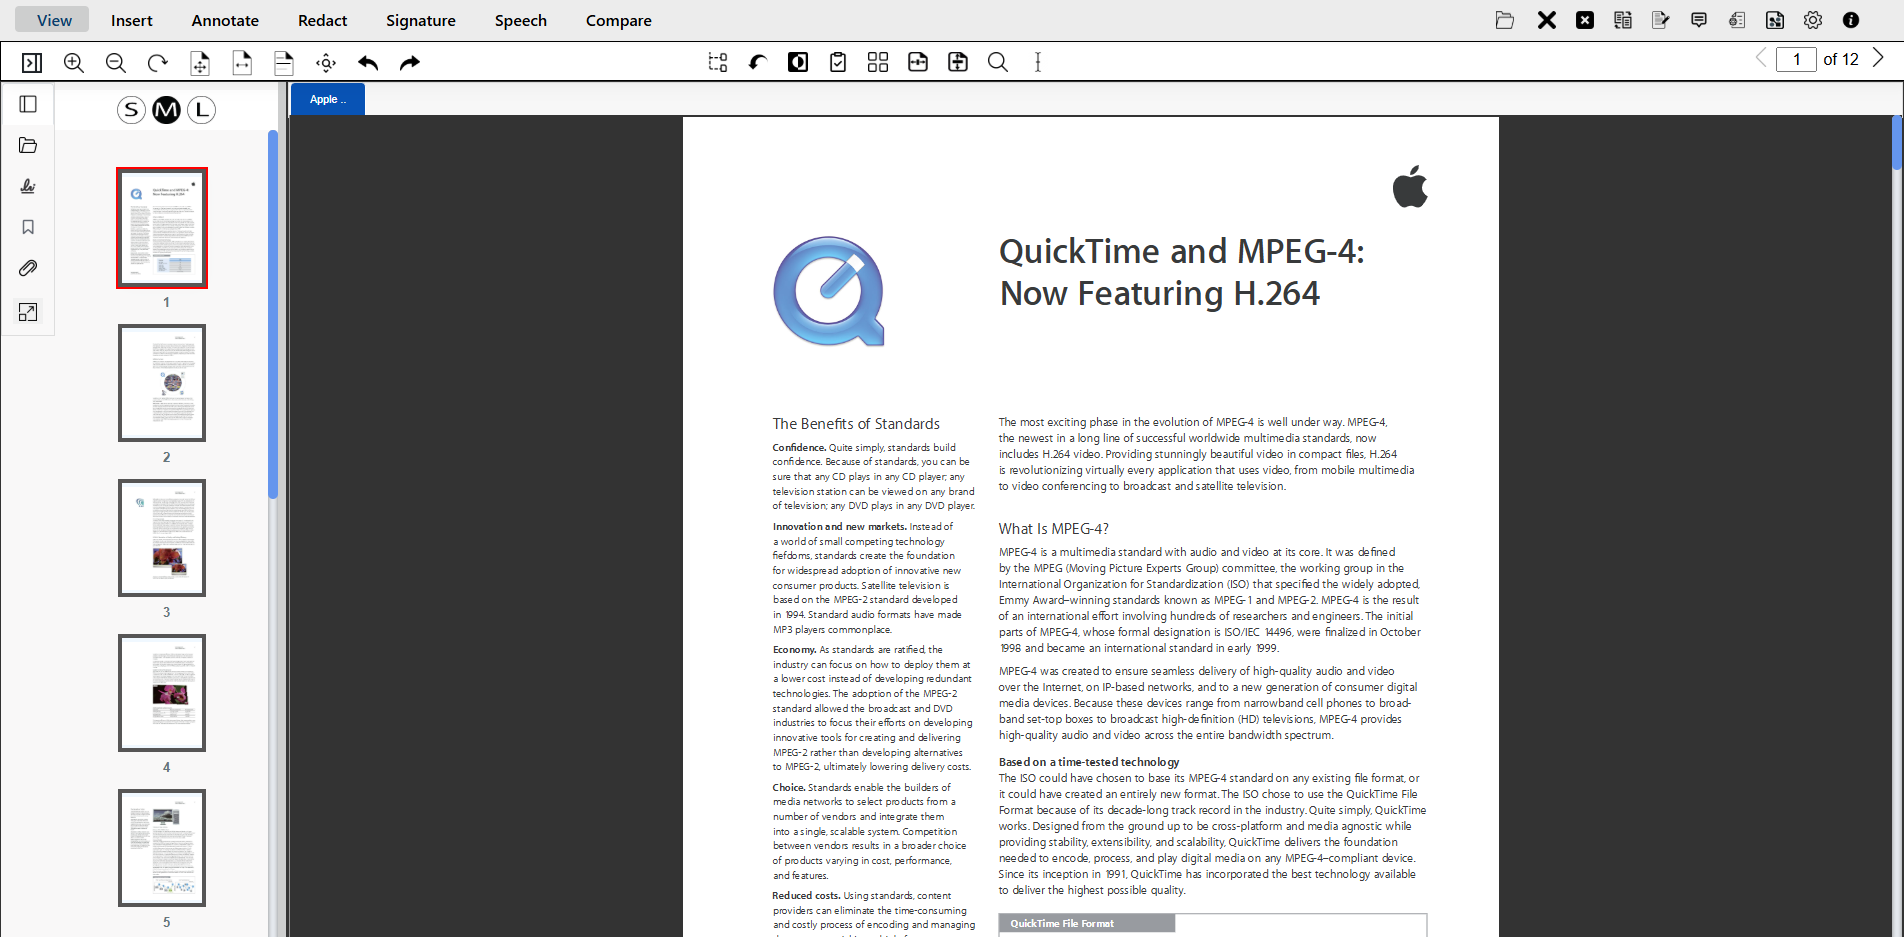
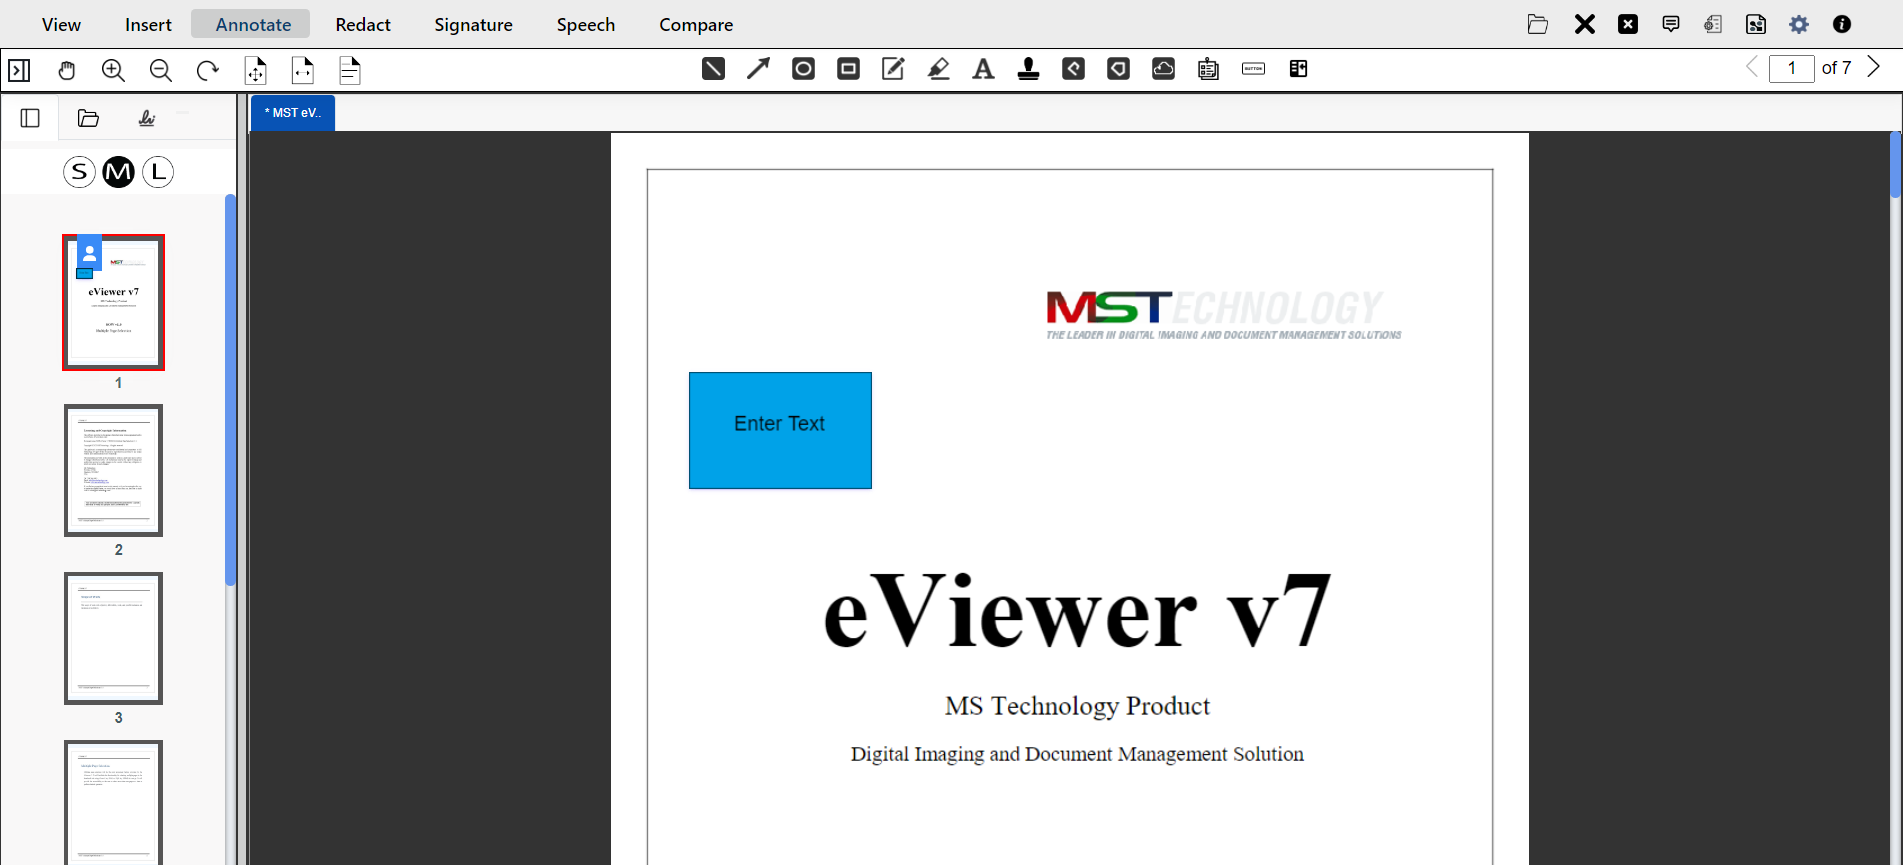
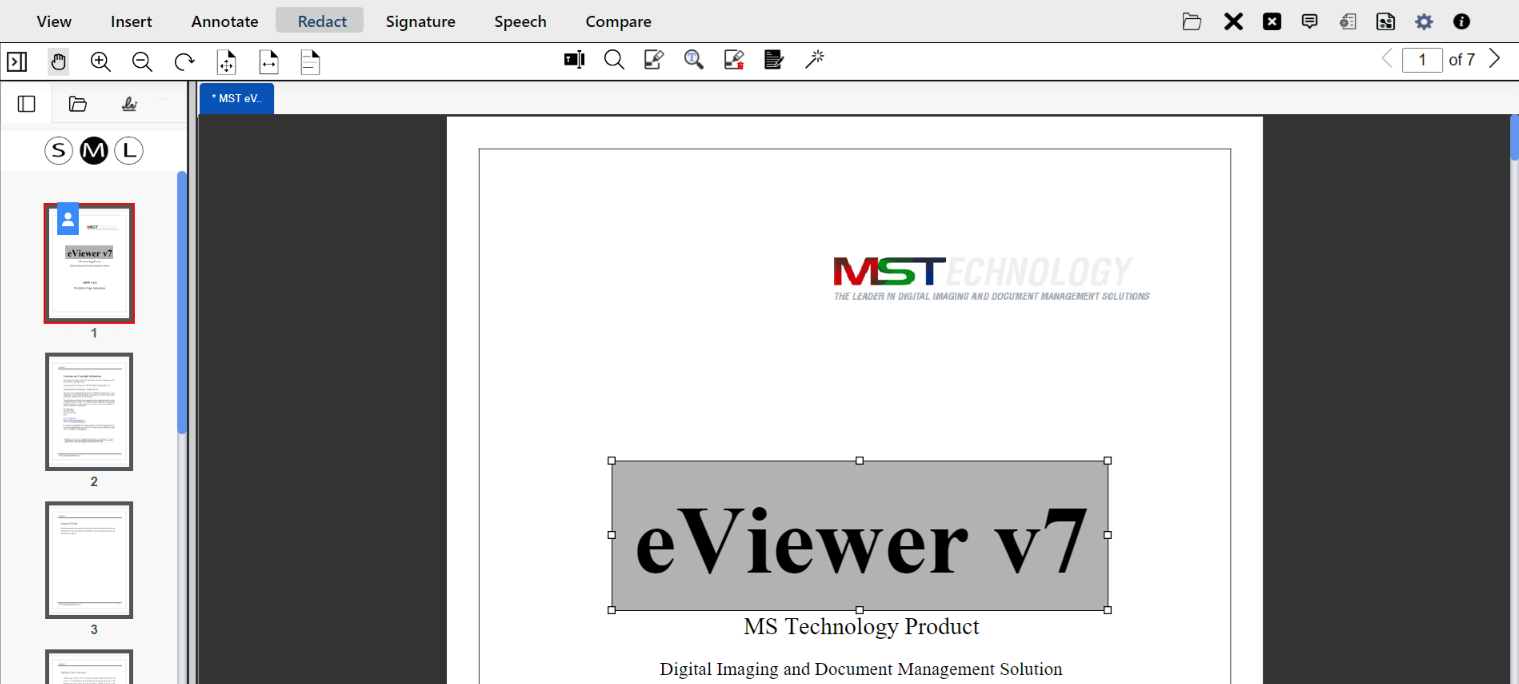
Blank eViewer v7
After submitting the viewer URL, this blank eViewer v7 will be displayed.
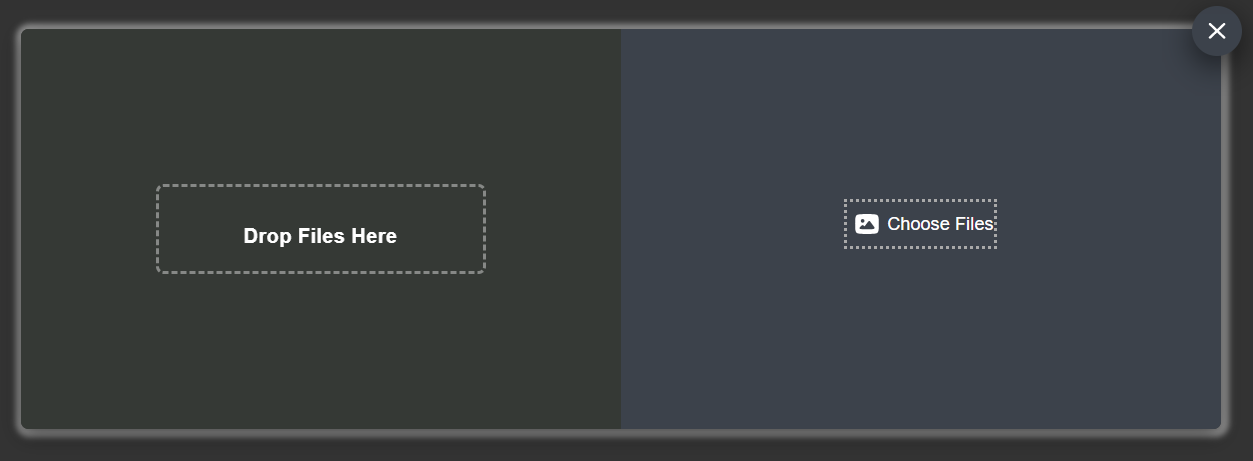
There are three ways for loading any type of document within eViewer v7 for viewing and manipulation:
- Upload
- Open File
- Scan Document
Upload
User can upload a document through an upload document button located on the right-hand side of the blank eViewer v7.

Click on the button, a dialog box will appear asking for choosing the desired repository from which the document needs to be fetched.
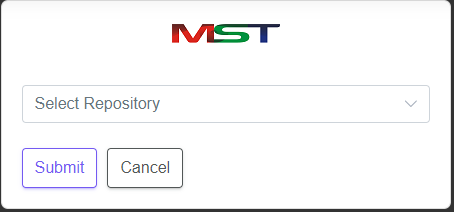
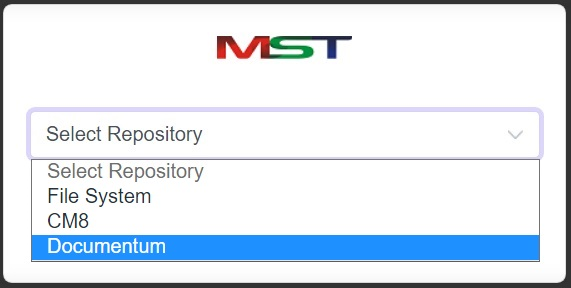
Users can upload the document from:
- File system
- IBM Content Manager 8 repository (CM8)
- OpenText Documentum
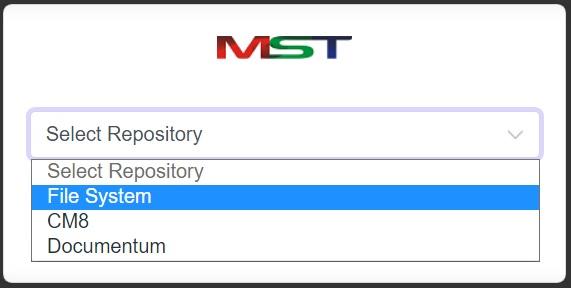
- File system
File system is the local storage of the computer. User can upload a document simply by selecting file system from the given dropdown list.
As soon as the file system option has been selected, another dialog box will pop up asking for some details which is required for uploading a document. These details are specific and consist of URLs which is necessarily required for the viewer to render the document.
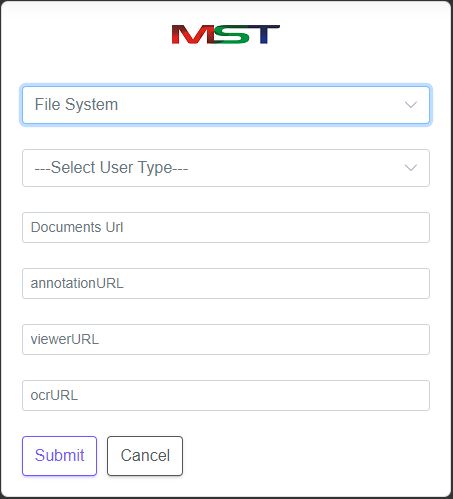
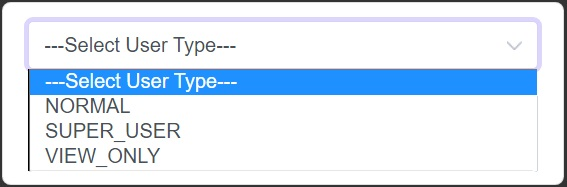
Required information includes-- Select User Type: There are three types of user access- normal, super user and view only.
- Document URL: The format of the Document URL format will be:
<Protocol>://<IPAddress>:<PortNumber>/<ApplicationName>/<FolderName>/<DocumentName>.<DocumentExtension>
- Annotation URL: This URL will help the viewer to display all the previously saved annotations from the respective xml file.
- Viewer URL: The format of the Viewer URL will be:
<Protocol>://<IPAddress>:<PortNumber>/<ApplicationName>
After entering all the required URLs click on the submit button, then the viewer will render the document in the document viewing area.
- Select User Type: There are three types of user access- normal, super user and view only.
- IBM Content Manager 8 (CM8)
IBM CM8 provides a readily accessible system of storing and retrieving documents in almost any format. eViewer v7 enhances its functionality by providing flexible uploading of a document from CM8 by simply selecting the CM8 option from the given dropdown list.

As soon as the CM8 option has been selected, another dialog box will pop up asking for some details which is required for uploading the document from the content management system.
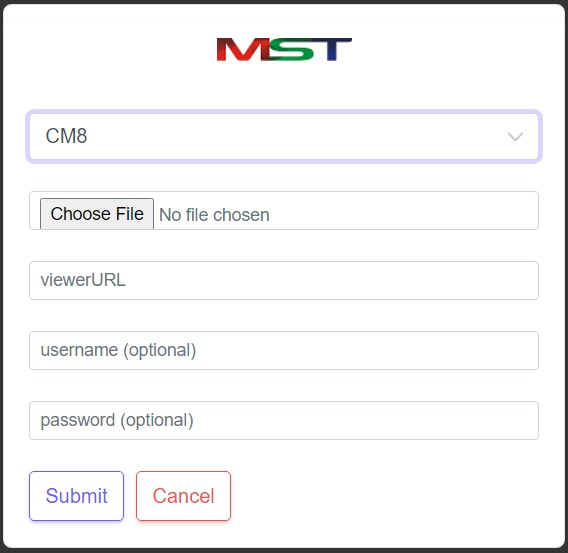
Choose file and provide viewer URL in the above format. Username and password are optional fields. After entering all the required URLs click on the submit button, then the viewer will render the document in the document viewing area. - OpenText Documentum
OpenText Documentum is a document management software which store documents like any other ECM. eViewer v7 allows flexible uploading of a document through documentum by simply selecting it from the dropdown list.
As soon as the Documentum option has been selected, another dialog box will appear asking for relevant details for uploading the document from this software.
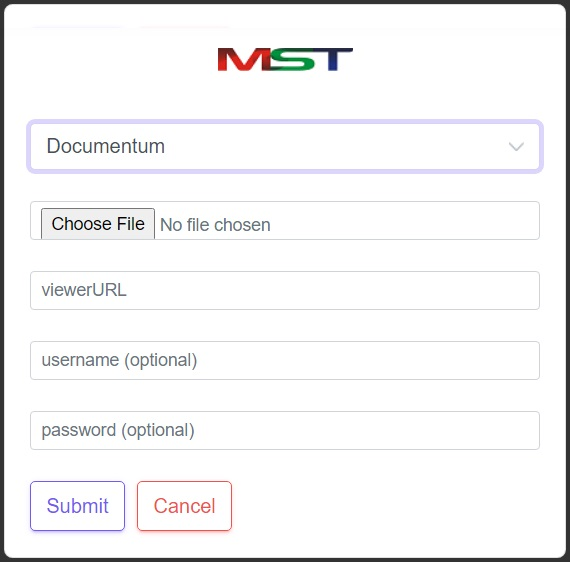
Choose file and provide viewer URL in the above format. Username and password are optional fields. After entering all the required URLs click on the submit button, then the viewer will render the document in the document viewing area.
Open File
User can open a document by selecting the Open File button located on the top right tab of the “blank” eViewer v7.
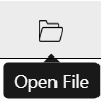
On clicking the Open File button, a dialog box will pop up allowing the user to select a document and render it in the viewer.
User can open multiple documents through this open file button, but one at a time.
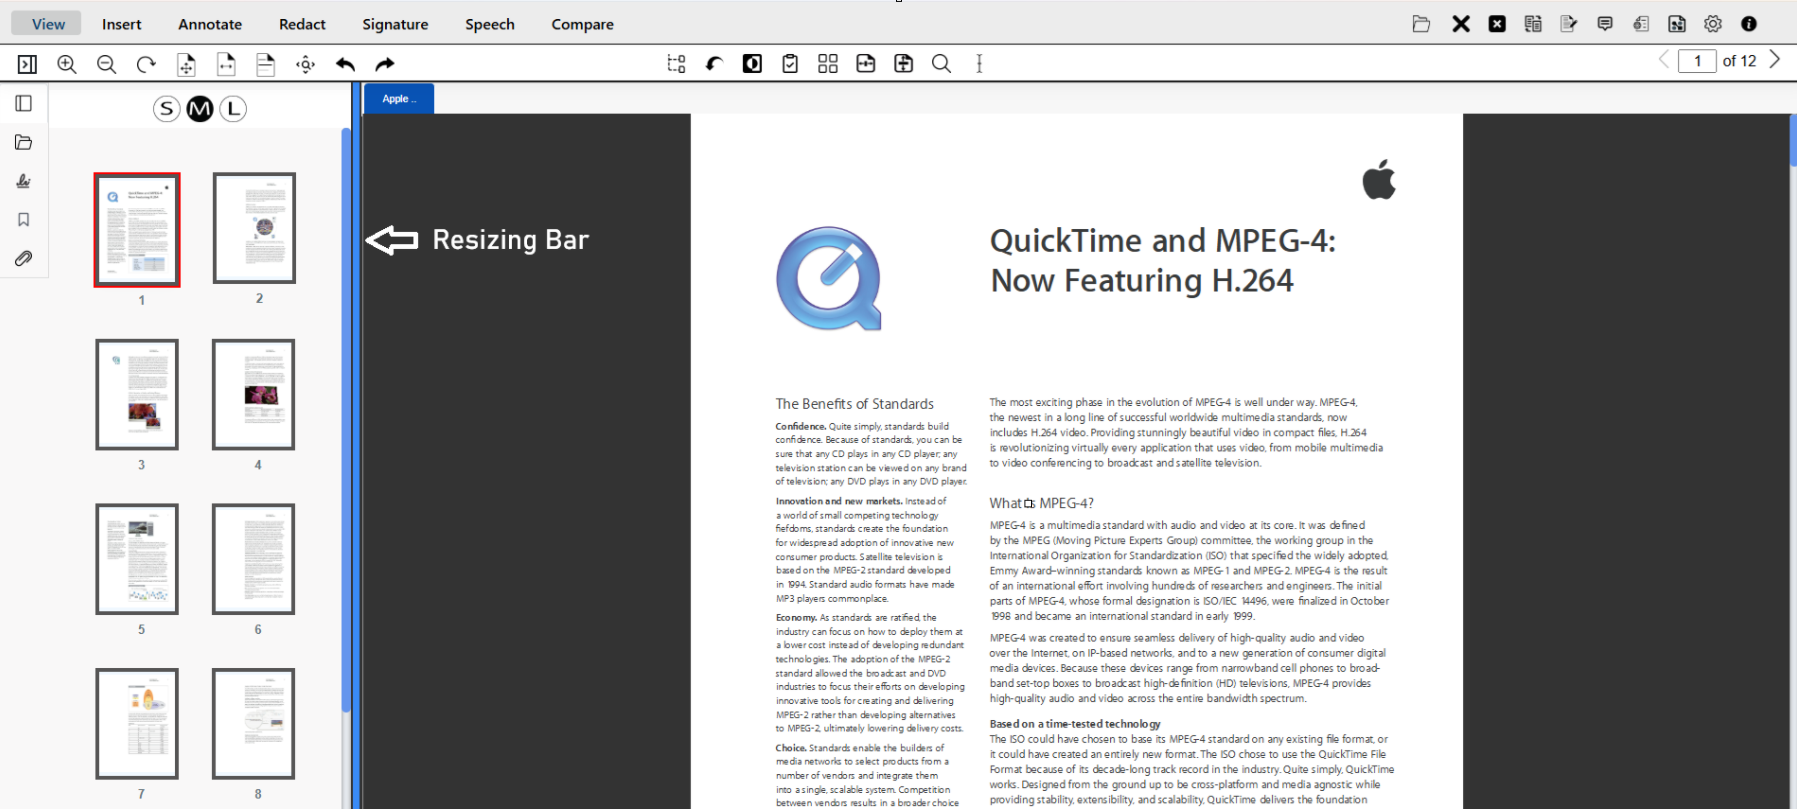
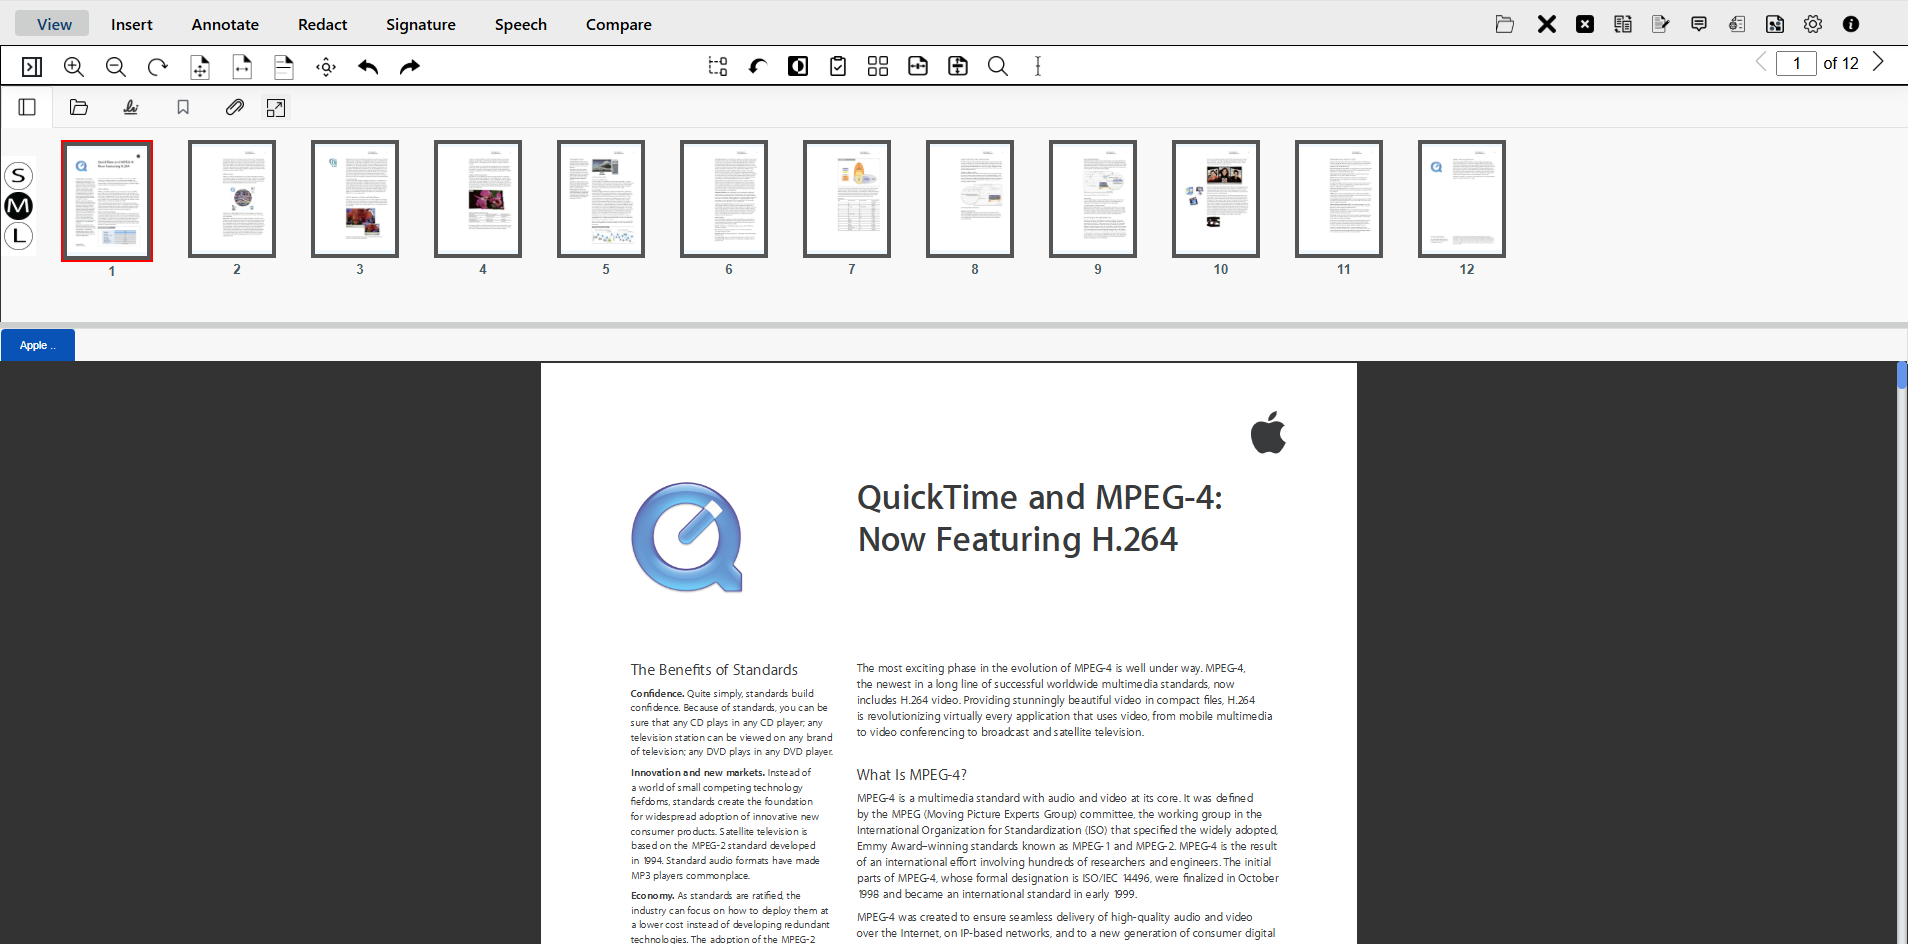
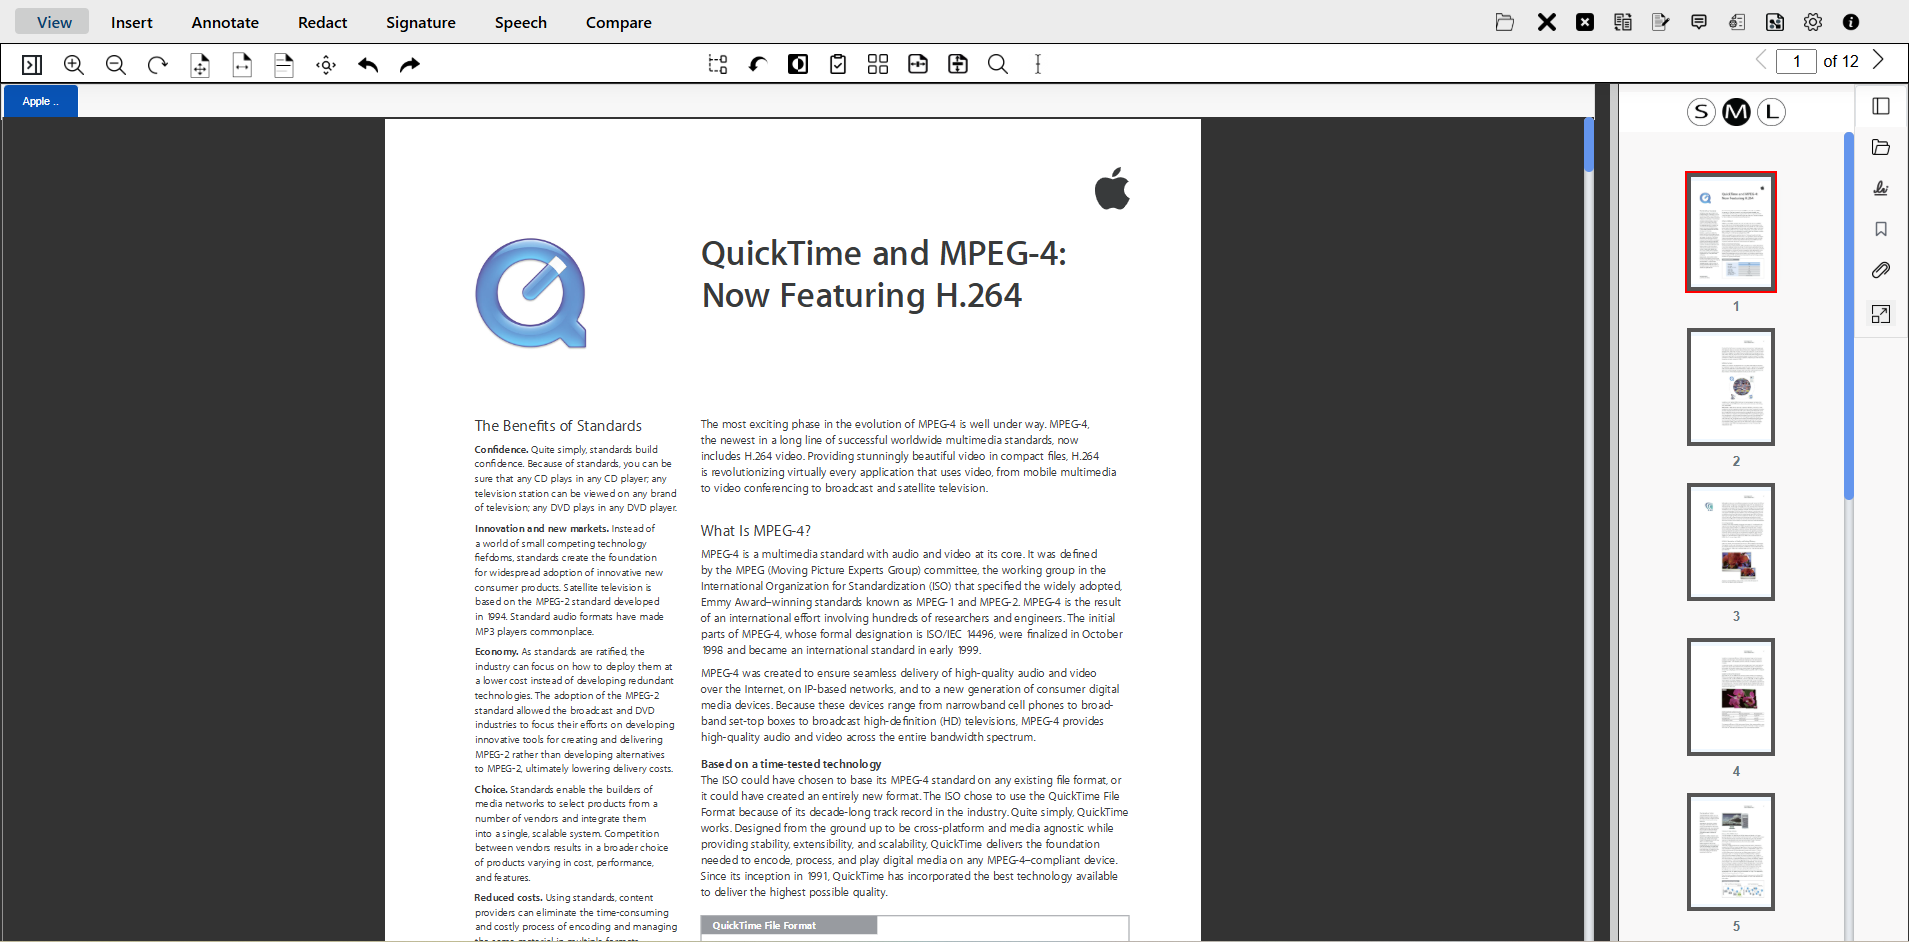
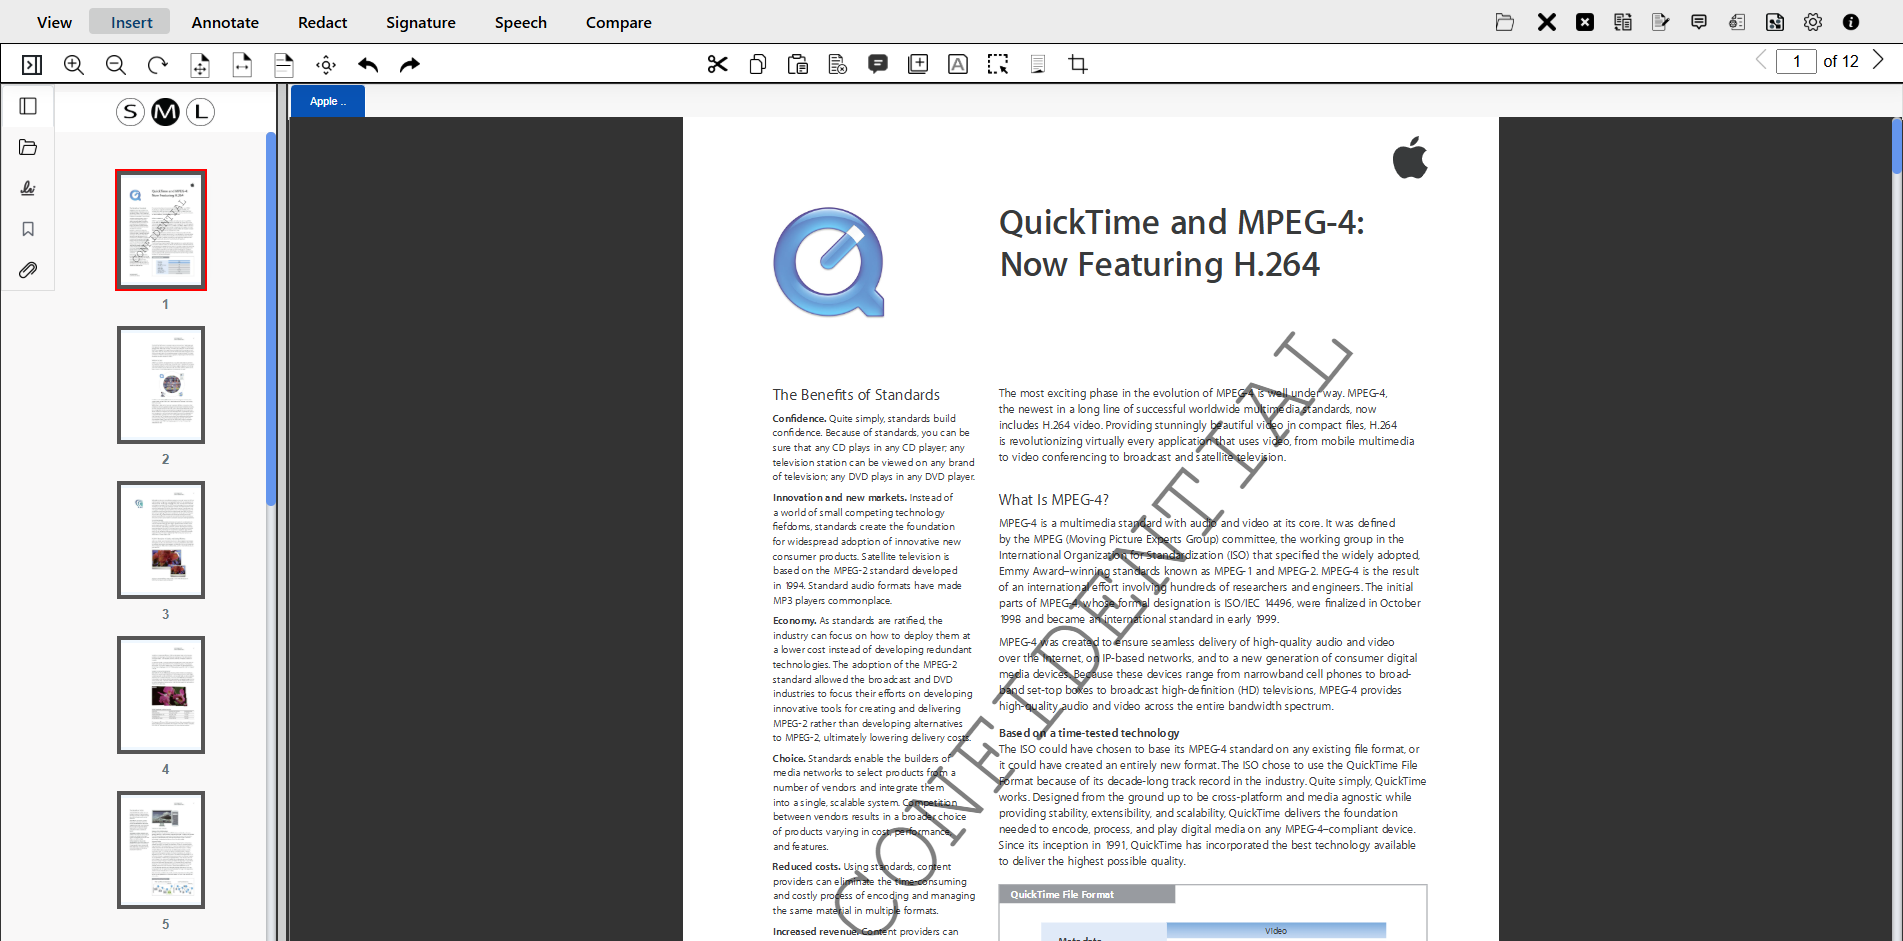
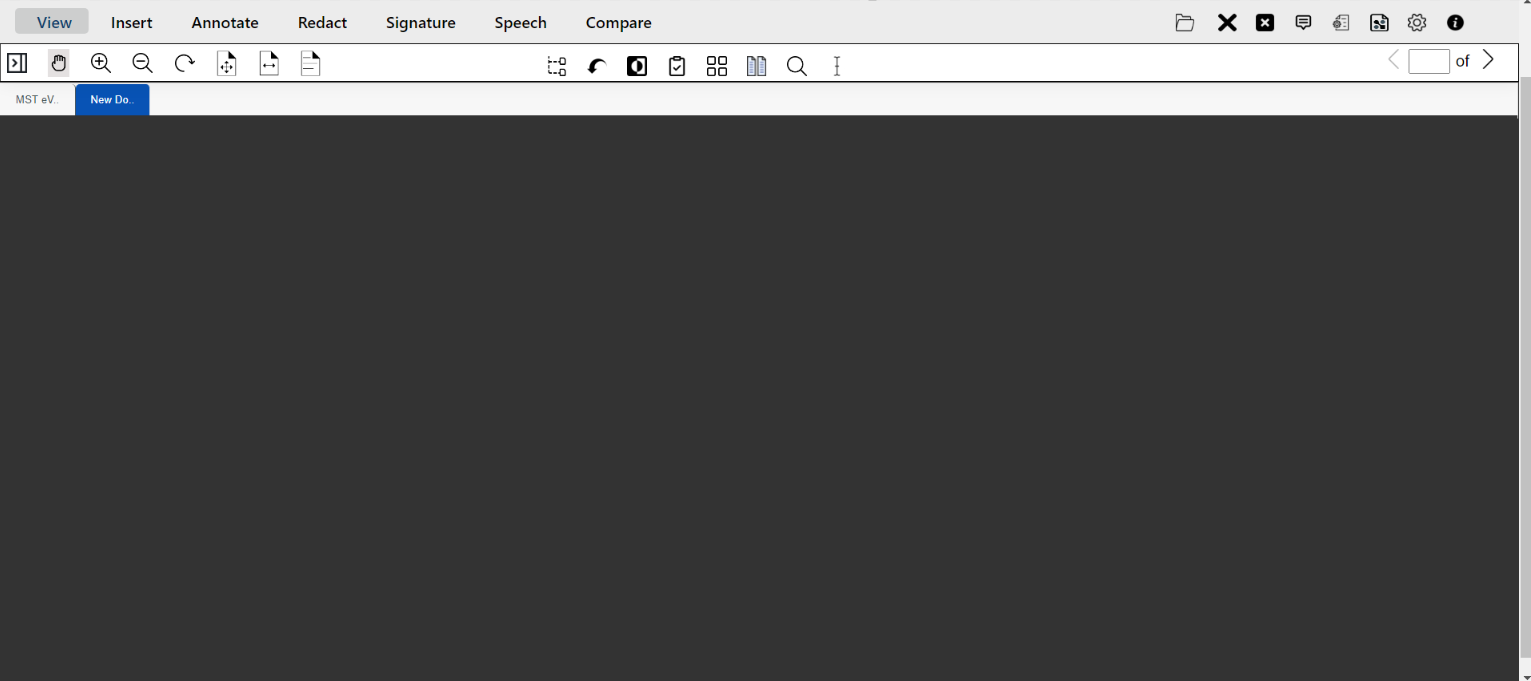
eViewer v7 after Document Insertion
After a document is inserted, the eViewer v7 interface displays the main document viewing area, providing access to all essential viewing and document management features.
The top toolbar contains the primary functional modules, including View, Insert, Annotate, Redact, Signature, Speech, and Compare. These options allow users to perform various actions on the loaded document.
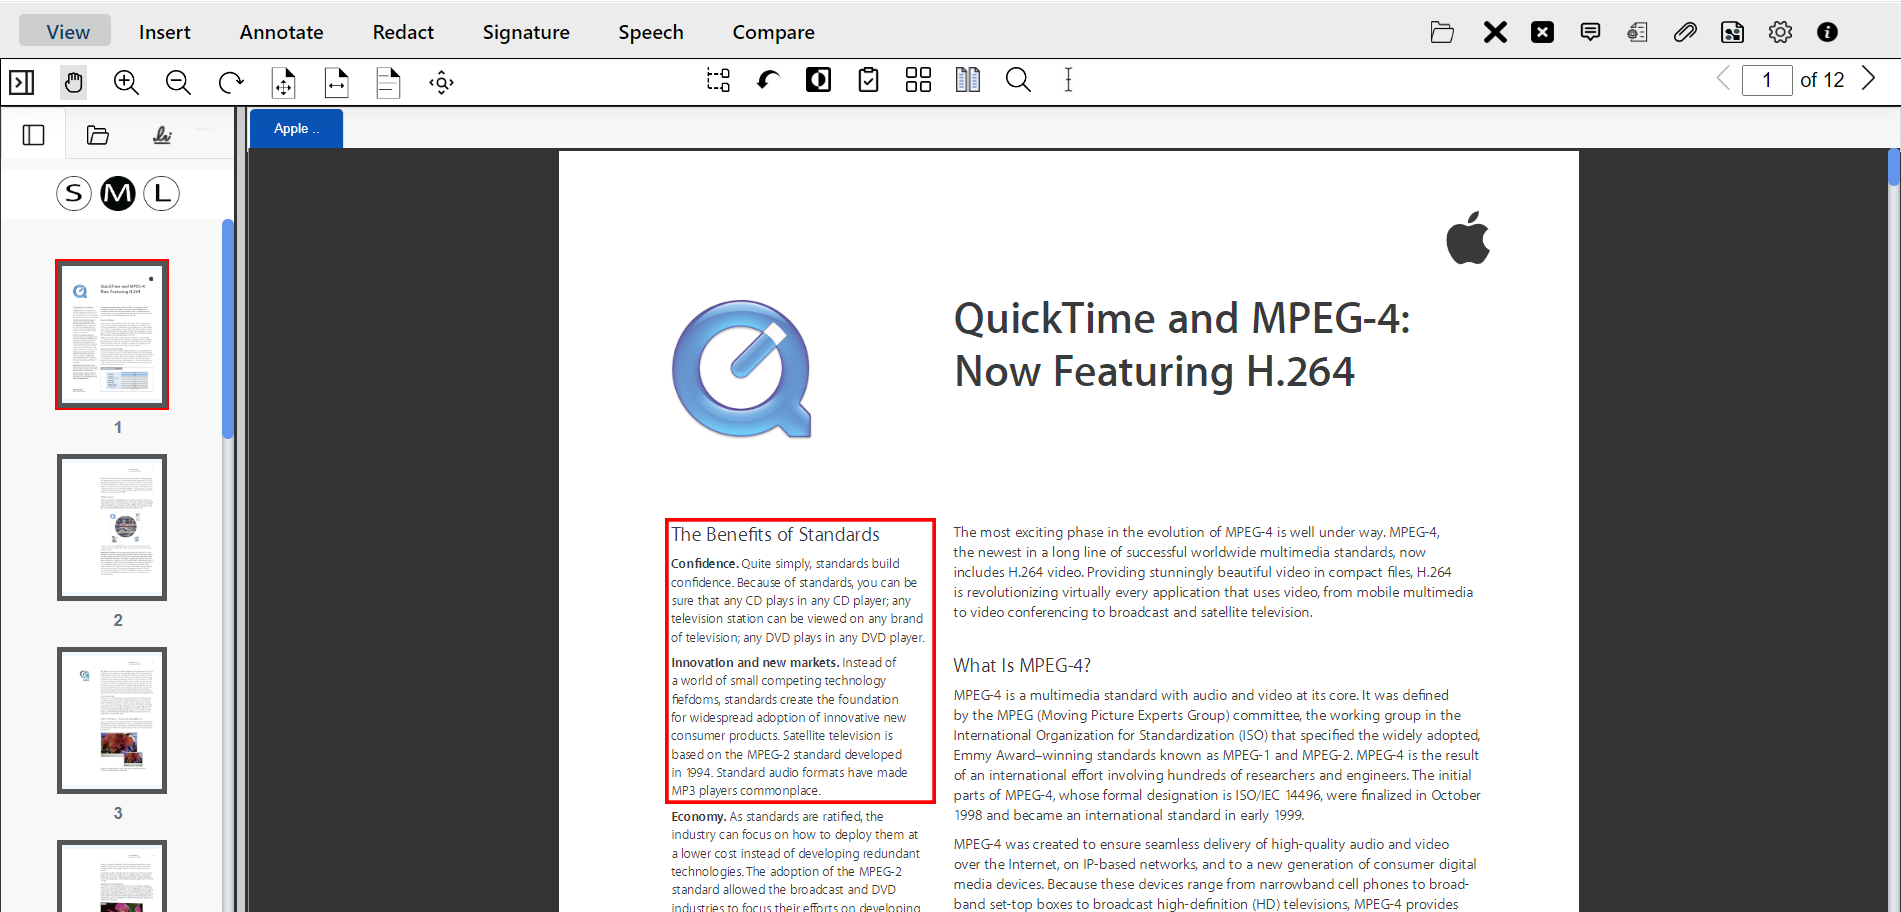
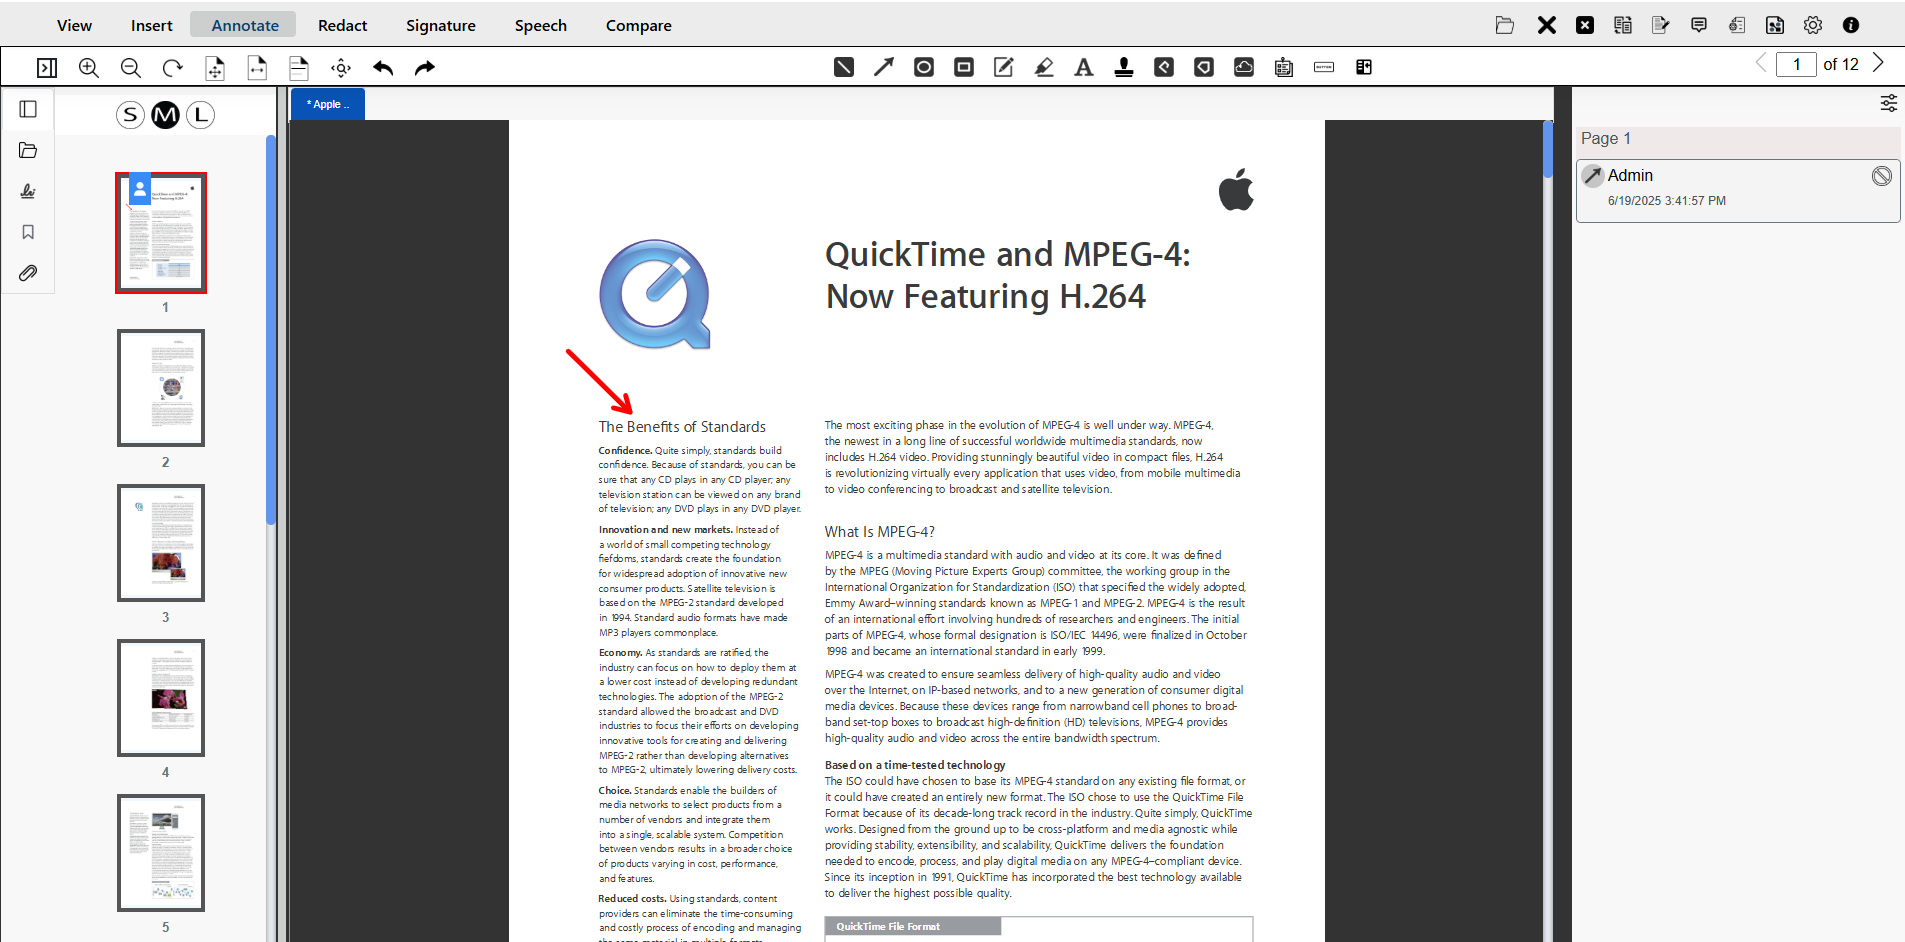
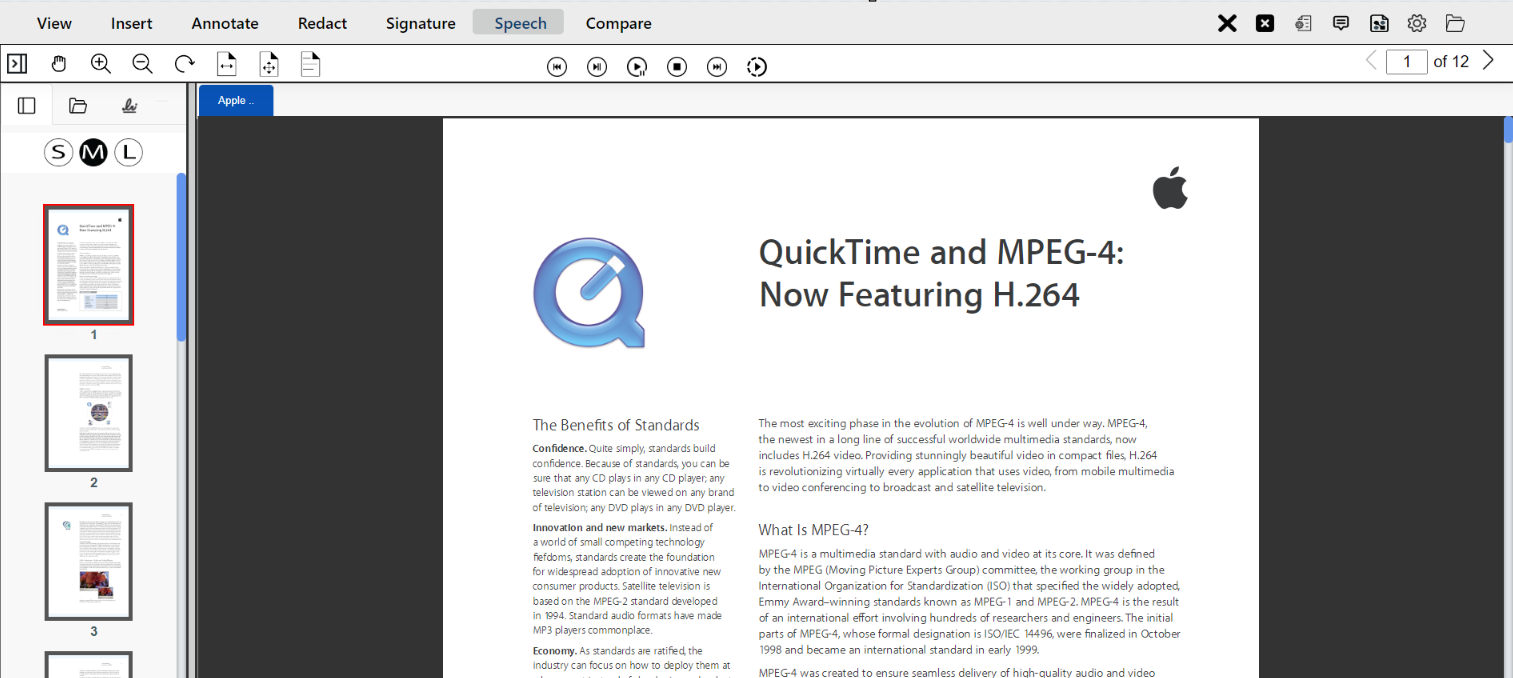
The left panel displays Page thumbnails, Document thumbnails, Signature, Bookmark, and Attachments.
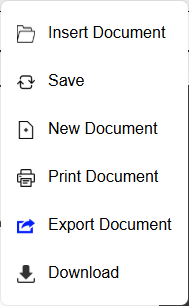
The right side of the top toolbar provides document-level controls, including Options to Insert, Save, New Document, Print, Export, Download, and Close documents. It also supports Document Switching, Document Editing, Comments, Metadata management, Notes, User Preferences, and Version Information—enabling users to efficiently manage and control their documents.
This layout ensures a structured and user-friendly experience for viewing and working with documents in eViewer v7.

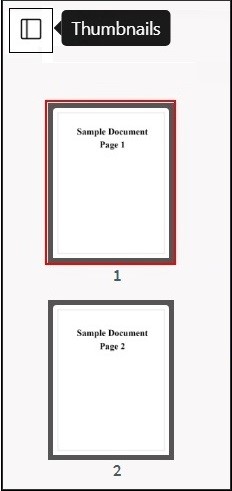
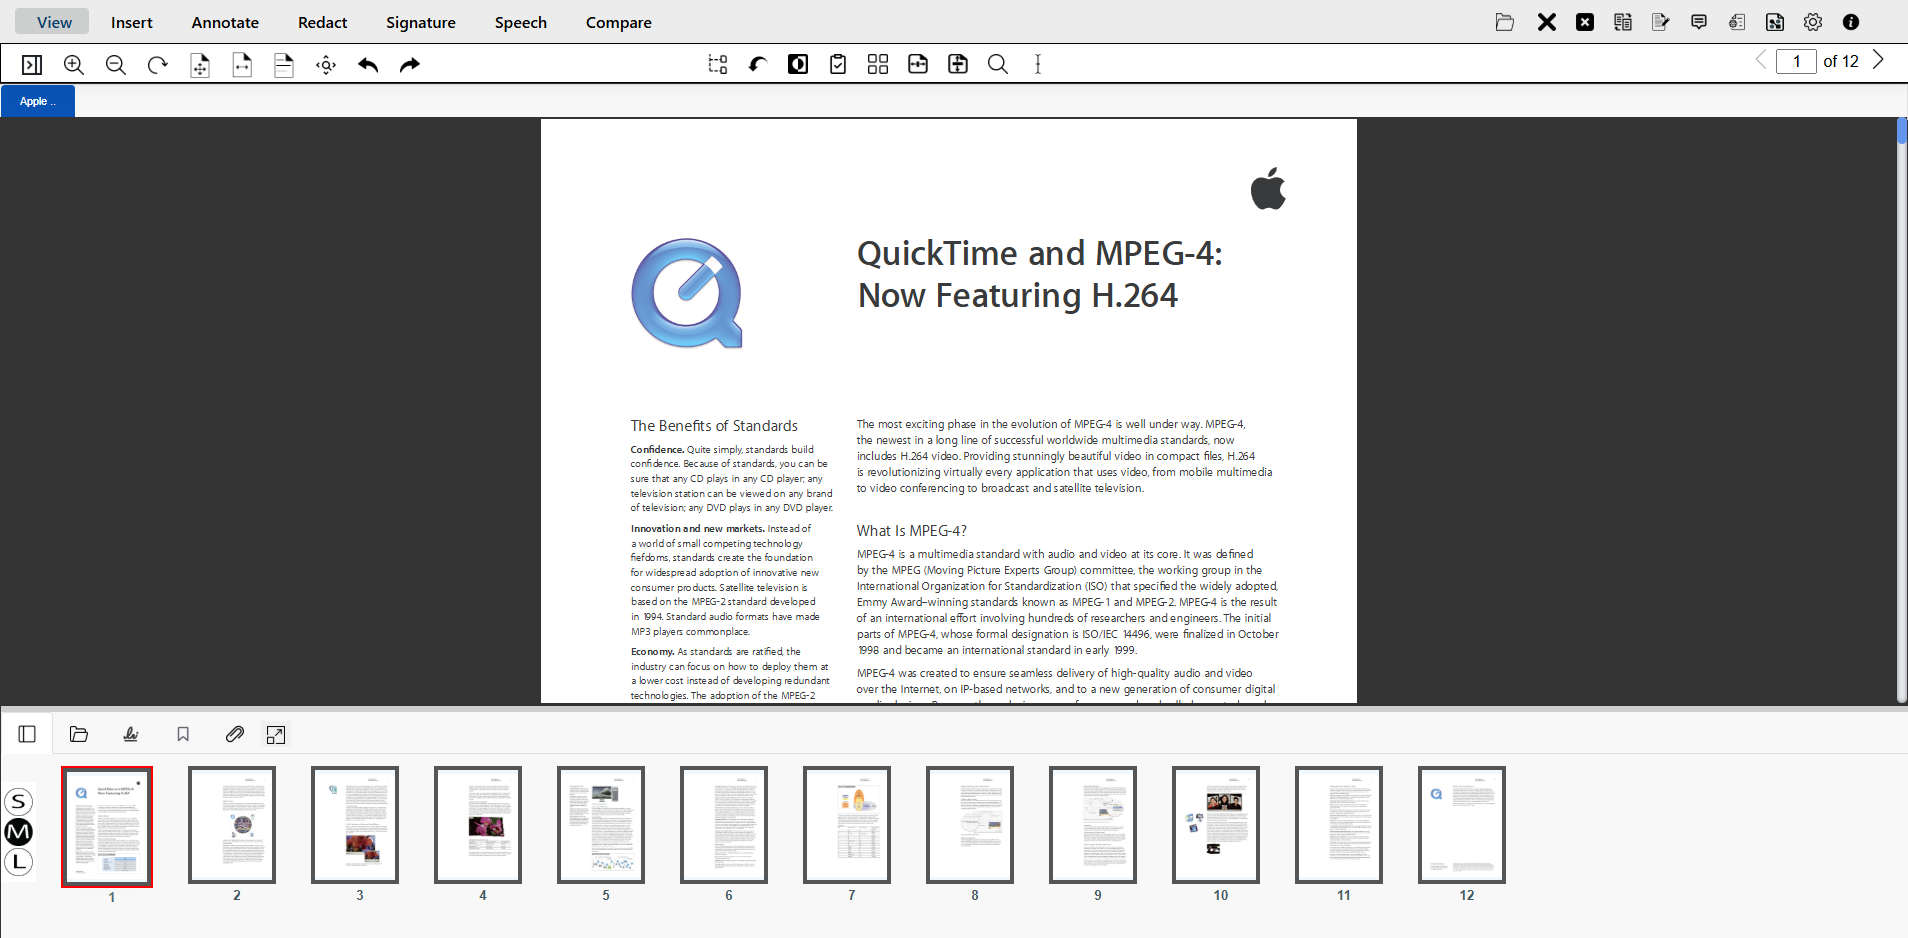
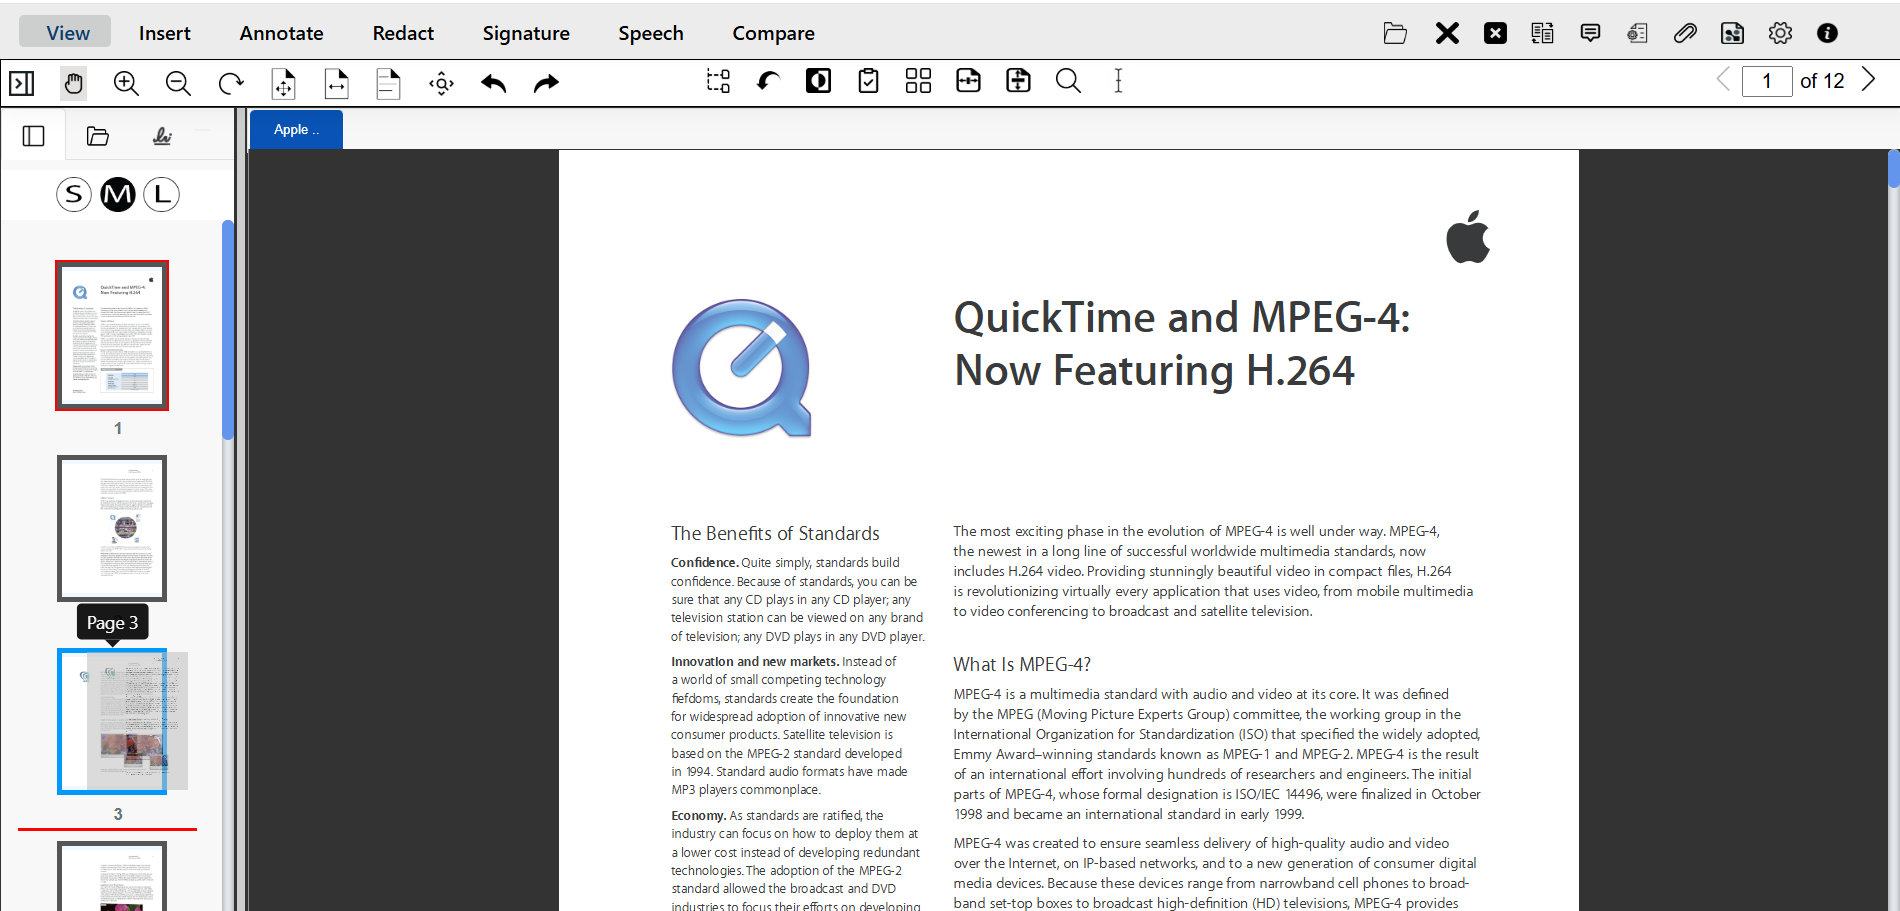
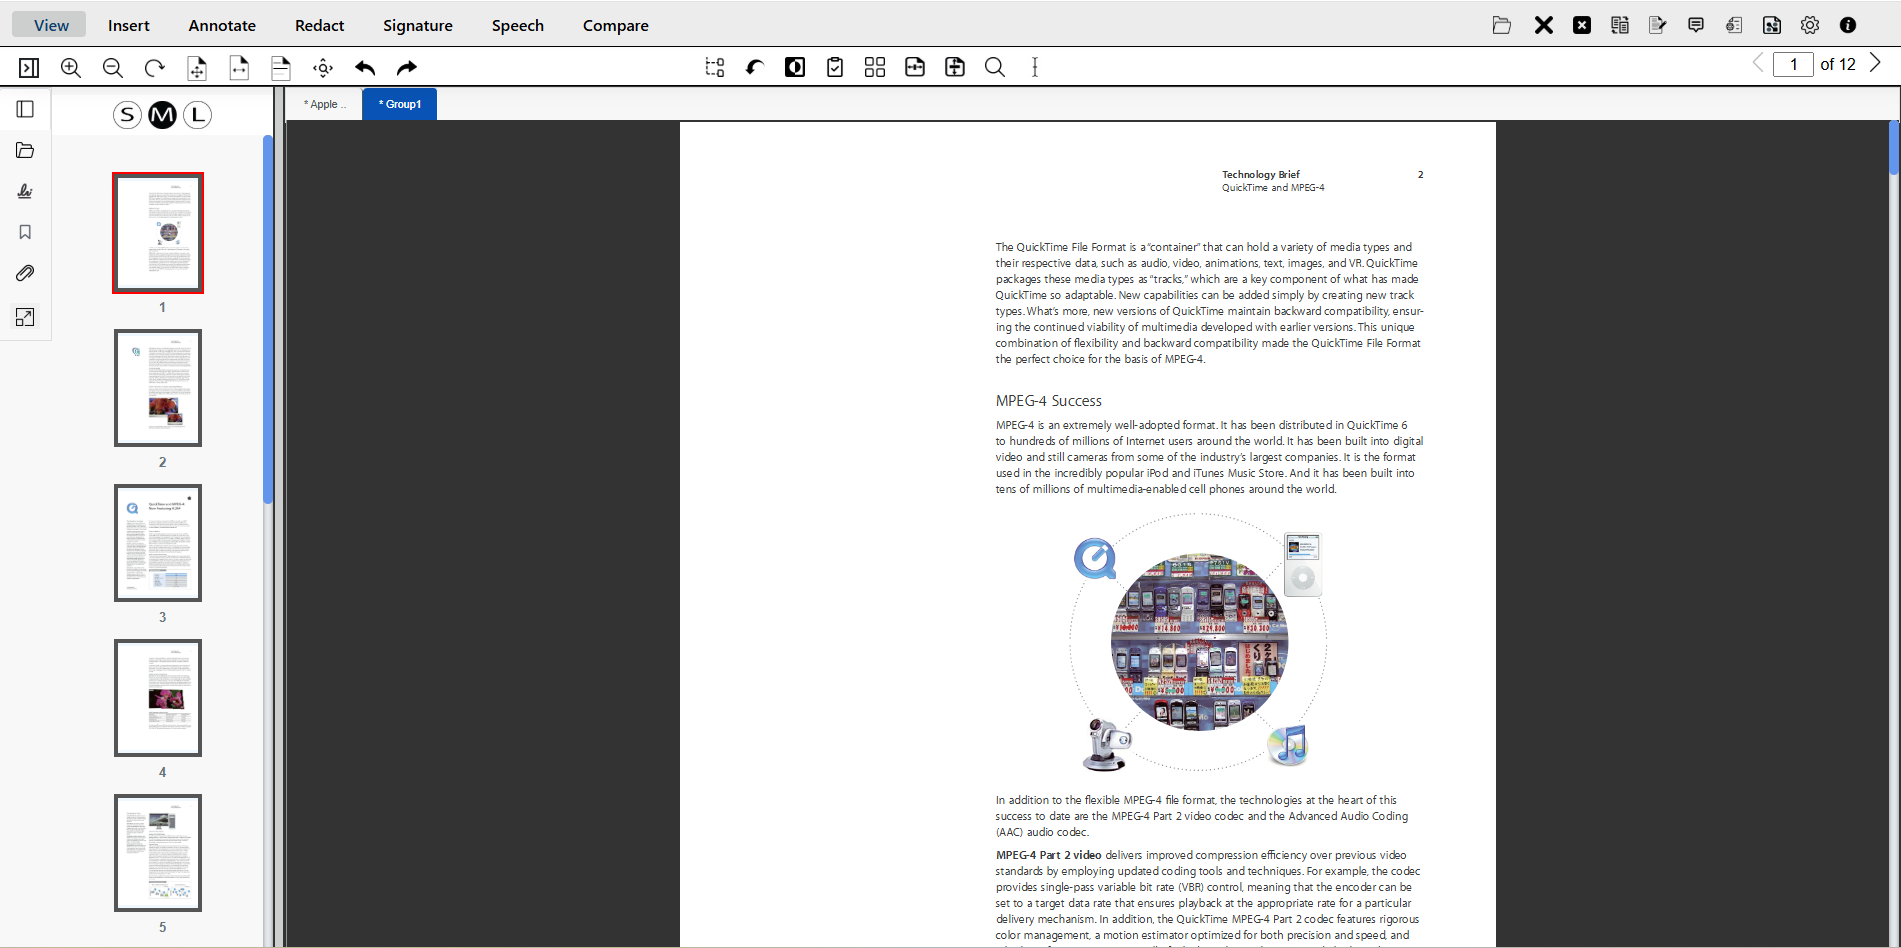
- Thumbnail
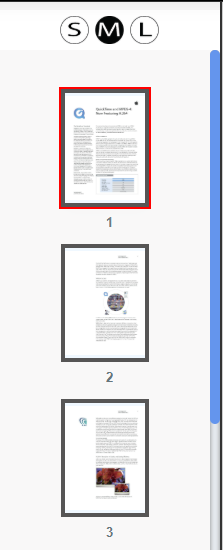
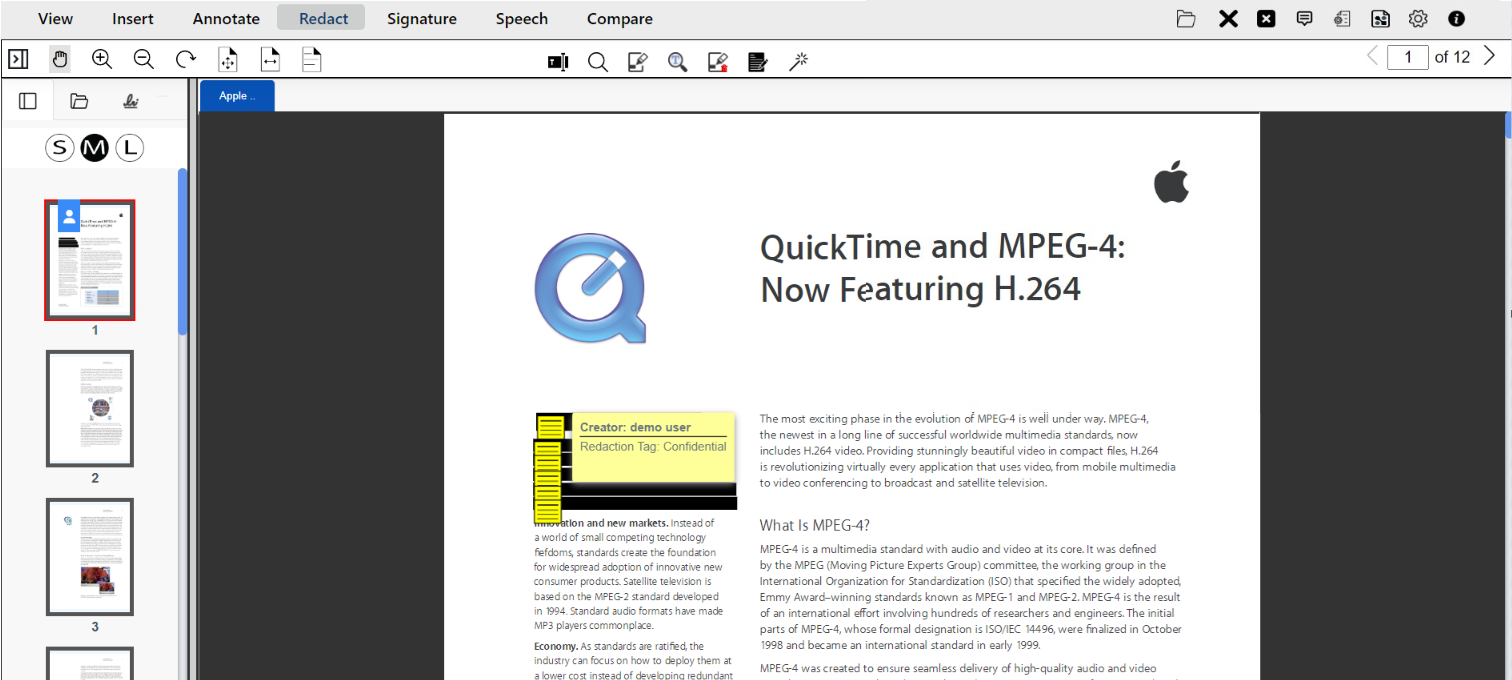
The thumbnail window displays a miniature representation of the document pages that helps in easy navigation. The pages of a document can be viewed by clicking on the thumbnail page, and then the selected thumbnail will be open in the document viewing area. The thumbnail which is currently visible in the document viewing area will be highlighted with red color signifying that this page is currently being viewed.
- Thumbnail Resizing
The thumbnail window can be increased or decreased by dragging the resizing bar. To increase the size of the thumbnail, drag the bar to the right, and to decrease drag the bar to the left. With this user can get a clear preview of the document pages.
- Multiple Page Selection in Thumbnail
Multiple Page Selection provides functionality to a user for selecting multiple pages in the thumbnail view area using the Control (Ctrl) or Shift keys to perform various functions.

Control key: The user can select individual pages of the document one at a time within the thumbnail view area.Shift key: The user can select an array of pages at a time. For example, selecting the thumbnails for pages 5 to 10 of the document.
Right Click Menu Options: When the user right clicks on the selected pages, the following menu is displayed:
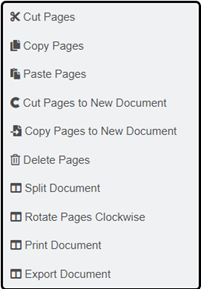
Print and Export Selected Thumbnails: To print or export the pages of the selected thumbnails, please follow these steps:- Click Options > Print Document or Export Document, for printing and exporting a document from the regular viewer menu.

- An option, “Selected pages” is available in the print and export document dialog boxes.
This indicates that only the highlighted pages in the thumbnail view area will be printed or exported.
- Click Options > Print Document or Export Document, for printing and exporting a document from the regular viewer menu.
- Thumbnail Zoom Controls
This functionality allows users to change the size of the thumbnails of the document in the panel. In the thumbnail panel, users can choose from Small (S), Medium (M), or Large (L) options for increasing or decreasing the size of the thumbnail pages.
If the user closes and reopens the document, the thumbnail zoom controls revert to the set default size. - Floating Thumbnail Panel
eViewer has a floating thumbnail panel that enables users to move the thumbnail panel around eViewer’s document window.
The following steps are how to move the thumbnail panel:- Click Floating Thumbnail icon in the thumbnail panel.
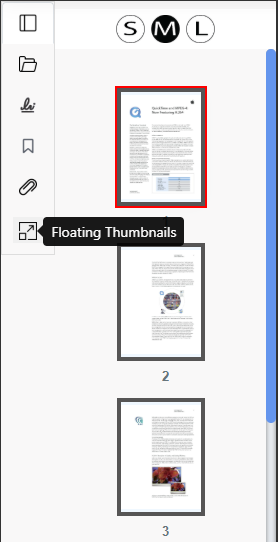
- Click and hold the left mouse button.
- While holding the mouse button, drag the thumbnail panel to the desired position in the viewer.
- Once the thumbnail panel is set to the desired position, release the mouse button to drop the panel in its new location.
- Click Floating Thumbnail icon again to return the panel to the default position.
- Click Floating Thumbnail icon in the thumbnail panel.
- Thumbnail Alignment
eViewer provides various thumbnail panel alignment options such as “top”, “bottom”, “left side”, and “right side” in the viewer’s application window. To change the alignment of the thumbnail panel, follow these steps:- Click User Preferences on the top right side of the viewer.
- 2In General Preferences > Switch Thumbnail Preferences. Choose from the following provided options.

- Click Save.
- Horizontal Thumbnail Alignment
User can shift the thumbnail toolbar to the top and bottom side of the viewer.
Top Side Thumbnail Alignment
Bottom Side Thumbnail Alignment
- Vertical Thumbnail Alignment
User can shift the thumbnail toolbar to the left side and right side of the viewer.
Left Side Thumbnail Alignment
Right Side Thumbnail Alignment
- Click User Preferences on the top right side of the viewer.
- Page Reordering
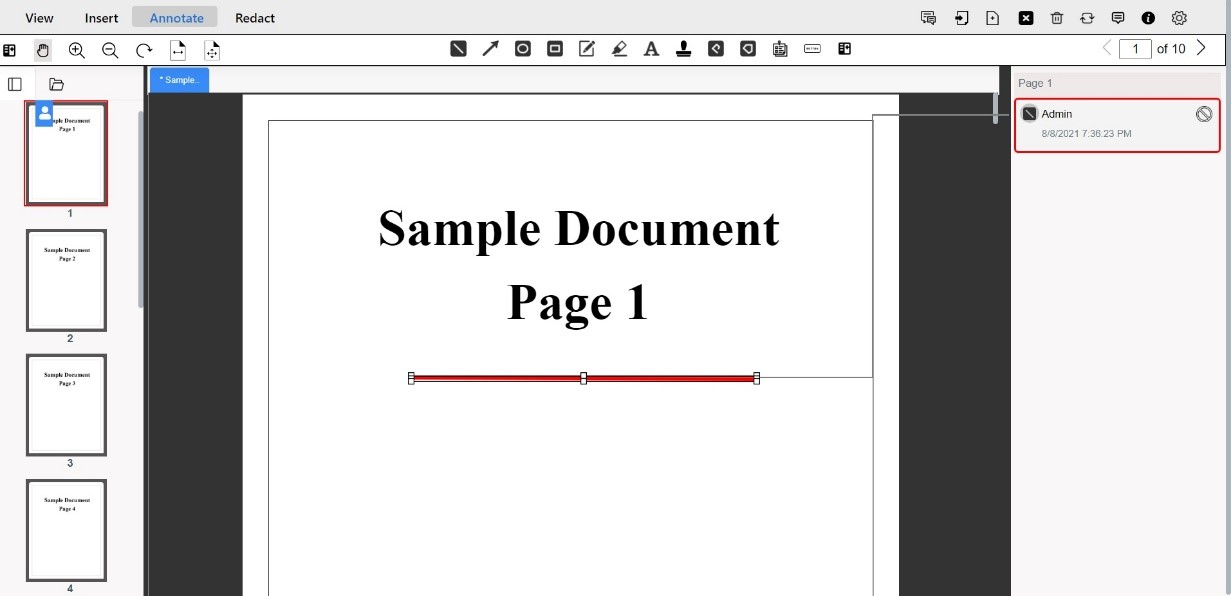
In eViewer, users can rearrange pages by dragging and dropping the page’s thumbnail in the viewer’s thumbnail panel.

The user selects the page that they wish to move, then drag and drop the selected page to its desired position in the document. While dragging the page, a red line will indicate the location it will be placed within the document.
For example, to move page 3 to the position of page 1, simply drag page 3 and drop it where page 1 is located, as shown below:
Now, page 3 has been moved to the position of page 1. - Drag & Copy Pages
eViewer 7 supports intuitive drag-and-copy functionality that allows users to select multiple pages in the thumbnail panel, by holding the Ctrl key while dragging, users can copy the selected pages to a desired location rather than moving them. This allows for easy duplication of the pages within the document.
- Thumbnail Resizing
- Document Navigation
User can easily navigate between all the documents that are loaded in eViewer v7.

By selecting the Documents button, users will be able to see all the documents currently being displayed in the viewer in thumbnail form. The selected document thumbnail gets highlighted with red color signifying that this document is currently being viewed in the document viewing area. The user can switch between documents by clicking on the desired thumbnail.

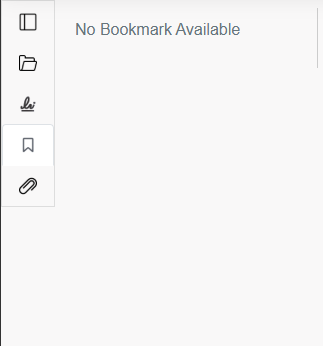
- Bookmark
eViewer provides a comprehensive Bookmark functionality that displays a hierarchical list of bookmarks associated with the currently loaded PDF document. Child bookmarks are visually indented under their parent bookmarks to enhance readability.
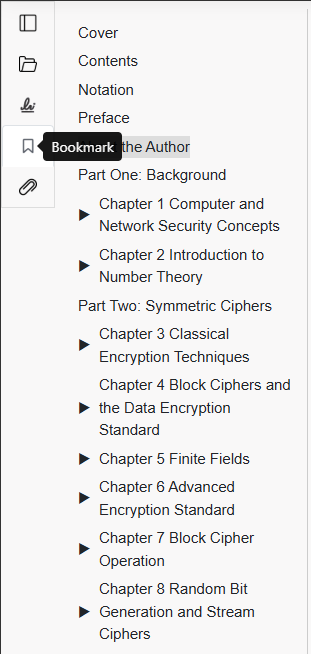
Users can expand or collapse the bookmark hierarchy by clicking on the arrow icons next to parent bookmarks.
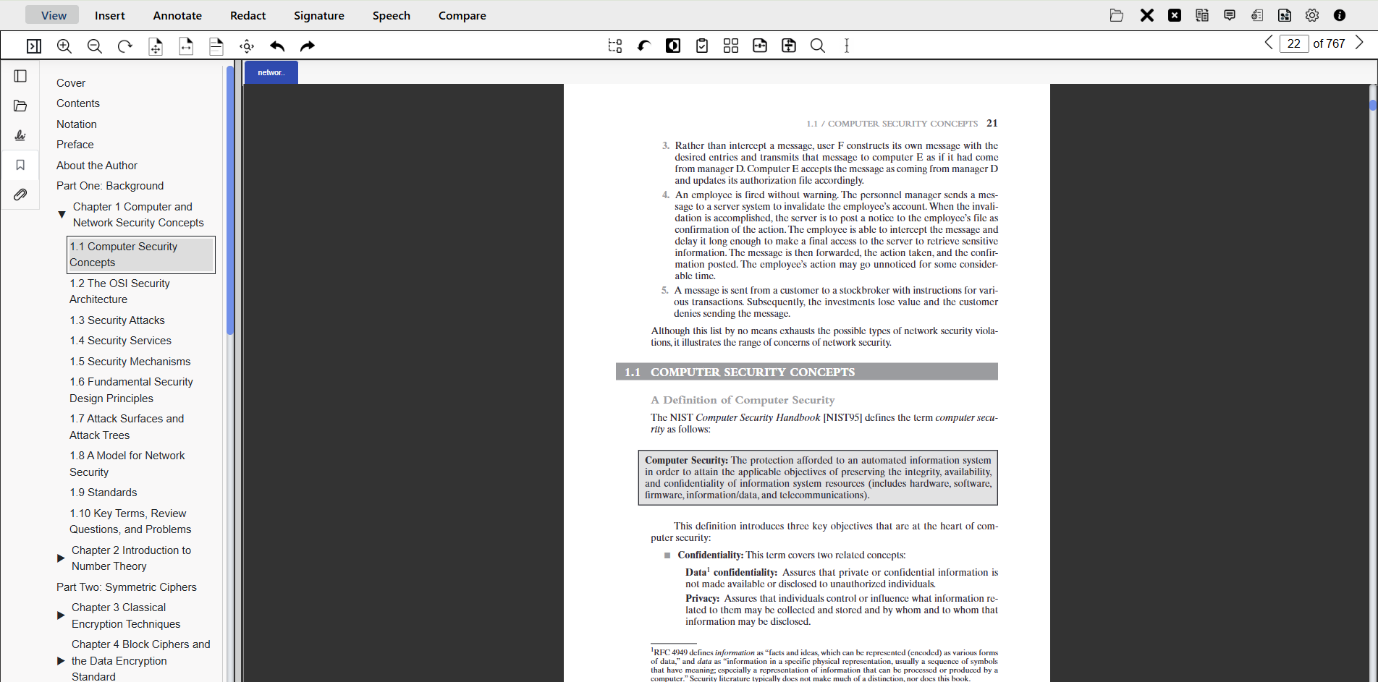
Clicking on the bookmark enables direct navigation to a specific page or section linked to that bookmark.Users can modify bookmarks using a right-click context menu, which includes the following options:
- Go to Bookmark: Navigate directly to the page or section linked to the selected bookmark.
- Rename: Edit the name of the selected bookmark.
- Cut: Remove the selected bookmark and store it in the clipboard.
- Paste Before: Paste a cut bookmark before the selected bookmark in the hierarchy.
- Paste After: Paste a cut bookmark after the selected bookmark in the hierarchy.
- Delete: Permanently remove the selected bookmark.
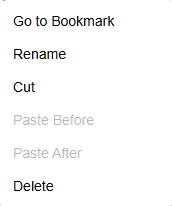
Note: The Paste Before and Paste After options will only become available after a bookmark has been cut.If no bookmarks are present in the document, the panel will display the message: “No Bookmark Available”.
- Attachments
eViewer 7 allows users to view and interact with both embedded and linked file attachments within documents. This includes attachments in PDF files as well as Object Linking and Embedding (OLE) objects in Microsoft Word documents.When a PDF or DOCX file with attachments is opened, users can click the Attachments button in the thumbnail panel toolbar to view a list of all embedded files, including their names and file types.
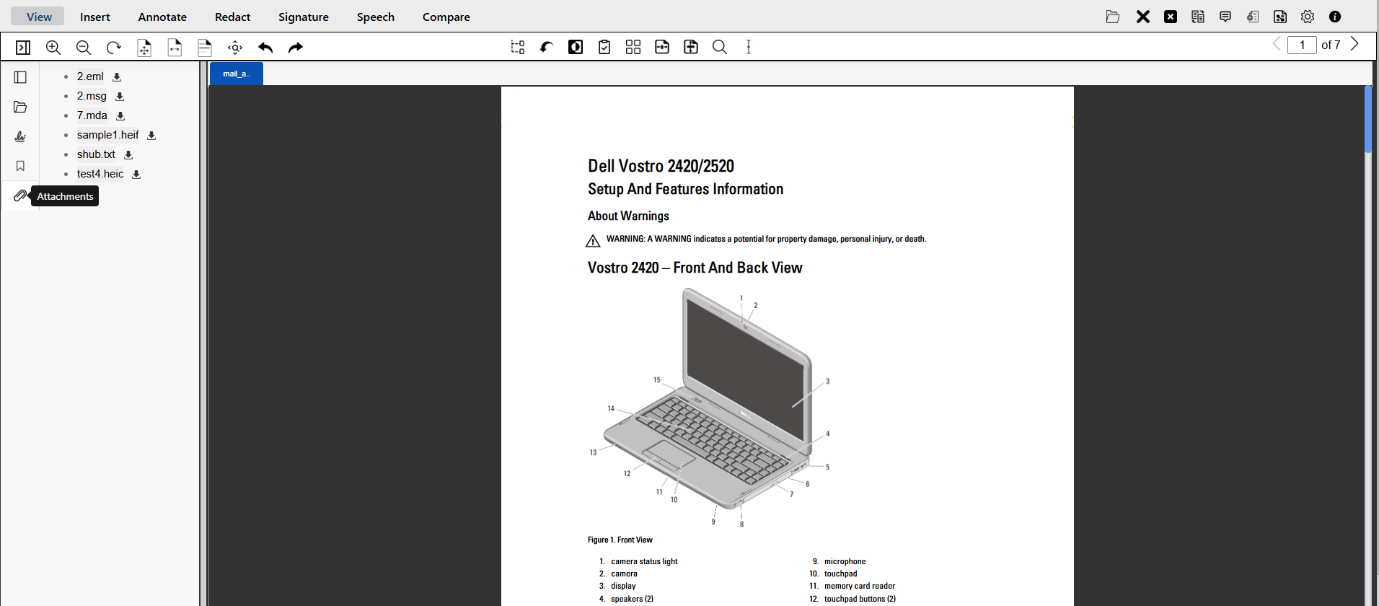
Clicking the Download icon will save the attachment to the user’s local system.
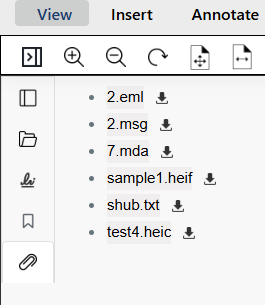
Users can also open and view attachments in a new tab within eViewer by clicking on them.
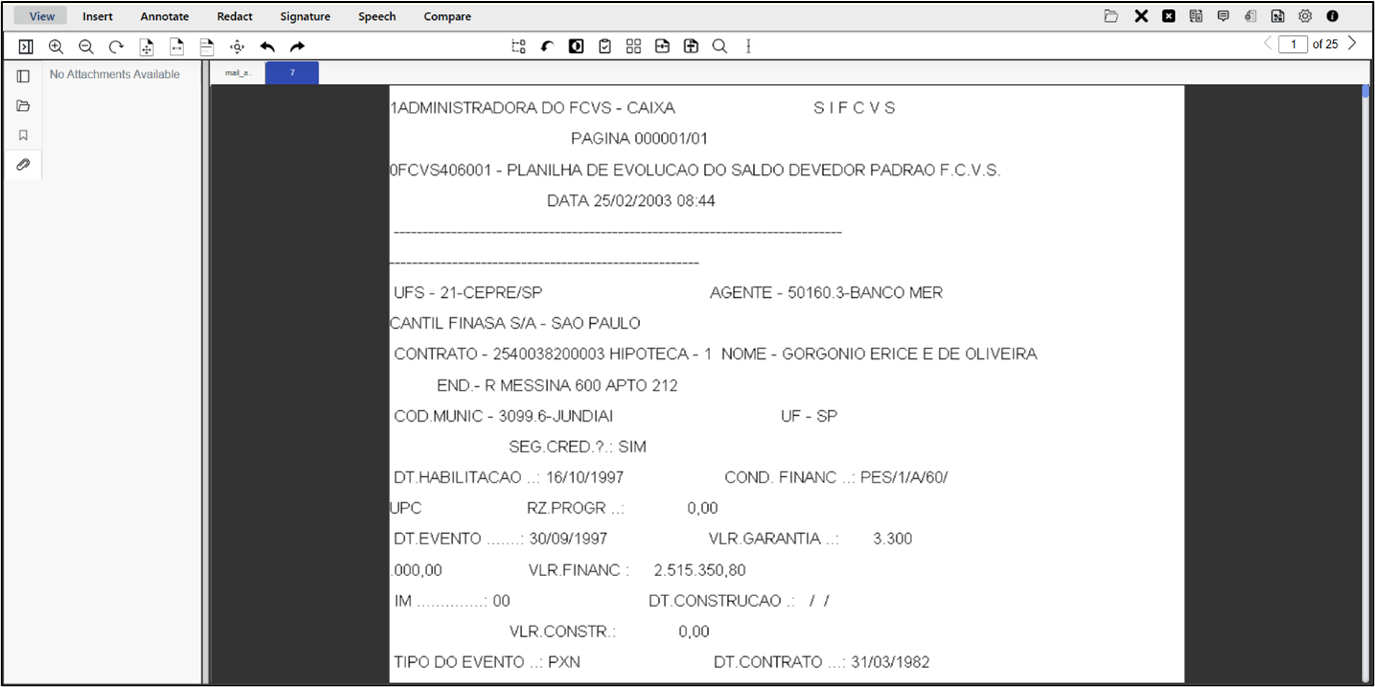
If no attachments are available in the document, the viewer will display the message: “No Attachments Available”.
- Page Navigation
Page navigation helps the user to easily traverse among the pages of the document.

- Previous Page
It will render the previous page of the selected page of the document.

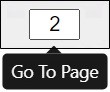
- Go To Page
It will render the page according to the page number provided by the user.
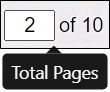
- Total Pages
It will show the total number of pages of the selected document.
- Next Page
It will render the next page of the selected page of the document.

- Previous Page
Home Buttons
The Home functions include of the following: Hide Thumbnails, Zoom, Rotation, Image Scaling Functions, Rubberband Zoom, Undo, and Redo.

Describing each option with their individual functionalities:
- Hide Thumbnails
This feature will hide the thumbnails side bar.

After hiding thumbnail, the user interface will look like the following:
- Page Zoom
- Zoom In
It will increase the magnification level of the page.

- Zoom Out
It will decrease the magnification level of the page.
- Zoom In
- Page Rotation
Rotation provides the ability to rotate a page of the document in the clockwise direction.

- Page Scaling Options
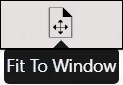
The available page scaling options help the user to view the pages in different scale level options for the document’s viewing area.- Fit to Window
It will resize the document to fit entirely in the window.
- Fit to Width
It will resize the document to fit in the width of the window.

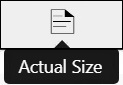
- Actual Size
Actual size view will reset the original zoom level of the document in the viewer window and the document level will be set to fit according to the actual height and width within the document viewing window.
- Fit to Window
- Rubberband Zoom
Enables the user to zoom into a specific area of a document by drawing a box around the area they desire to zoom in to.
After selecting the “Rubberband Zoom” function, move the mouse cursor to the starting point of the area you want to zoom in on. Click and hold the left mouse button, then drag the mouse to create a rectangular selection box around the area you want to zoom in on. Once the desired area is selected, release the mouse button to zoom into that area.
To switch back to the default viewing mode, use the page scaling options explained above. - Undo
eViewer provided the user with the ability to undo any changes made to the documents, enabling them to revert to the previous state and replay all existing features. They can revert to the most recent actions, restoring the document to its state before those actions were performed.

It will work with some existing features in the viewer, and for the rest, it will provide an alert.

- Redo
It will allow the users to reapply actions that were previously undone, restoring the document to the state it was in before the undo action was applied.

View Tab
The View tab contains the functions for Split Document, Undo Split, Invert, Copy To Clipboard, Thumbnail and Normal View, Side By Side View Vertical, Side By Side View Horizontal, Text Search, and Select Text.

- Split Document
eViewer v7 provides a feature of splitting the document into separate documents. Split can divide the document from the selected page number and make another document from those splitting pages.By selecting on the Split Document button, the document is split up into two documents.
Users can split a document from any desired page except the first one. It will provide the following alert if split has been applied on first page of the document.

Splitting can be initiated from Page 2 or later of the document. This means that starting from that page, the pages have been removed from the original document and a new document is formed from that page till the last page of the document, by default, named as Group1.For instance, the original document (Sample Document) contains only Page 1.
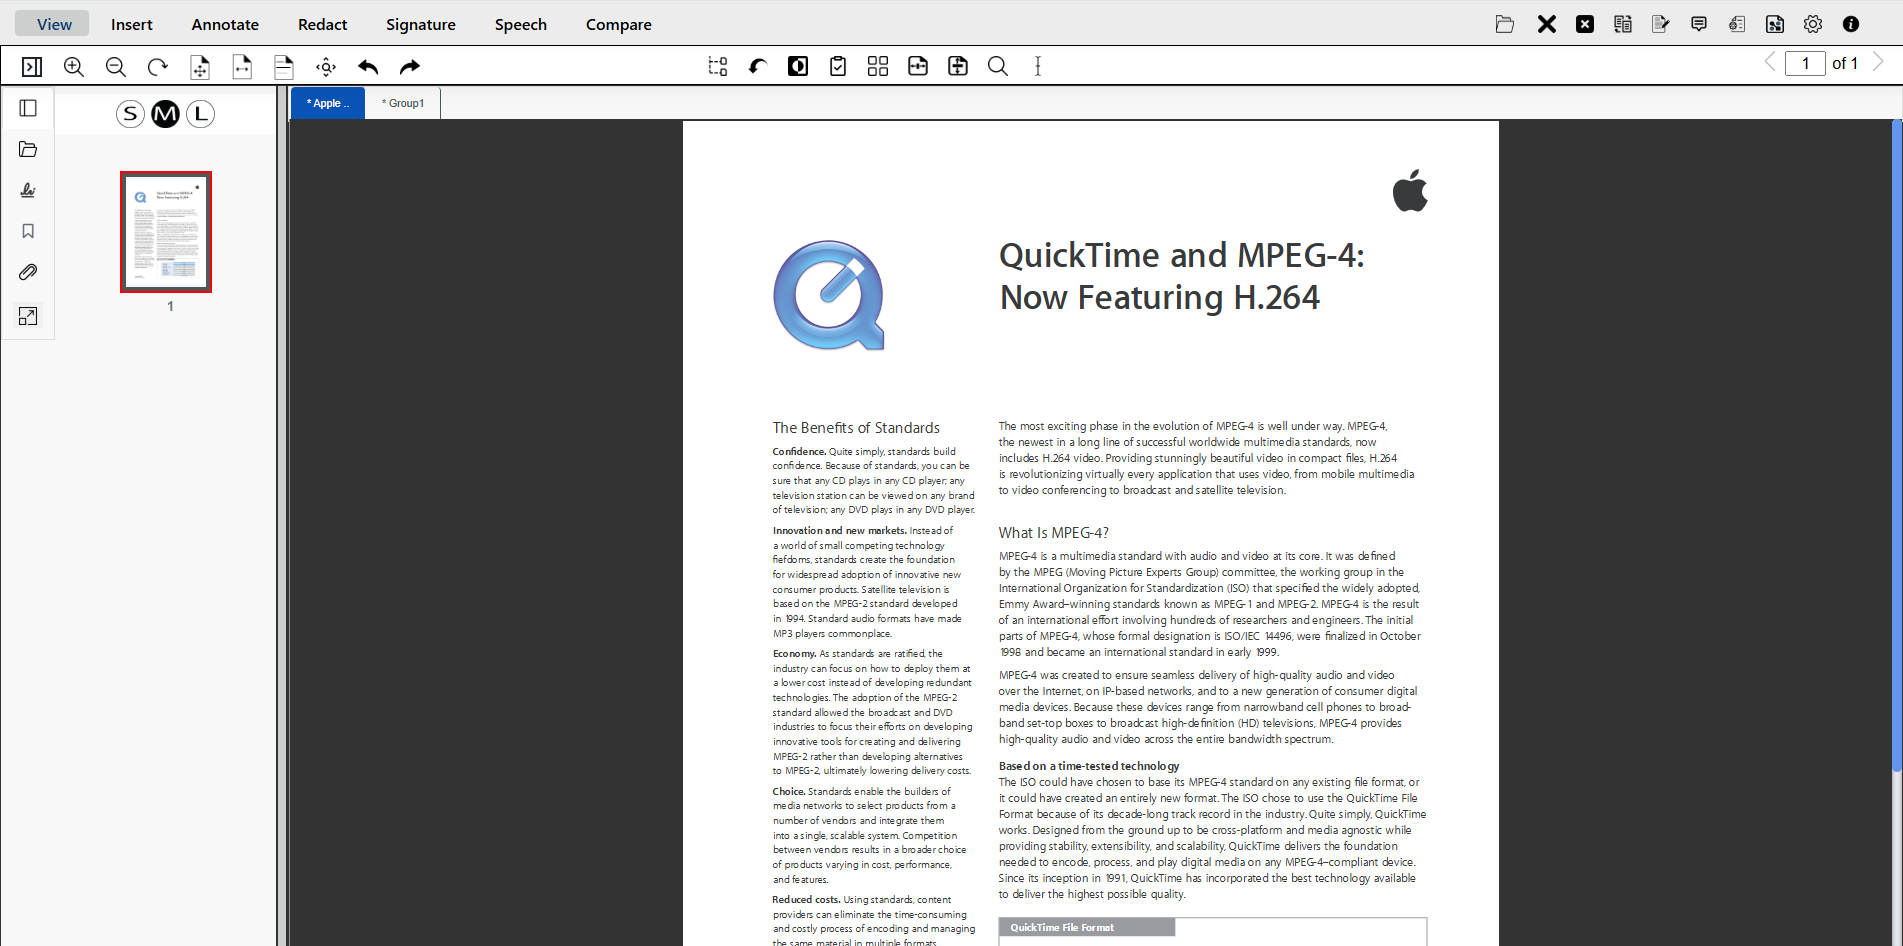
The new split document (Group1) contains all the pages starting from Page 2.
Users can perform this operation many times on a single document until the last page. - Undo Split
Undo Split works only after the split functionality has been used and reverses the splitting changes.

After performing undo, the split changes made to the original document will be undone taking the document back to its previous state and the new split document will be automatically deleted. This can be only be used until the documents are saved.It can be applied only once at a time on the new document after splitting otherwise it will provide an alert.
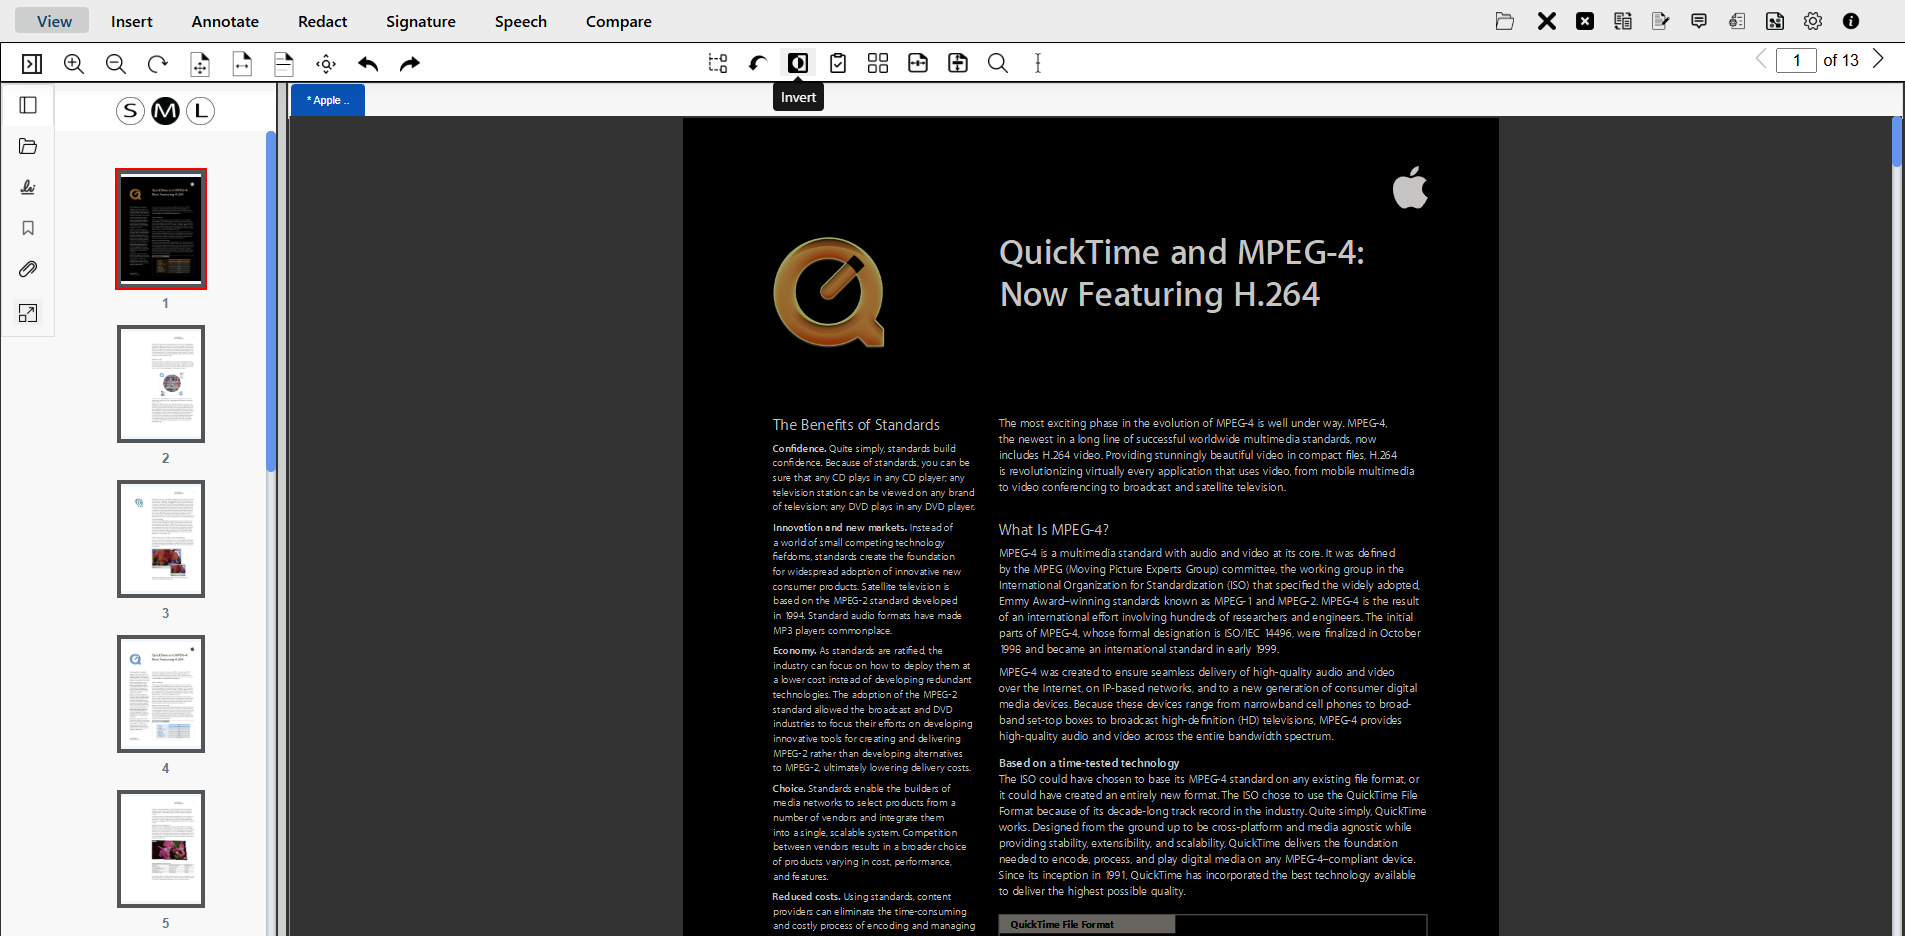
- Invert
When the user clicks on the invert the background of the current page changes into black/white color which makes the text clearly visible.
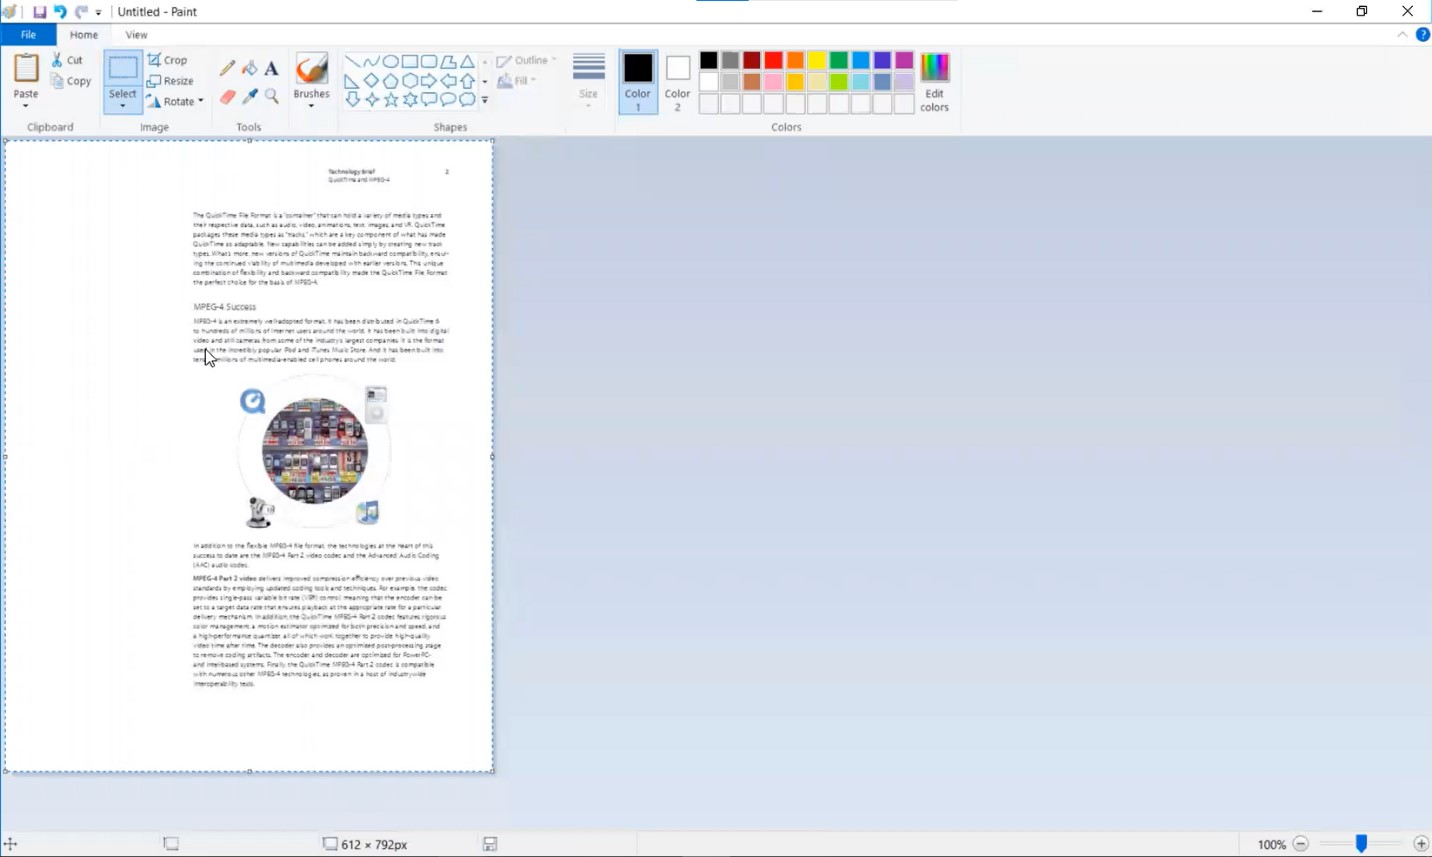
- Copy To Clipboard
It allows the user to copy the current image from a document and save it to the viewer’s clipboard.
When the user clicks Copy To Clipboard, the current document image is copied.
User can simply paste the image outside of the eViewer 7.
- Thumbnail and Normal View
For easy and quick navigation among the pages of a document, eViewer v7 provides Thumbnail View, which displays all the pages of a document as tiles in the document viewing area.
Users can traverse the pages and the selected page will be highlighted with different border color. To open the desired page, the user will double click the particular page, and it will be rendered in the viewer.
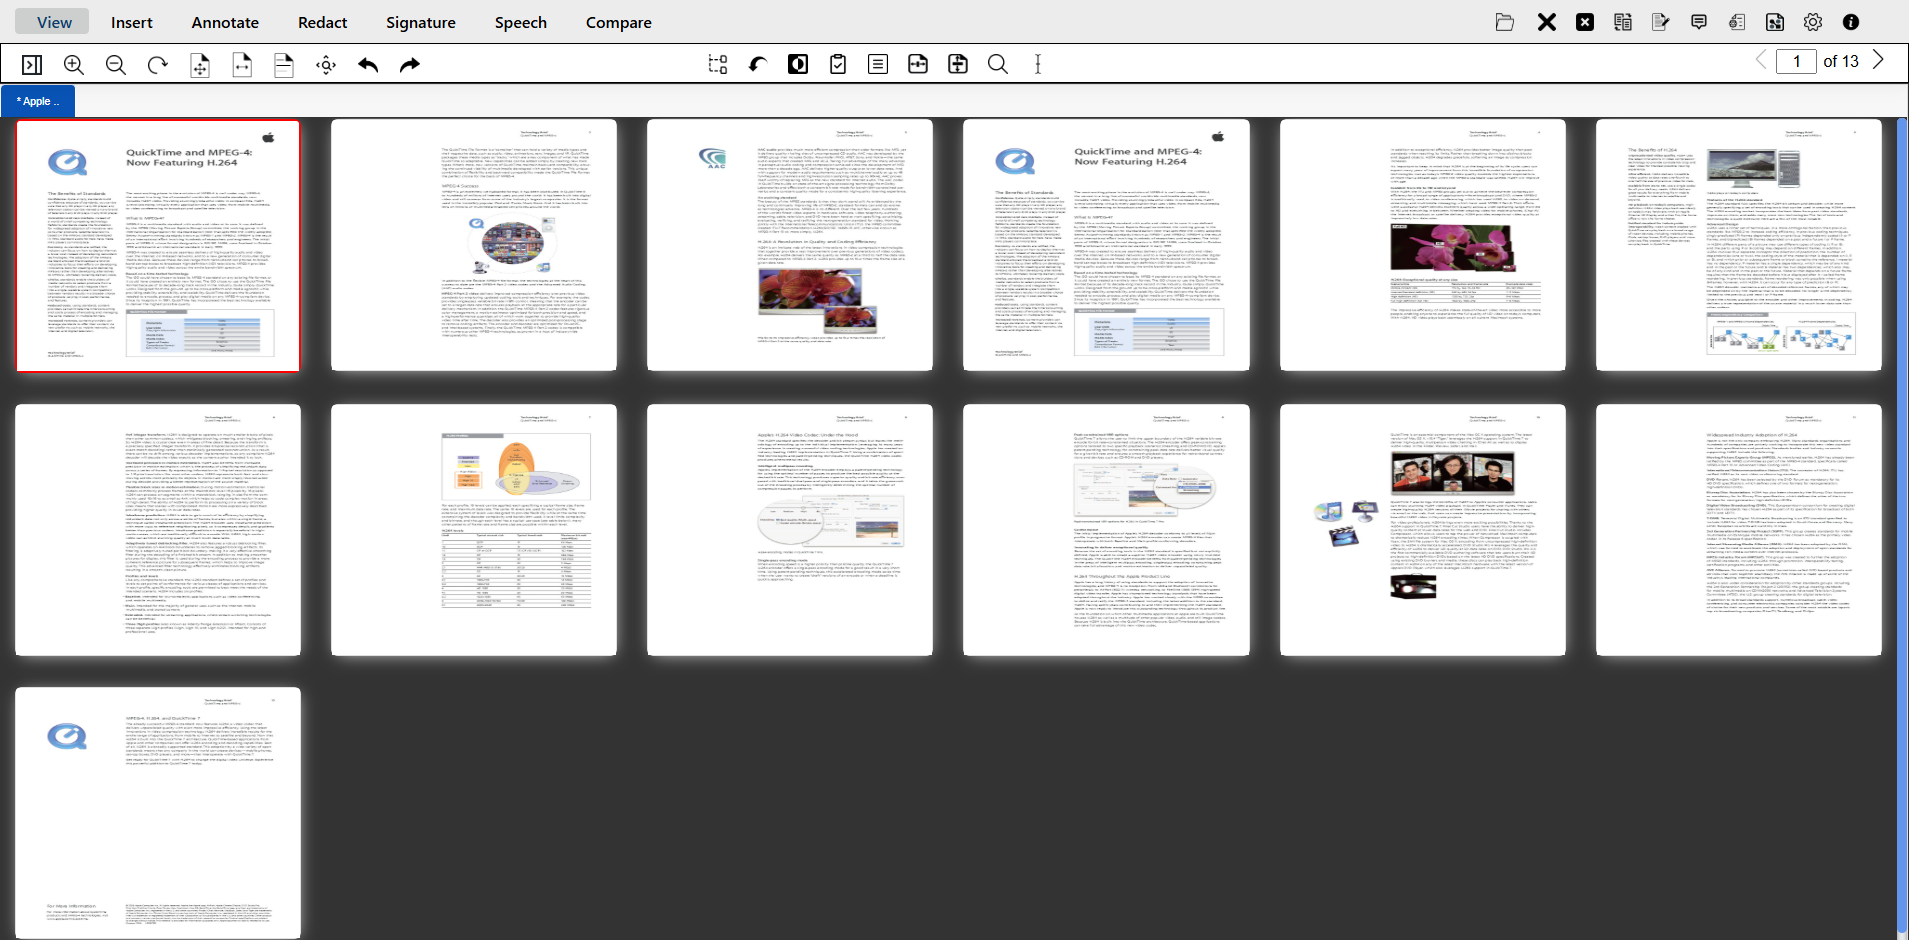
To get back to the standard view of eViewer is by clicking the “Normal View” button.

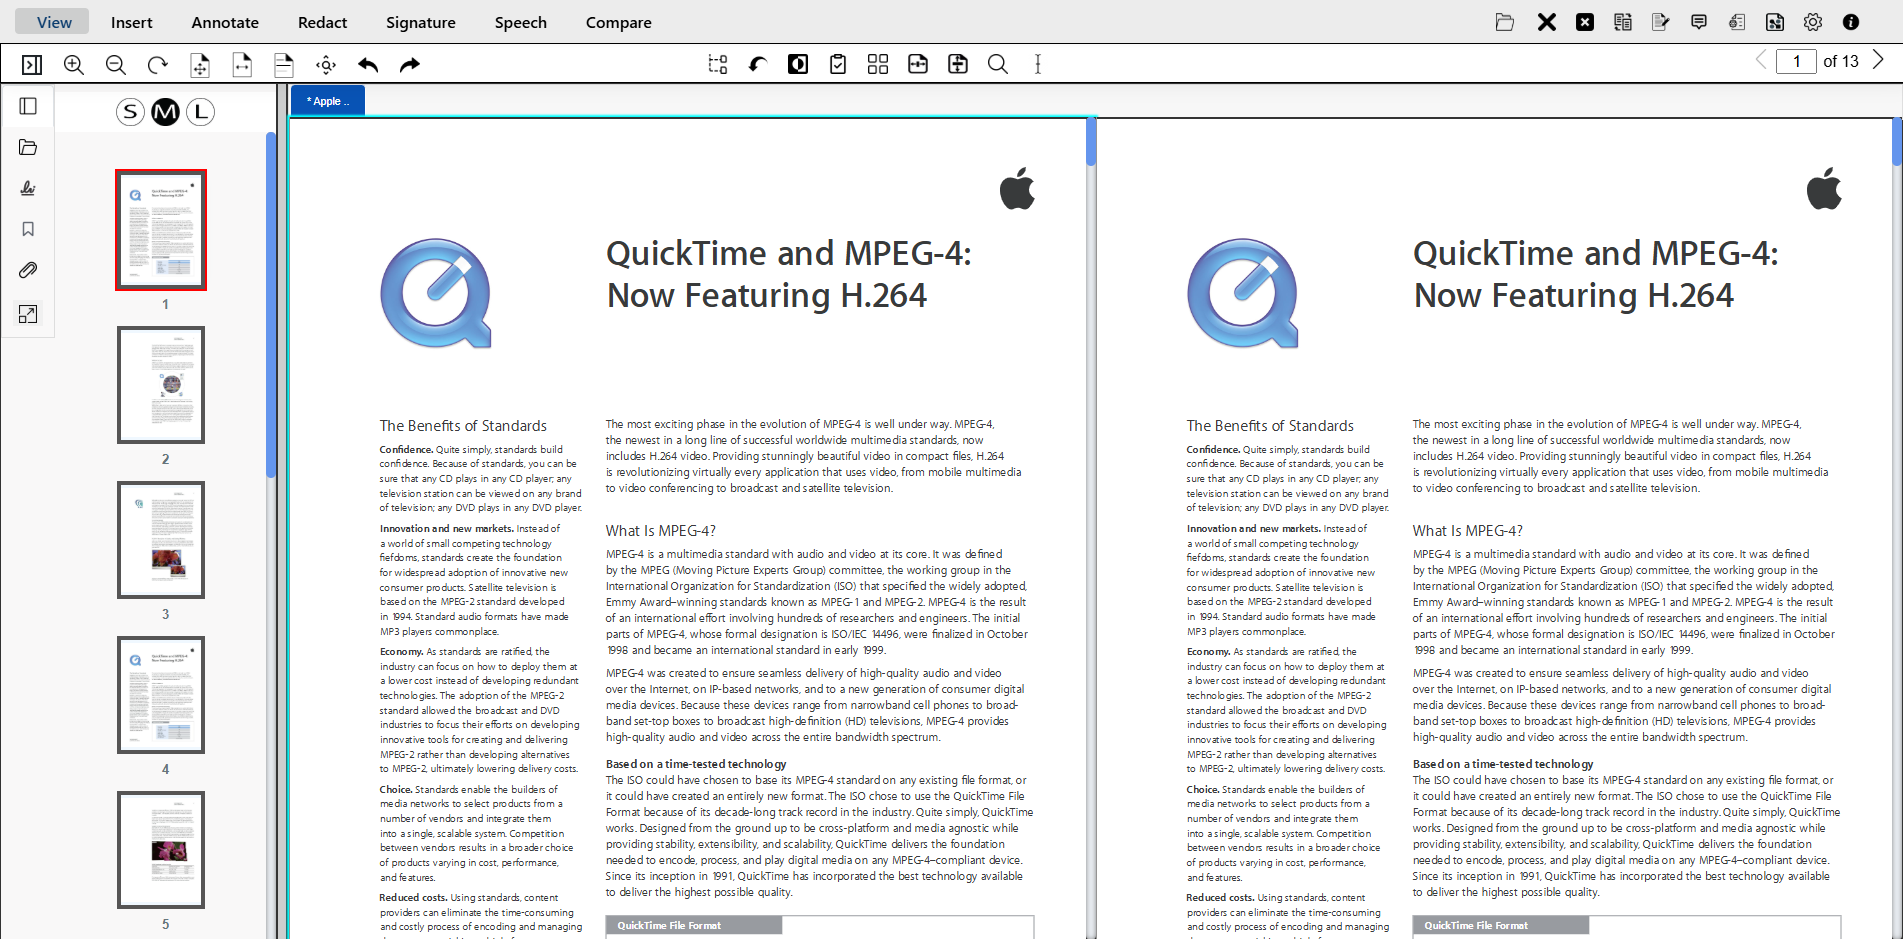
- Side by Side View Vertical
Enables the user for viewing two documents simultaneously in vertically split panes. It will allow the user to view more than one document simultaneously. When the user selects the Side By Side View Vertical button, a new viewer tab will be created.
The left pane will be highlighted and marked with a blue outline to indicate the active document window the user is working with and capture all of their keyboard and mouse events. Both views will have their own respective scroll bars and each document is scrolled independently.
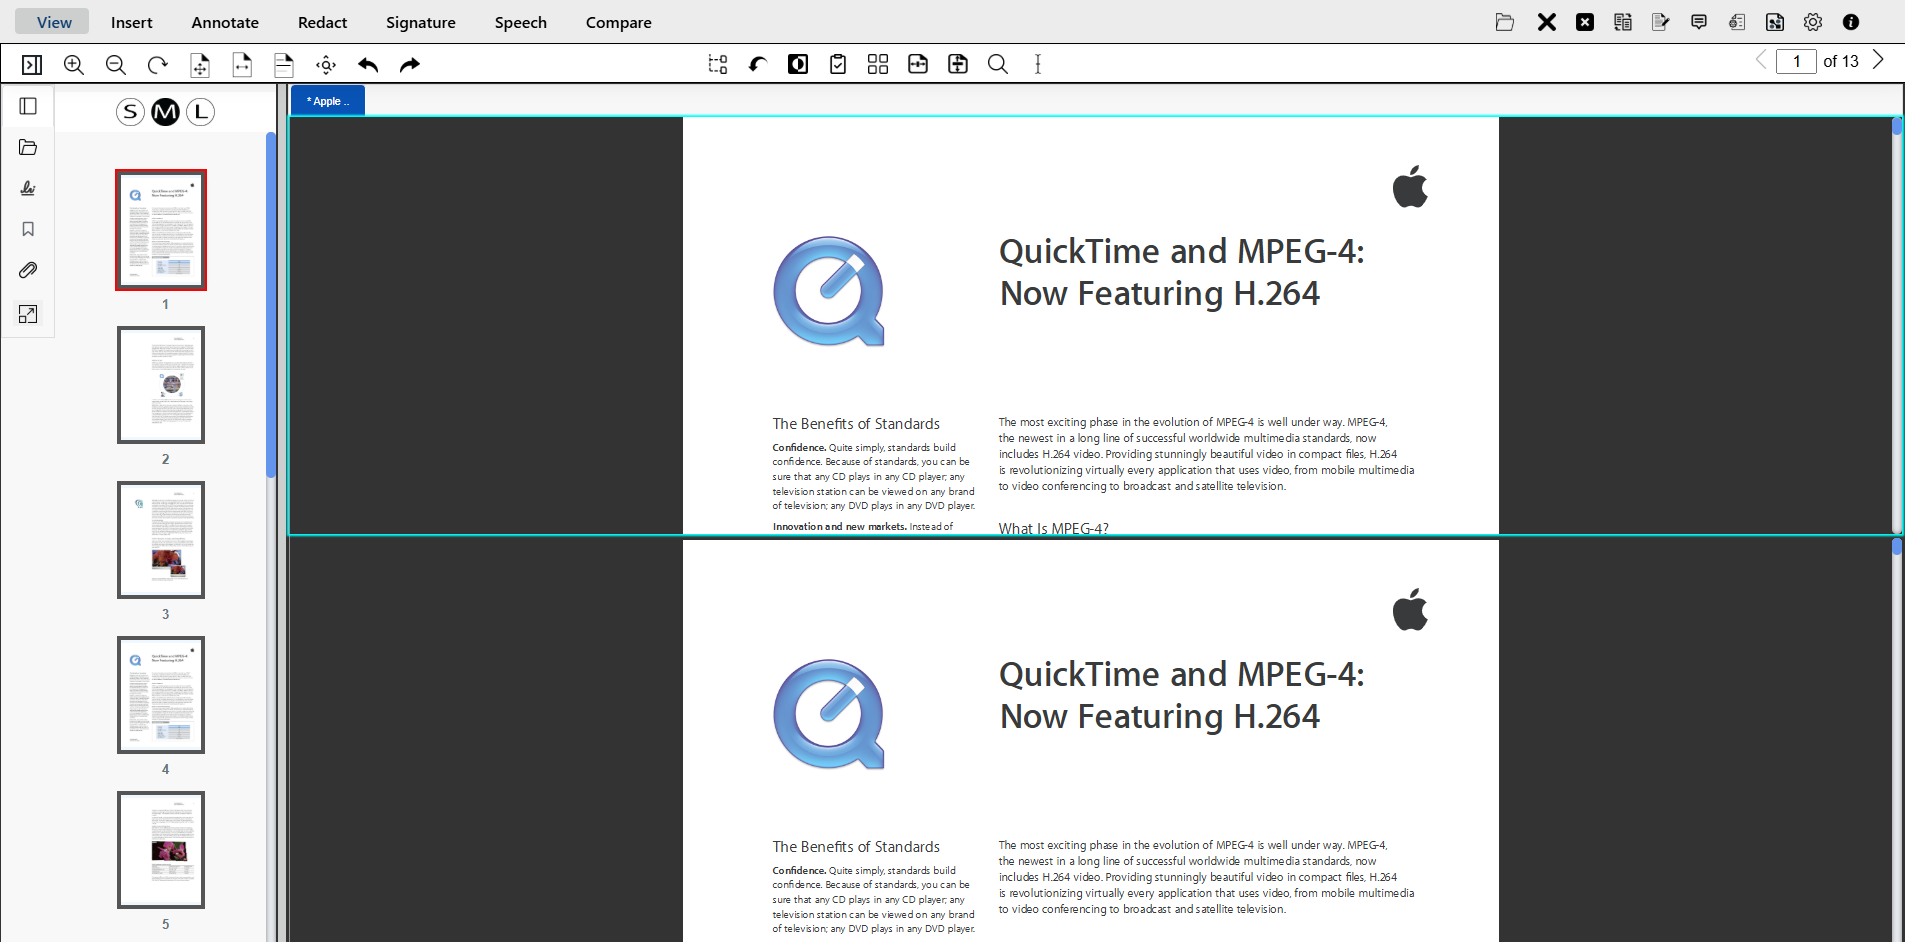
- Side by Side View Horizontal
Enables the user to view two documents simultaneously in horizontal split panes.
When the user clicks on the Side By Side View Horizontal button, a new viewer tab will be created. The bottom pane will be highlighted and marked with a blue outline to indicate the active document window that the user is working with and capture all of their keyboard and mouse events. Both views will have their own respective scroll bars and each document is scrolled independently.
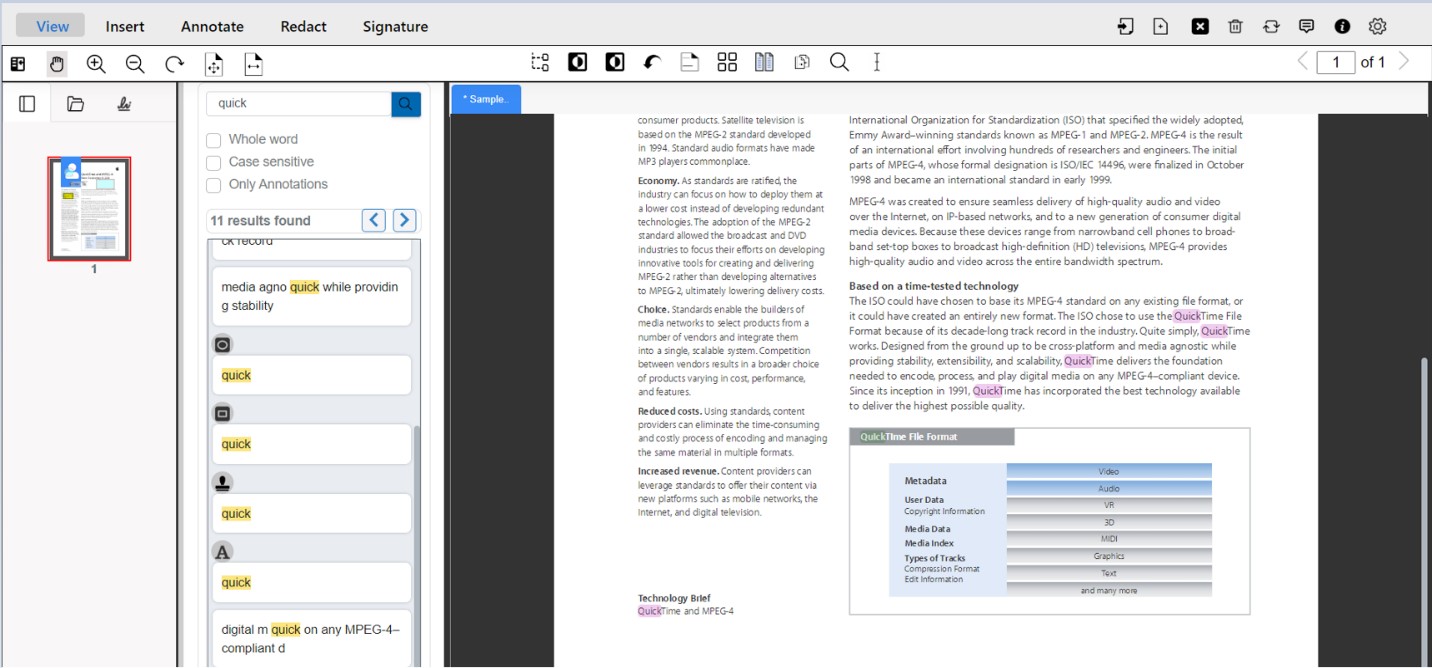
- Text Search
Text Search enables searching text across the currently “in view” document, and all other documents rendered in the viewer. This functionality will be available for text-based documents.

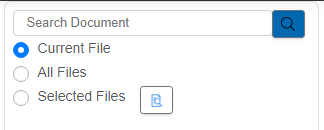
In the Search Document field, the user will provide the text to search within the documents. In this panel, three options are provided which the user can choose from.- Current File: Searches the text in the current opened file in the viewer. By default, this option is selected.
- All Files: Searches the text in all opened files in the viewer.
- Selected Files: Enables the user can select multiple documents from a dropdown list to search the text for. A drop-down window will appear to display the list of currently rendered documents for the user to select from.
- Advanced Search
eViewer 7 provides the user with advanced searching functionalities.
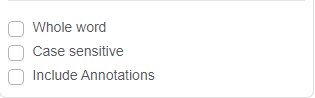
- Whole word restricts the search to the word only. These words are separated by a space.
- Case sensitive is used to search only for those words that match the word exactly the same as typed in the text box while checking for the capitalization of characters.
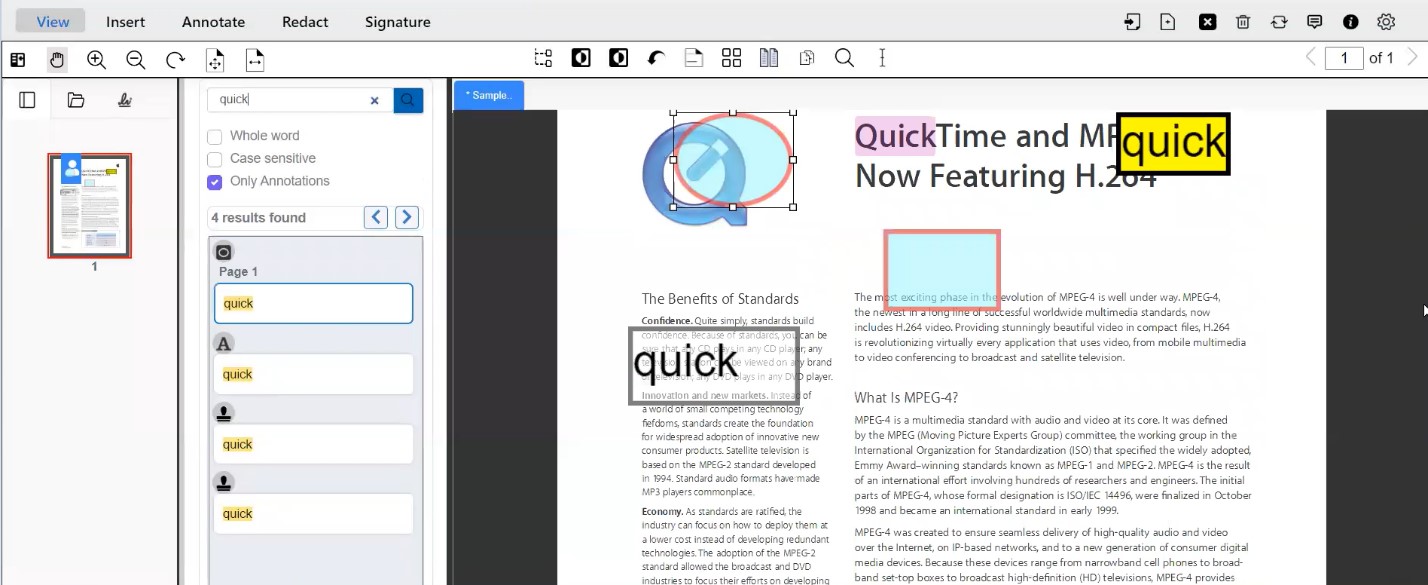
- Include Annotations enables users to search text to include text within the document’s annotations.
Review Search Results
The text search results will display based on the selected options. If an annotation is found, the annotation icon will appear along with the result.The searched text will also be highlighted throughout the documents, and by clicking on the search results in the result panel, the user will be redirected to the documents and pages where the search text is found.
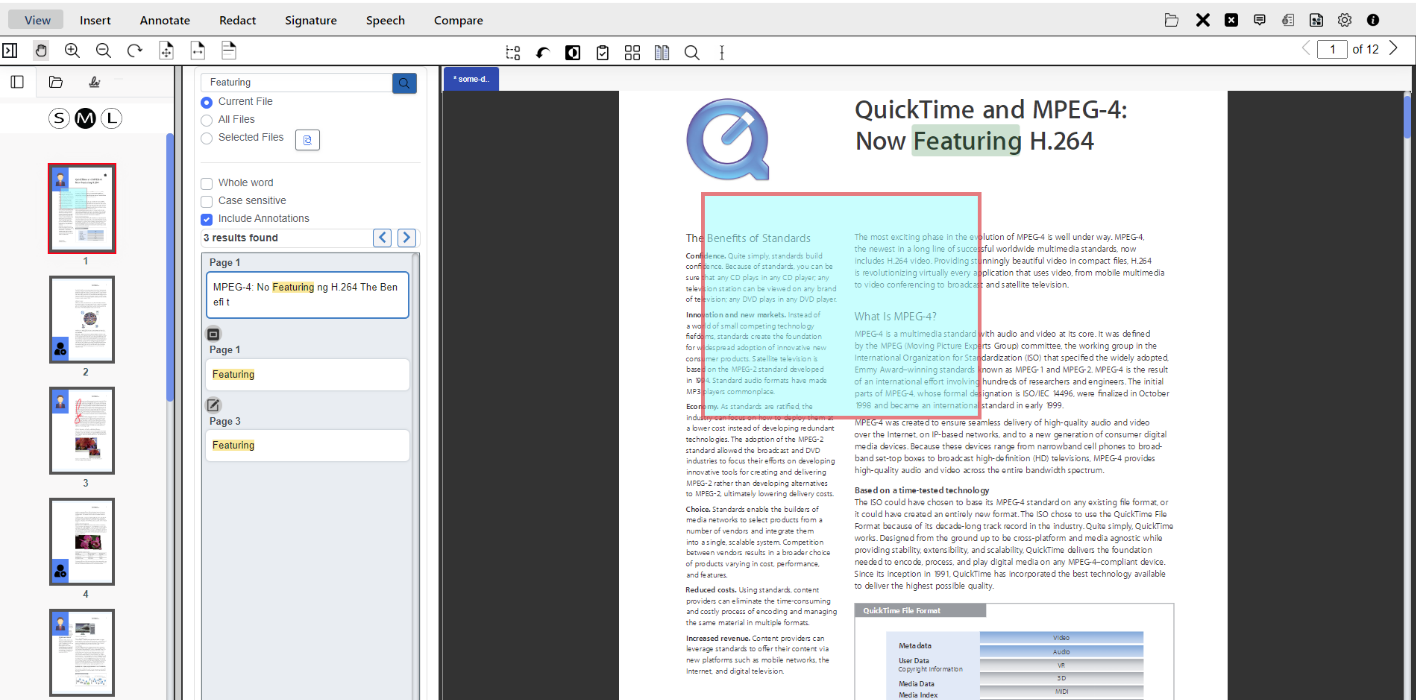
The user can navigate through the search results and review each occurrence by using the “Next” and “Previous” buttons to move between results.

Searching in case of multiple documents, users will be able to expand/collapse the search results by clicking on the document name.If the user has multiple documents open in eViewer and selects a search result for a document that is not currently in view, eViewer will switch the focus from the current document to the document where the search result is found and bring it into the focus.
- Select Text
Select Text allows the user to select the text from the document.

It captures the selected text along with its screen coordinates, page details, and scaling information for accurate positioning.
Insert Tab
Insert tab provides features for page editing tools, add checkpoints, append document, setting up watermark, snipping tool, blank page, and crop page.

- Page Editing Tools
- Cut Page
It will Cut the selected page from the document.

The viewer will display a confirmation pop up showing that the cut operation has been successfully implemented on the desired page with the page number.

- Copy Page
It will Copy the selected page and will be available on the Windows “clipboard”.

The viewer will display a confirmation pop up showing that the copy operation has been successfully copied with the desired page to the clipboard.

- Paste Page
It will Paste the copied page or cut page next to the selected page.
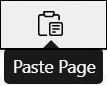
If the page is not copied or cut successfully, then it will provide an alert for copying page first.

The viewer will display a confirmation pop up showing that the paste operation has been successfully pasted the desired page, which is copied from the clipboard and also mentioned in the pop-up box.

- Delete Page
It will delete the current page being viewed by the user from the document.
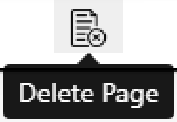
The viewer will display a confirmation pop up showing that the delete operation has been successfully deleted the desired page.

- Cut Page
- Checkpoint
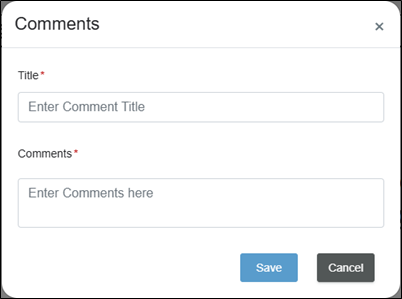
Checkpoint is a feature that enable users to add comments to an area of interest of the document.
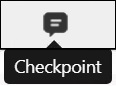
To use, click and drag diagonally on the screen and release the mouse button once the desired area is highlighted, the dialog box will appear over the screen.
Provide the title and comments in their respective fields and then click “Save”.
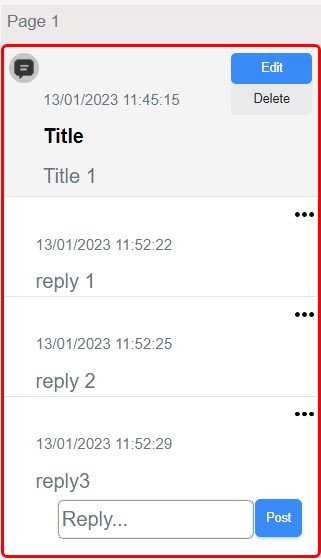
Users can change the color, delete it, view the comments, and link comments of Checkpoints by right clicking on the Checkpoint.
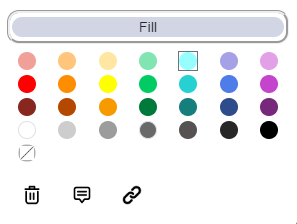
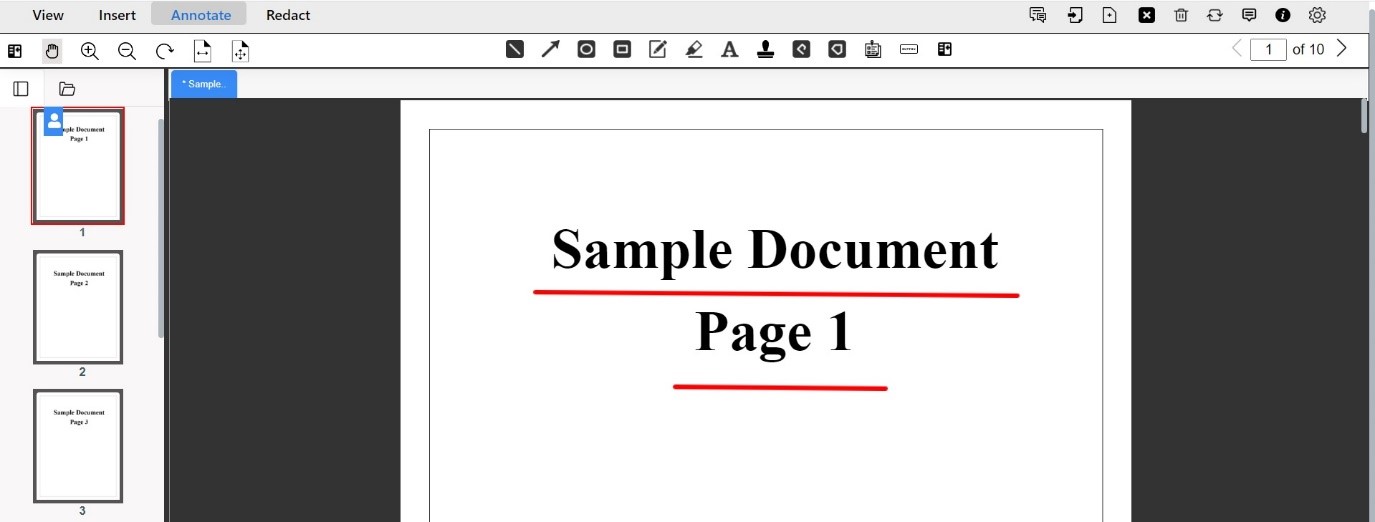
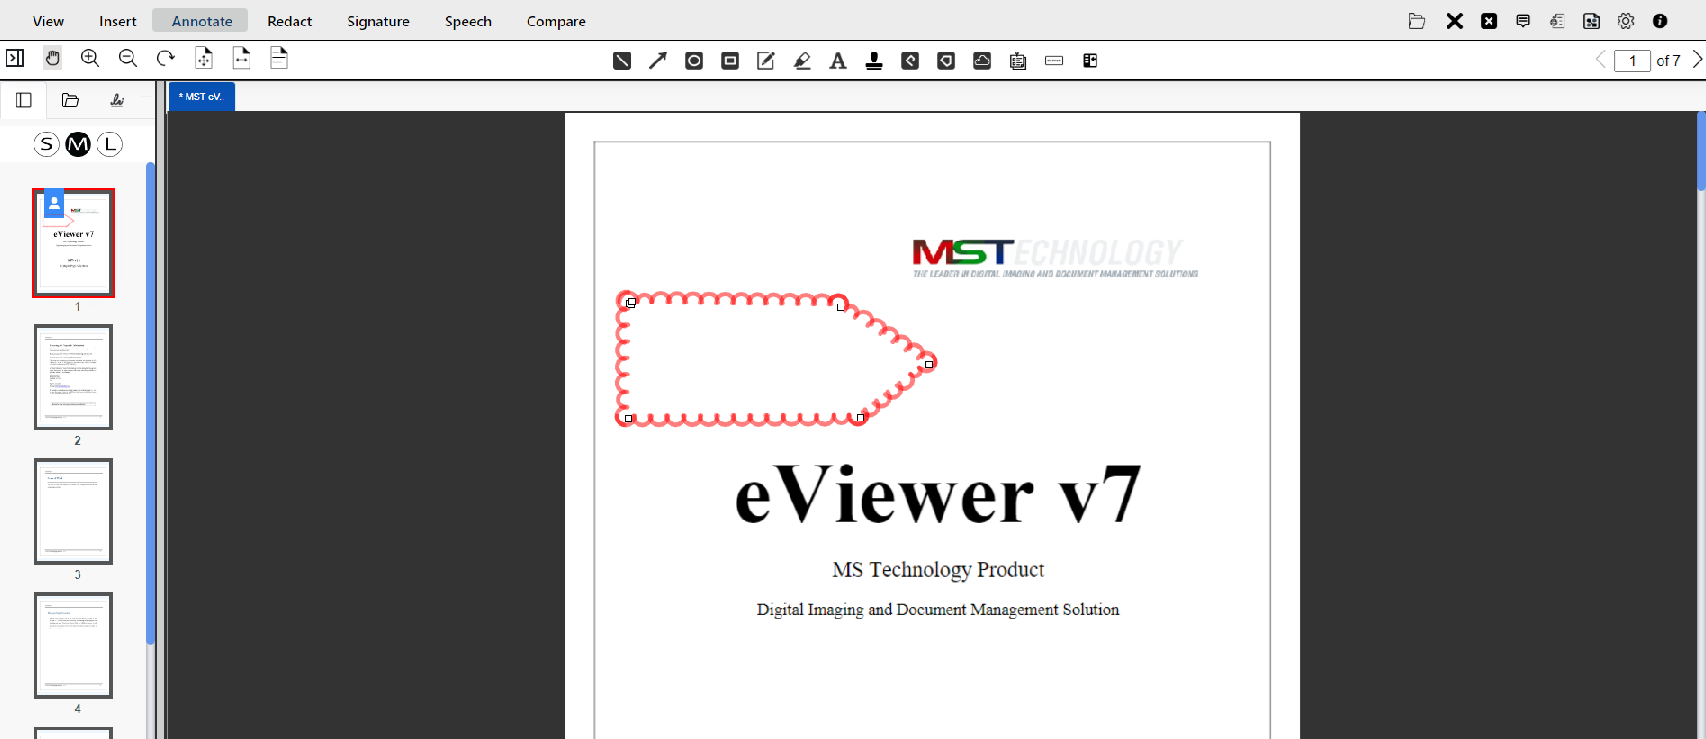
Example, the checkpoint shown in the color red.
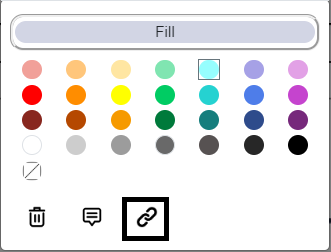
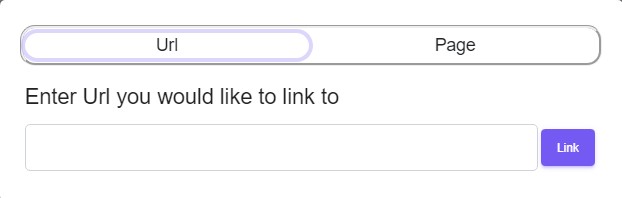
Link Checkpoint
User can link the checkpoint by right clicking on it, and a dialog box appears. Click on the link button.
Enter the URL to link the checkpoint to or the page number to jump to the particular page within the document and click link. The checkpoint is linked successfully.
For deleting the checkpoint link, the user has to right click on the checkpoint. This dialog box will appear with a remove link button in it.
View Checkpoint Comments
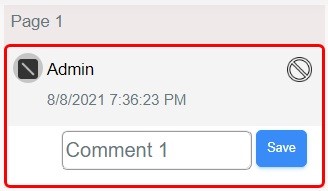
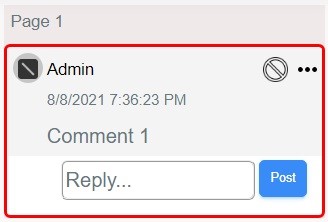
eViewer v7 provides the ability to view all the comments using the Comment button that is located on the top right panel of the viewer.

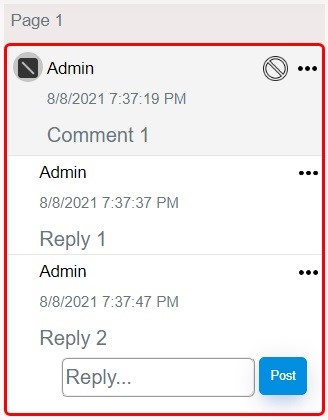
All the comments will be displayed sequentially. These comments include the miniature representation of the checkpoint, the page number on which checkpoint is being drawn, the username with the date and time of the checkpoint. Users can also write comment.

Users can make notes and communicate using further replies.
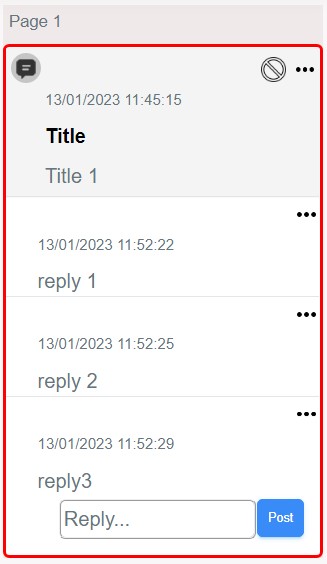
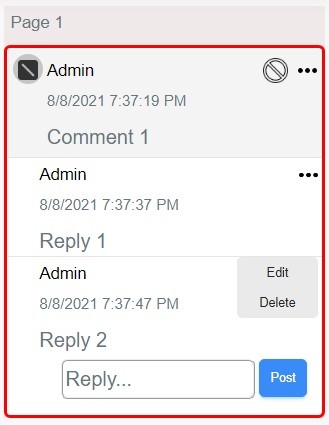
These comments and replies can be edited and deleted using the “shish-kabob” (…) menu.
There are certain verification options for each checkpoint comment. By default, all the comments are set as null.

- Append Document
Append Document enable users to add pages to the original document from another document.
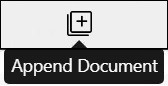
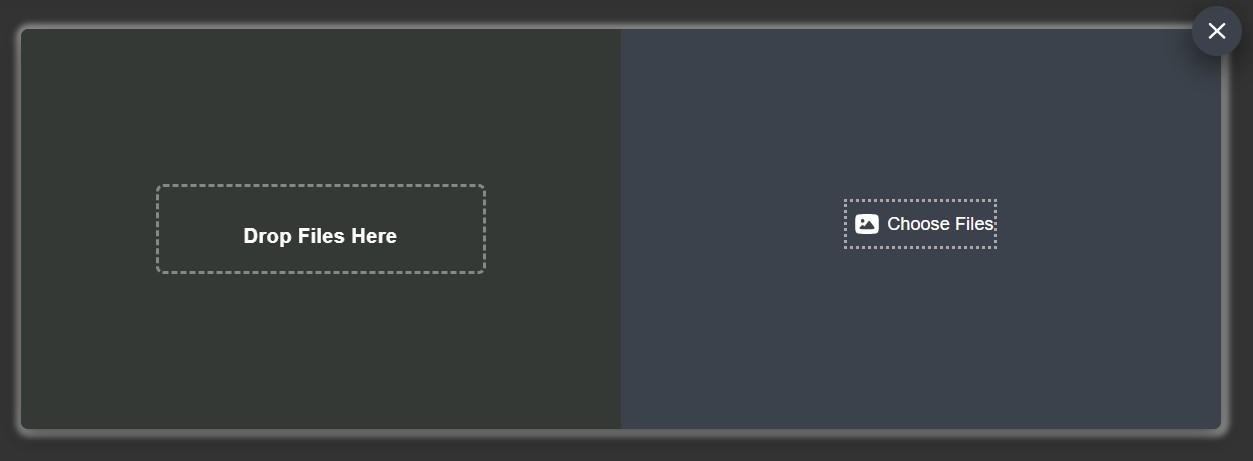
Clicking on the Append Document button, a pop-up box will appear on the screen to choose the document which the user wants to append.
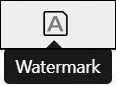
The selected document will be appended after the selected page in the current document. - Watermark
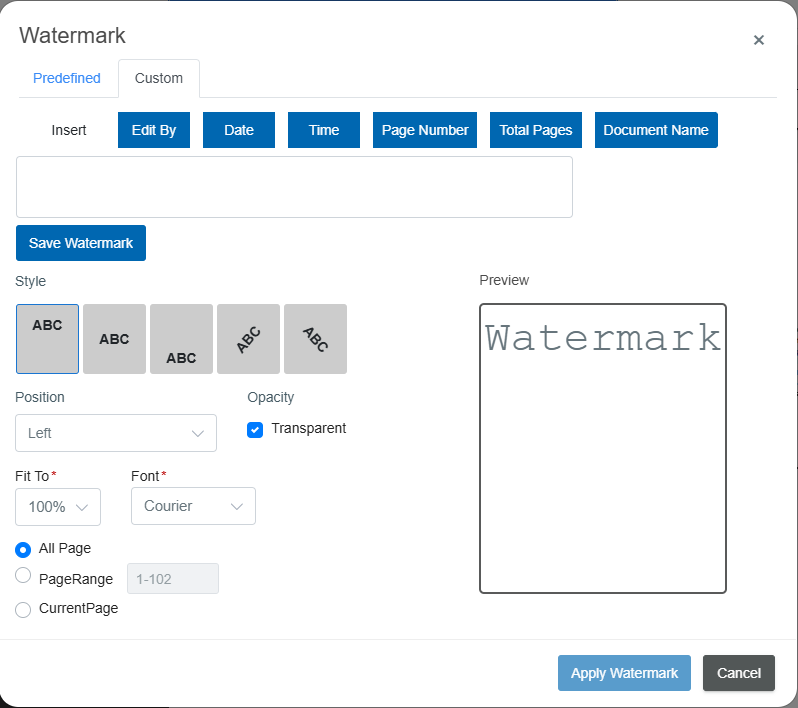
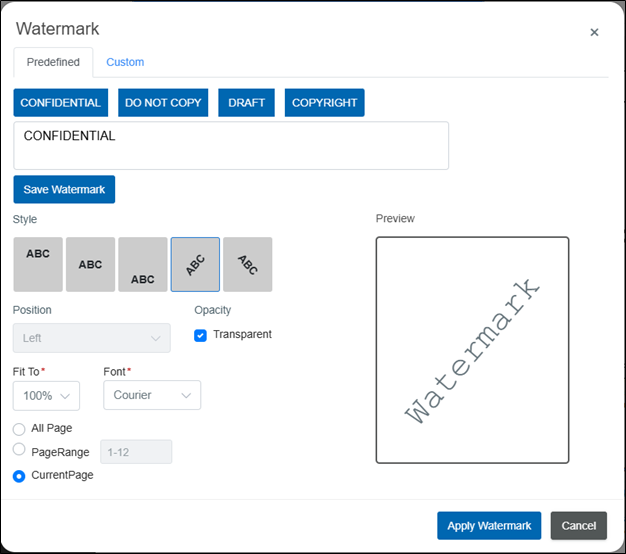
Watermark provides the ability to apply watermarks to the document.
Watermarks are text or pictures that appear in front of the document text. They often identify the document status, such as marking a document as a Confidential, Do not copy, Draft, and Copyright. eViewer v7 provides a list of standard watermarks, or the user can create their own custom watermark.
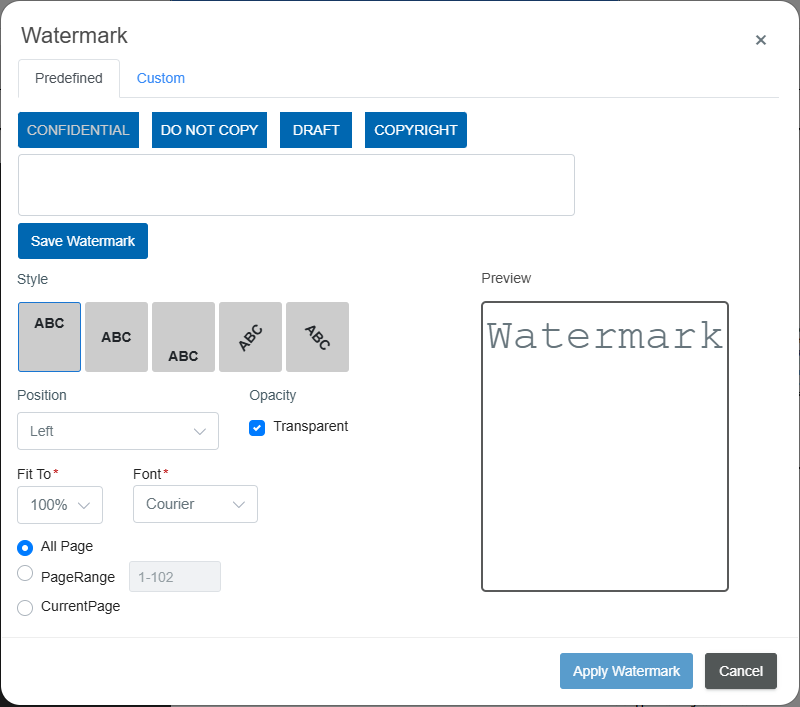
- Predefined Watermarks
There are four predefined watermarks in eViewer v7:
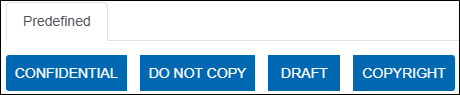
These predefined watermark text can be readily selected from the given list and can be placed on the document. - Custom Edits
Custom edits are used to insert different types of watermark texts according to the requirements.

For example:- Select “Edit By” is used to indicate ownership, confidentiality, or document status and to help prevent unauthorized use or distribution.
- Select “Date or Time”, the watermark will be the exact date or time of applying the watermark to the document.
- Select “Page Number”, the watermark will be the page number for every page of the document.
- Select “Total Pages”, the watermark will be the total page count of the document and applied on every page of the document.
- Select “Document Name”, the watermark will be the name of the document applied on every page of the document.
- Save Watermark
To save the custom watermark.

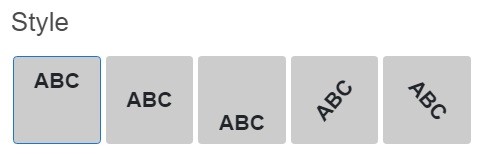
- Style
Style signifies the look of the watermark in the document, as described below. By default, the left most design option is selected.
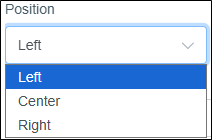
- Position
Position function will allow the user to align watermark to the page. It may be left, center or right, by default, it is on the left side.
- Opacity
Opacity function will allow the user to select the opacity of the watermark. By default, it is transparent.

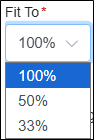
- Fit To
Fit To allows the user to select the scale of the watermark according to the document. By default, it is 100%.
- Font
Font allows the user to select the font used for the text of the watermark. By default, it is courier type.

- Preview
Preview of the watermark after setting all the above-mentioned features, but before finalizing it.

- Page Limit
Page Limit have following options:- All Pages: All the pages of a document will be watermarked. By default, it is selected.

- Page Range: User provides the page range (“from page number” to “to page number”), for example 1-2.

- Current Page: Applying the watermark only to the page in viewing window of the viewer.

- All Pages: All the pages of a document will be watermarked. By default, it is selected.
- Apply
After configuring all the styling features of the watermark, the user needs to click on “Apply Watermark” button for creating the watermark on the document.

Applying a Watermark:
Watermark is marked on the document as per the above settings.
- Delete
Once the watermark has been created and applied to the document can be deleted by selecting the created watermark annotation and then selecting the “Delete” button.

- Delete
- Predefined Watermarks
In the viewer, users can snip a selected area of the current page from the document using the Snipping Tool feature located in the Insert menu.
To snip an area of a document, follow these steps:
- Open the document and select the Snipping Tool button.
- Click and hold on an outer point of the desired capture area on the document, then drag diagonally to select the specific portion of the page in the document that needs to be snipped.
A rectangle outline appears over the page.
- Release the mouse button. Anything inside the rectangle box will be copied into the viewer’s clipboard and can be pasted into the current document, another document, or creating a new document within the viewer.
When the area gets snipped, the viewer will display a confirmation pop-up:

The Blank Page feature allows users to efficiently manage the display of blank pages within the active document through a simple toggle function.

With a single click, users can hide all detected blank pages in the document. Clicking the button again will restore any hidden blank pages to view.

For example, if page 2 of the document is blank, clicking the Blank Page button will temporarily hide page 2 from the document.

Page 2 is hidden from the document. Clicking the button again will restore page 2 to its original display position.
The Crop Page feature allows users to remove unnecessary portions of the pages from the document.

To crop pages in a document, follow these steps:
- Select Crop Page.
- Click and hold on outer point of the area of the page that needs to be cropped, and drag diagonally the mouse pointer over the specific portion of the page in the document to encompass the entire area.
- Release the mouse button, the selected area will be outlined and shown on the page.
A dialog box will appear which consists of the following options to crop the pages as needed:- All: This option allows the user to crop all pages of a document. By default, it is selected.
- Current Page: When only the current page of the document needs to be cropped.
- Specific Page: Enables the user to provide a single page or a range of pages to crop the area.
Crop Dimensions
Crop dimensions provides and enables the user to provide specific measurements for the area that needs to be cropped.Cancel
To cancel cropping, Click Cancel, all the modifications that the user has done on the pages will be removed. - After confirming all the options, Click Apply. The viewer will display a pop-up window confirming that the selected page will be cropped.
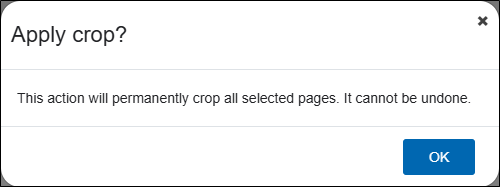
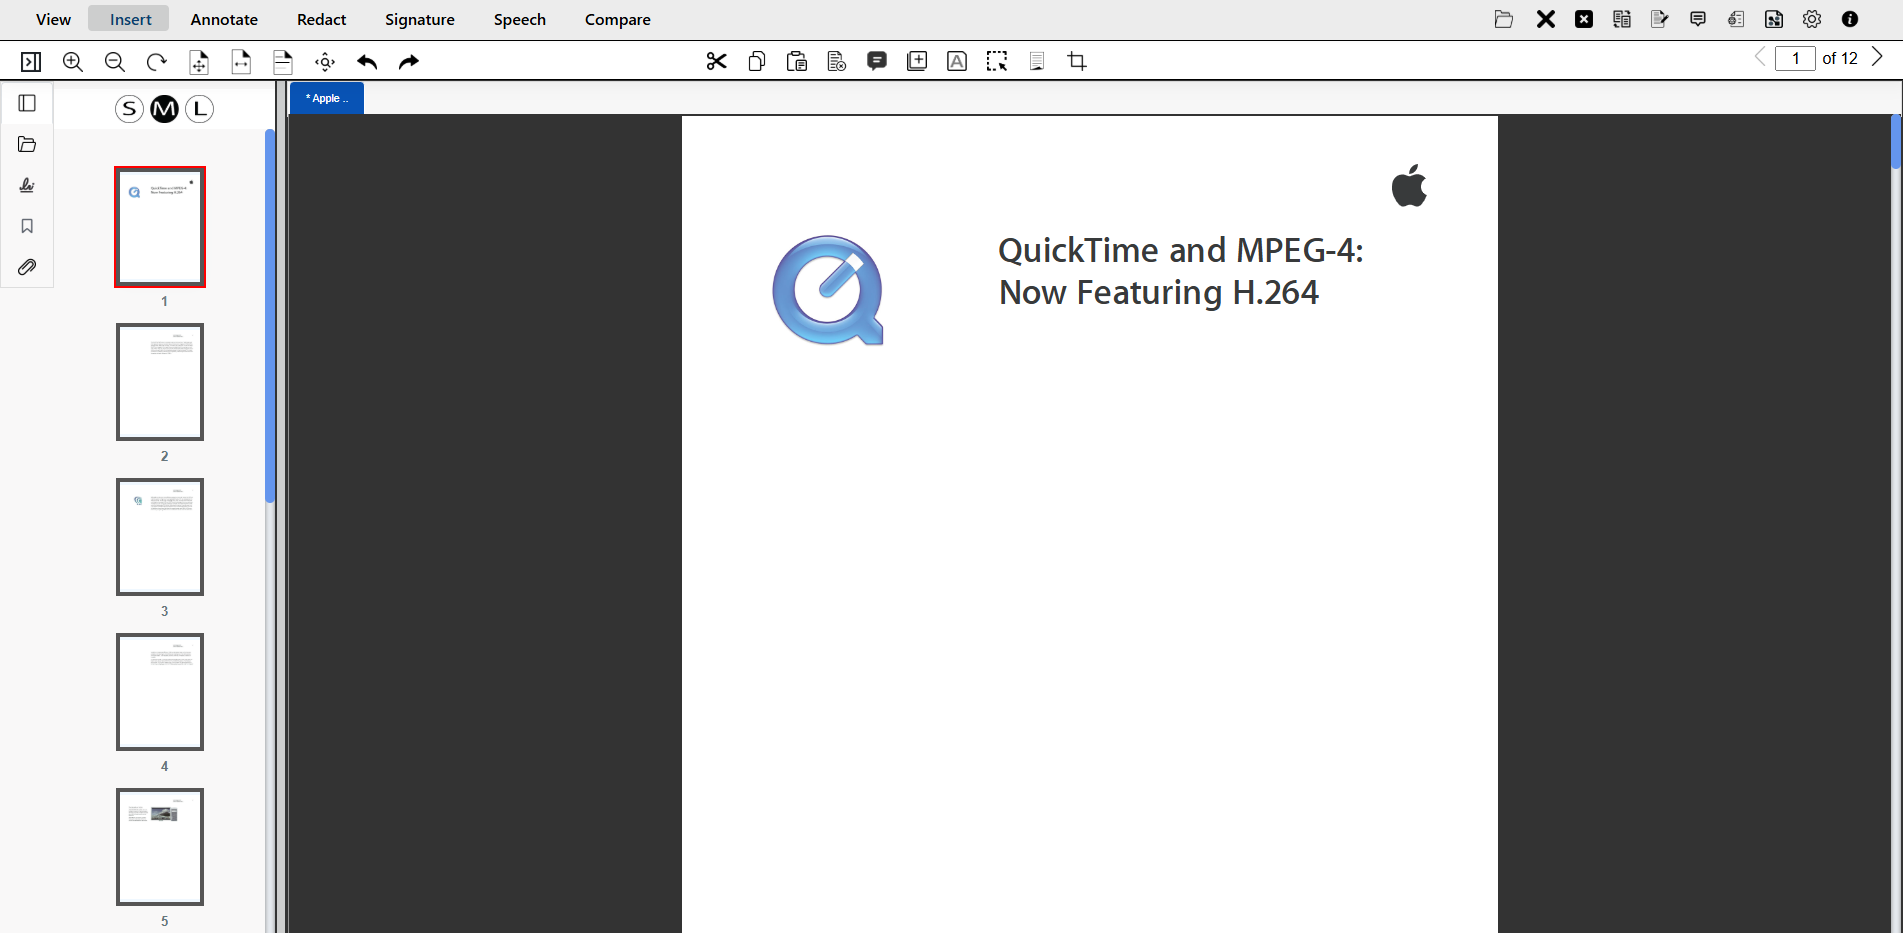
- Click OK. The selected area inside of the rectangle box will be retained, and the rest will be removed.
Annotate Tab
The Annotate tab provides various annotation options that users can use to markup documents.
Annotations are comments, notes, markups, explanations, and other types of external remarks that can be added to a specific part of the document. They are used to highlight, explain, or bring attention to a particular area in the document.
eViewer v7 provides various tools for adding notes and comments to the document and helps users collaborate with others. Additionally, it provides the ability to add digital stamps, and other useful markups to make the viewer an ideal solution for a business workflow environment.
Users can add comments to every annotation, which can be approved, rejected, canceled, completed, or cleared by other users. To every comment, additional replies can be posted, edited, and deleted.
Annotation markups are saved as annotation data that is stored in a separate XML file. When an annotation for a document is created, an XML file with the same name as the document name is created in the current directory. The annotations can also be printed with the document if desired.
eViewer also allows for saving annotations in the MO:DCA annotation format and any annotations made on the document will only be saved in the MO:DCA binary file. Note that any only annotations that are MO:DCA compliant, can be saved as MO:DCA annotations.
The Annotate tab contains all the available annotation tools for eViewer, including line, arrow, circle, rectangle, pen, highlight, text, stamp, polyline, polygon, cloud, sticky note, and action button. It also provides the option to hide annotations on the document if needed.

- Line Annotation
The Line annotation tool provides the user with the ability to draw lines.

The user can create a line by clicking where the line to begin, and drag the cursor to the place where it should end, then release the mouse button.
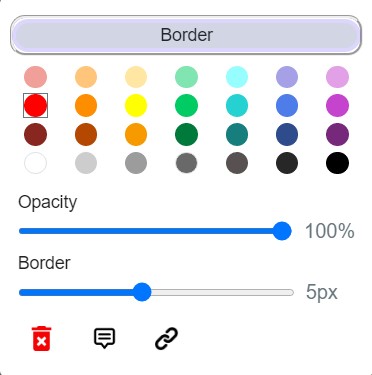
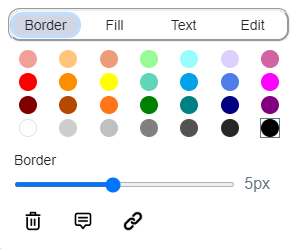
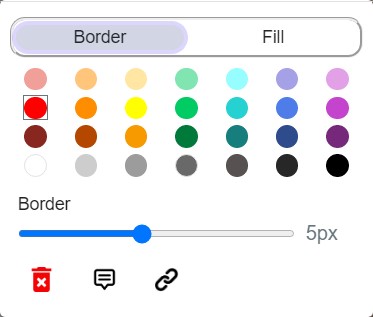
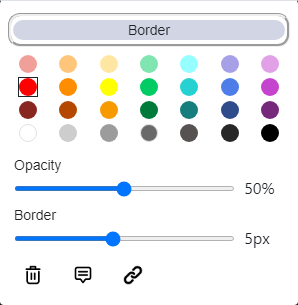
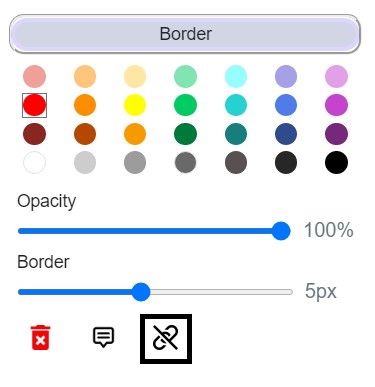
User can edit the properties of annotation by right clicking on the annotation. Set the border (line) color, adjust the opacity, and set the border (line) width of the line.

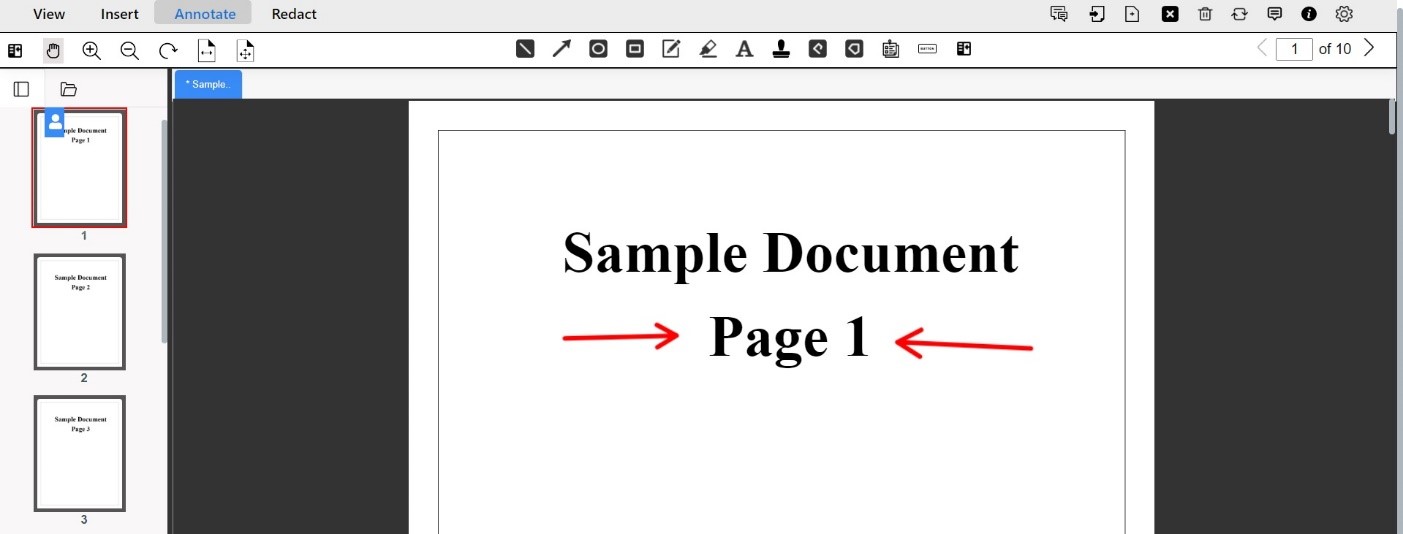
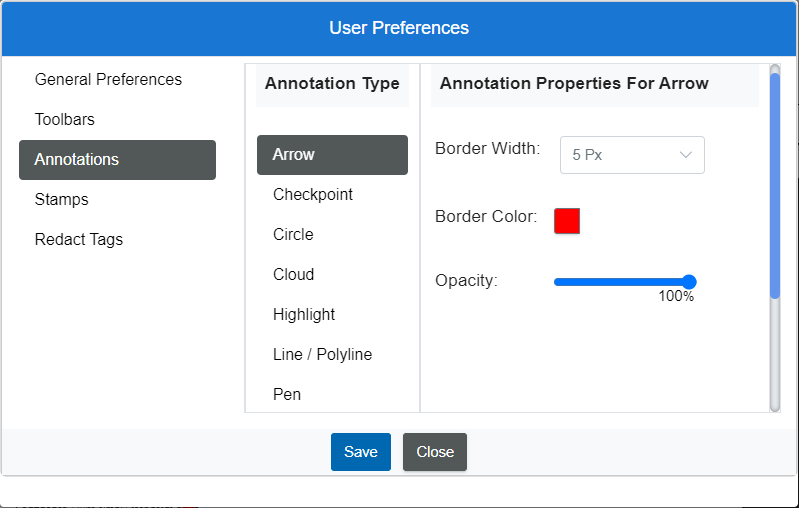
- Arrow Annotation
The Arrow annotation tool allows the user to place an arrow on the document.

The user can create an arrow by clicking and dragging diagonally, then release the mouse button.
User can edit the properties of annotation by right clicking on the annotation. Set the border color, adjust the opacity, and set the border width of the arrow.
- Circle Annotation
The Circle annotation tool allows the user to place a circle on the document.

The user can create a circle by clicking and dragging the cursor on the screen, then release the mouse button.

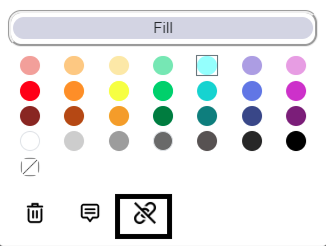
User can edit the properties of annotation by right clicking on the annotation.

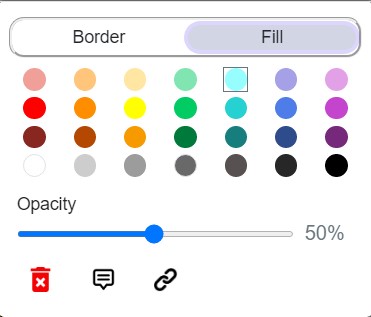
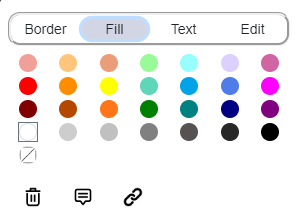
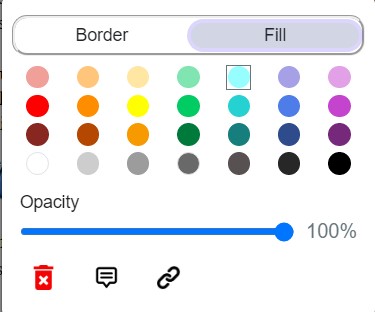
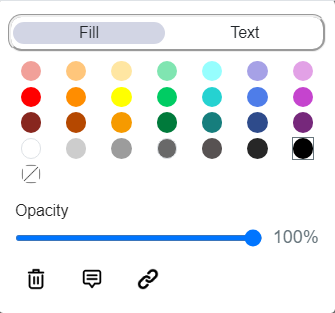
Set the border color, set the border width, fill the background color, and adjust the opacity of the circle. - Rectangle Annotation
The Rectangle annotation tool allows the user to place a rectangle on the document.
The user can create a rectangle by clicking and dragging the cursor on the screen, then release the mouse button.

User can edit the properties of annotation by right clicking on the annotation.
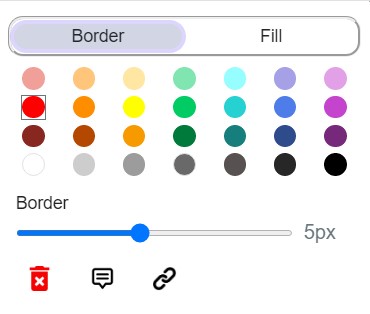

Set the border color, set the border width, fill the background color, and adjust the opacity of the rectangle. - Pen Annotation
The Pen annotation tool enables users to draw freehand lines on the document.

The user can create a freehand line(s) by clicking on the screen and dragging the cursor. It will follow the moves, so release the mouse button to end the drawing.
User can edit the properties of annotation by right clicking on the annotation. Set the border color, adjust the opacity, and set the border width of the freehand lines.

- Highlight Annotation
The Highlight annotation tool provides the ability to highlight text or areas of the document.

The user can highlight by clicking and dragging diagonally on the screen, then release the mouse button.
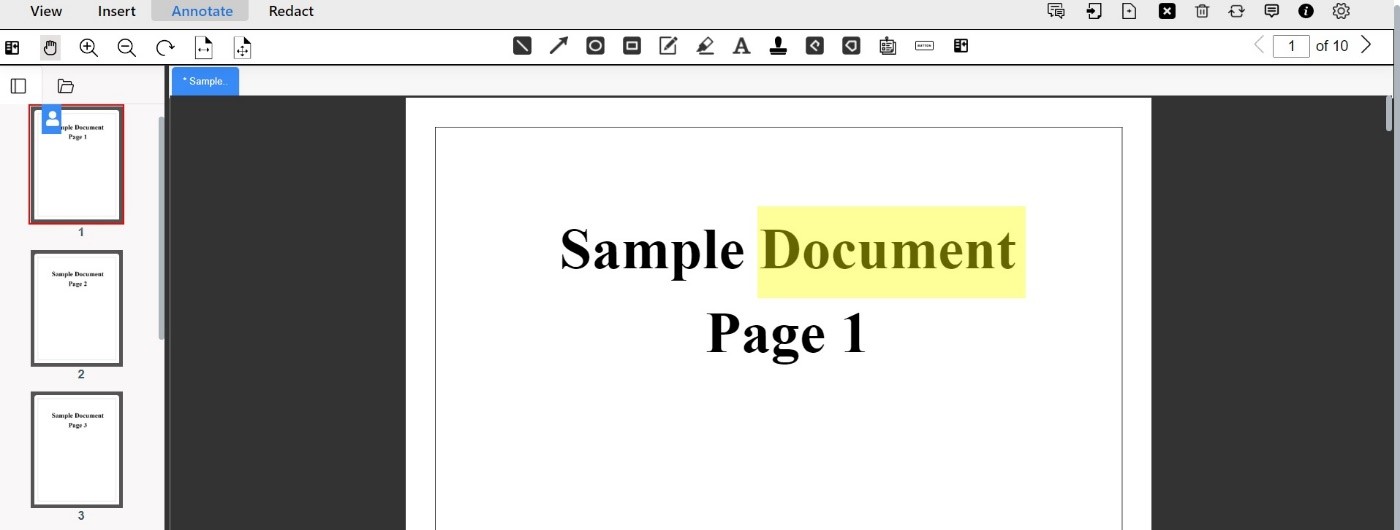
User can edit the properties of annotation by right clicking on the annotation.
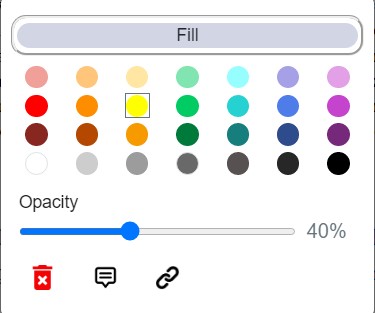
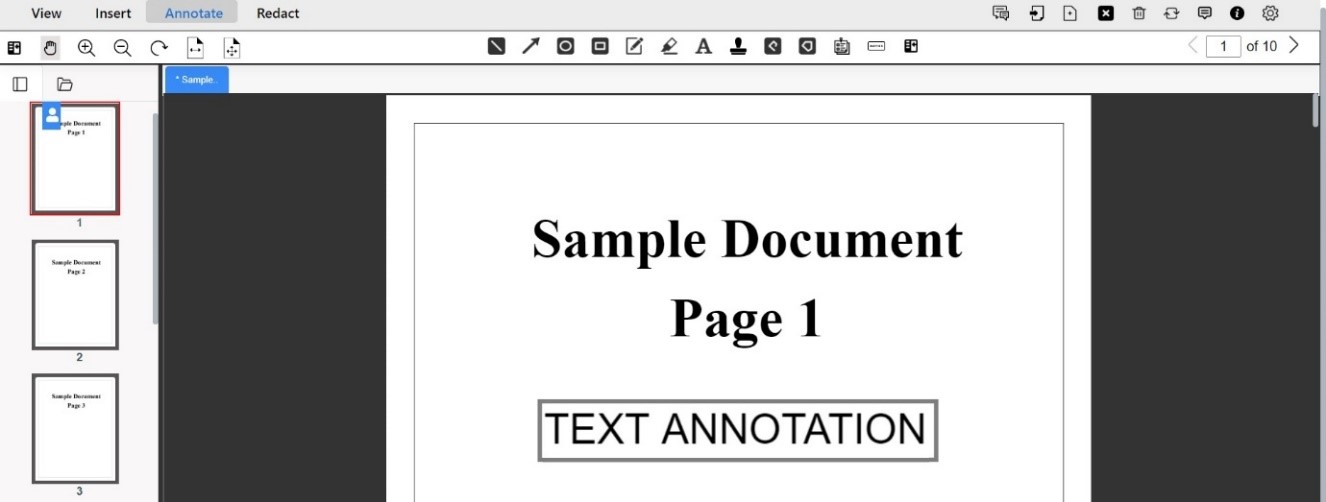
Fill the background color and adjust the opacity of the highlighted area. - Text Annotation
The Text annotation tool allows the user to write text within the text box on a page of the document.

User can create text annotations by clicking and dragging diagonally on the screen where they would like the text to be placed, then release the mouse button. To type, double click on the text box and a cursor will appear enabling them to add text. By click anywhere outside the box, the writing capabilities will end and the text will be finalized. To edit the text, double click on the text box again.The text box can be repositioned by dragging the box border and the size of the text box can be adjusted by dragging the selection handles.
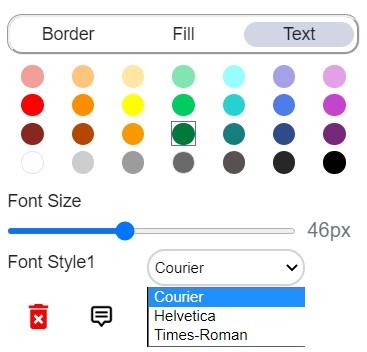
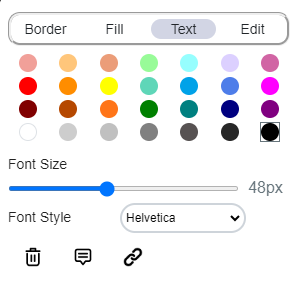
User can edit the properties of text annotation by selecting and right click on the annotation.Set the border color, set the border width, fill the background color, adjust the opacity, choose the text color, set the font size and select the font style of the text.


Example: After making these modifications to the properties, the text annotation will look like:

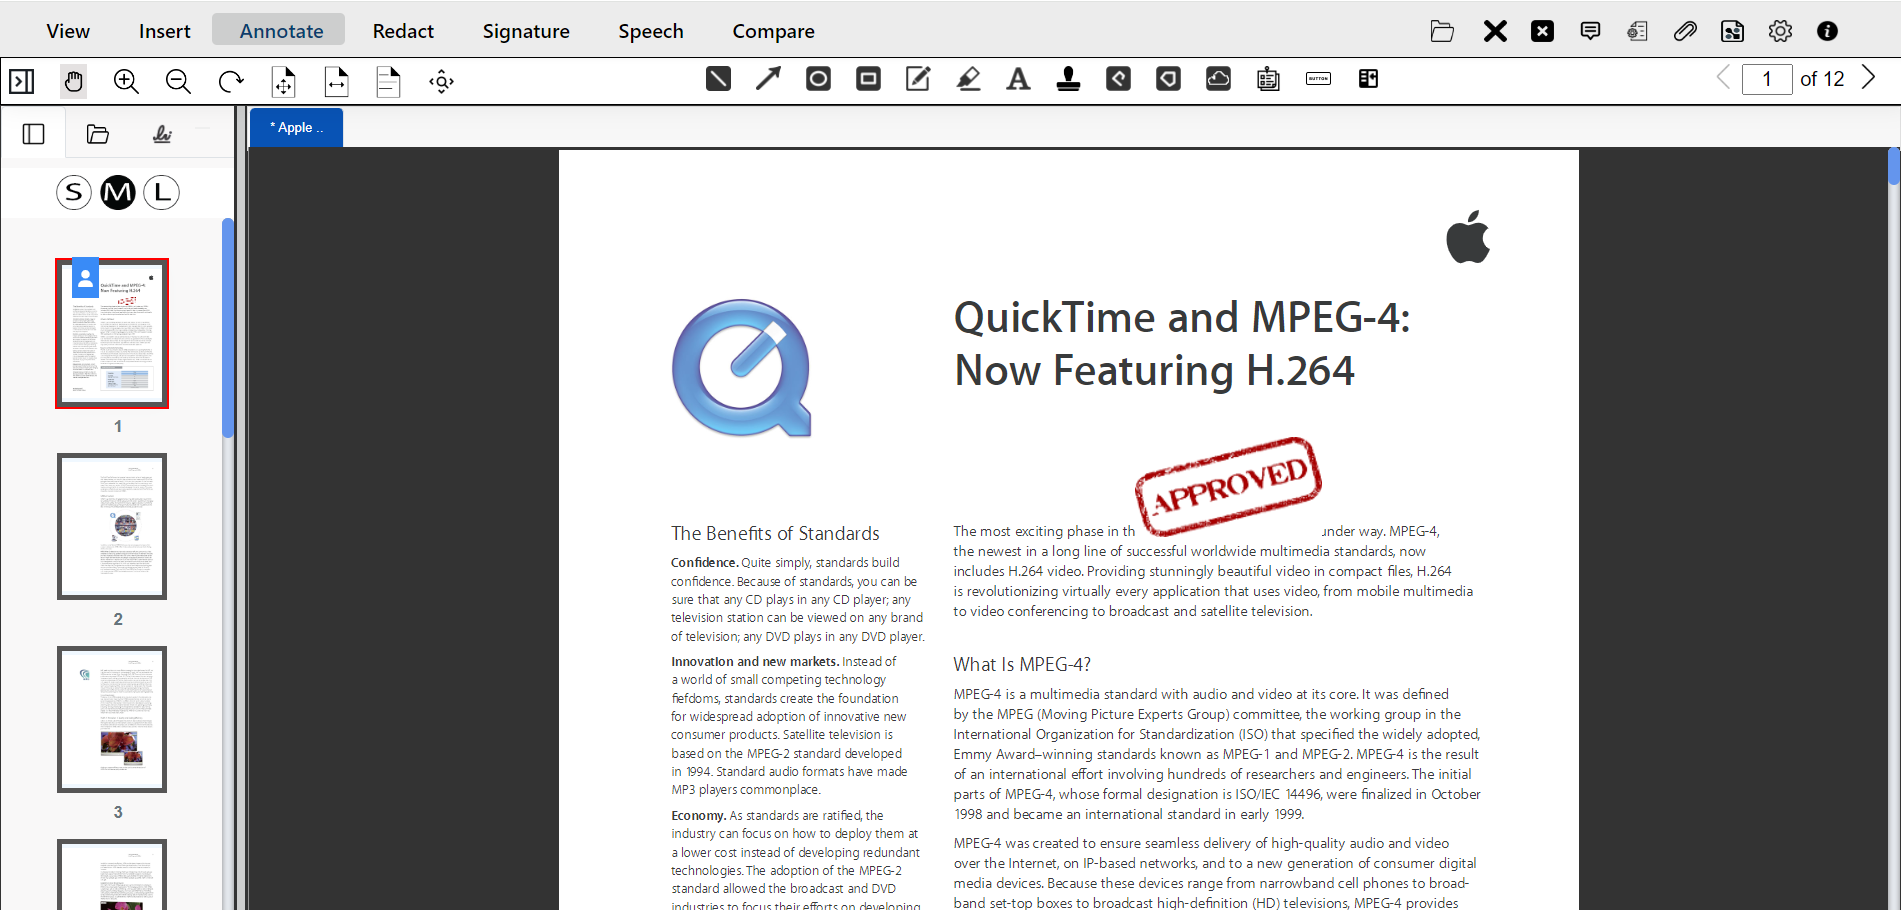
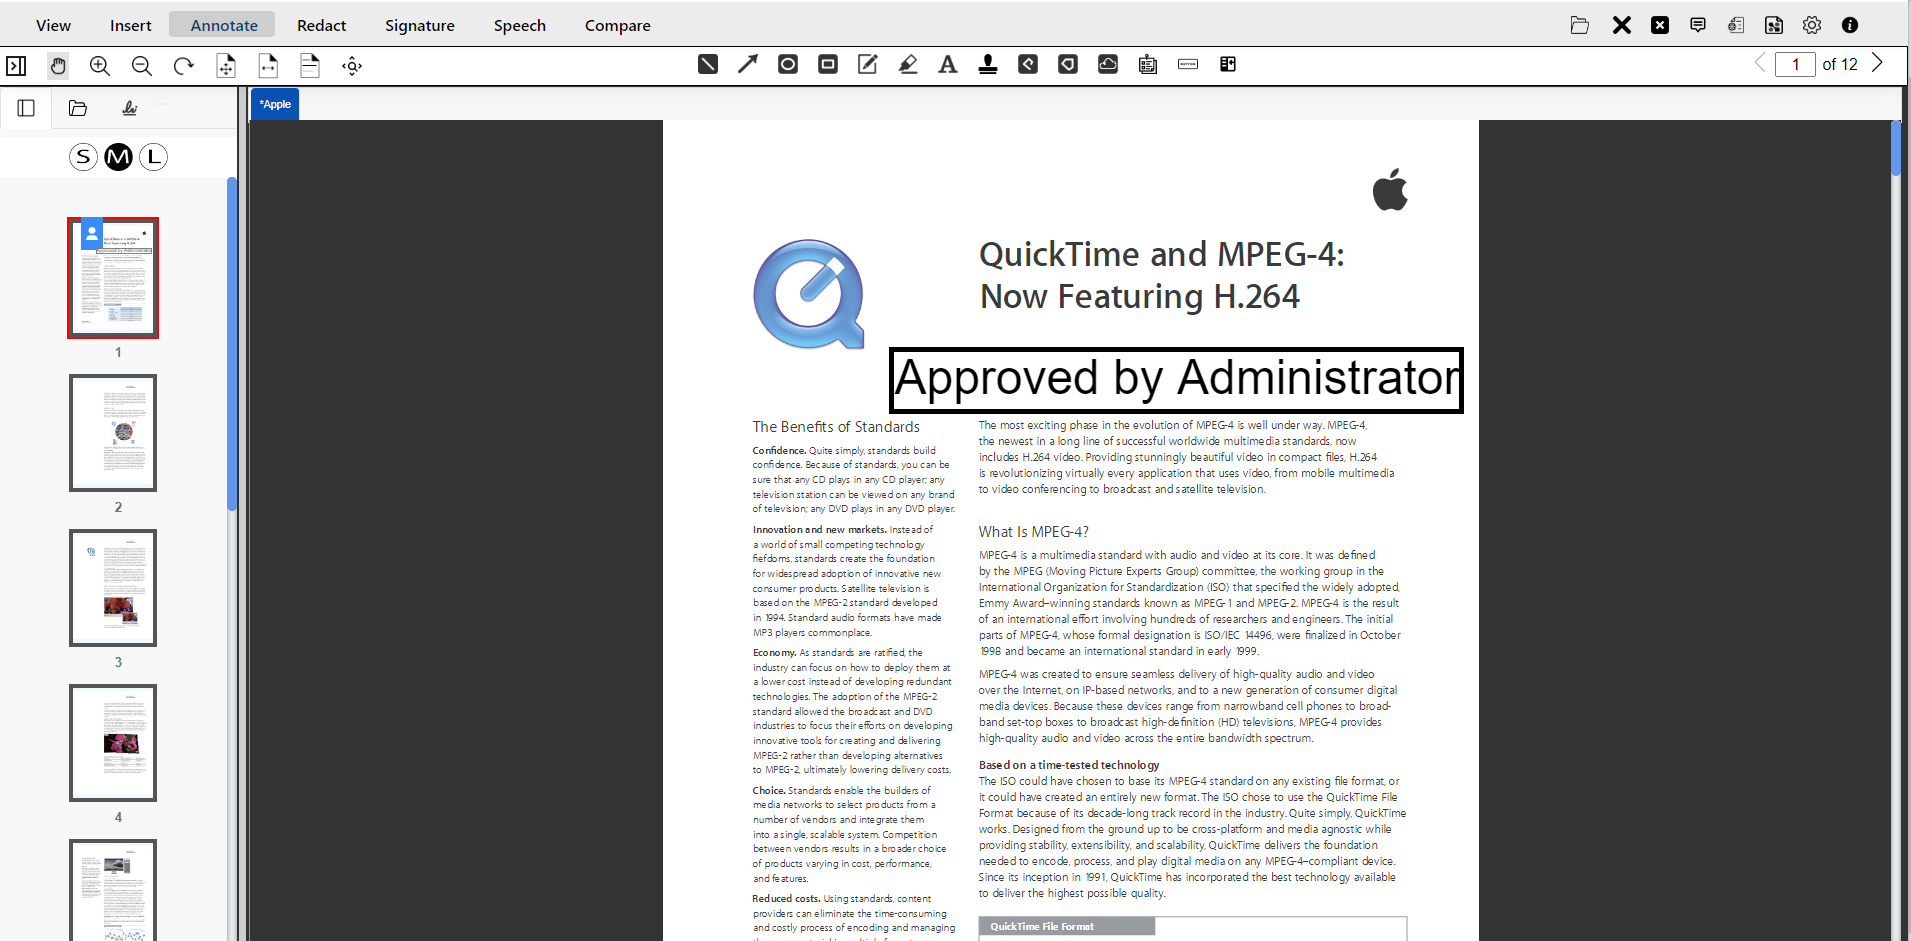
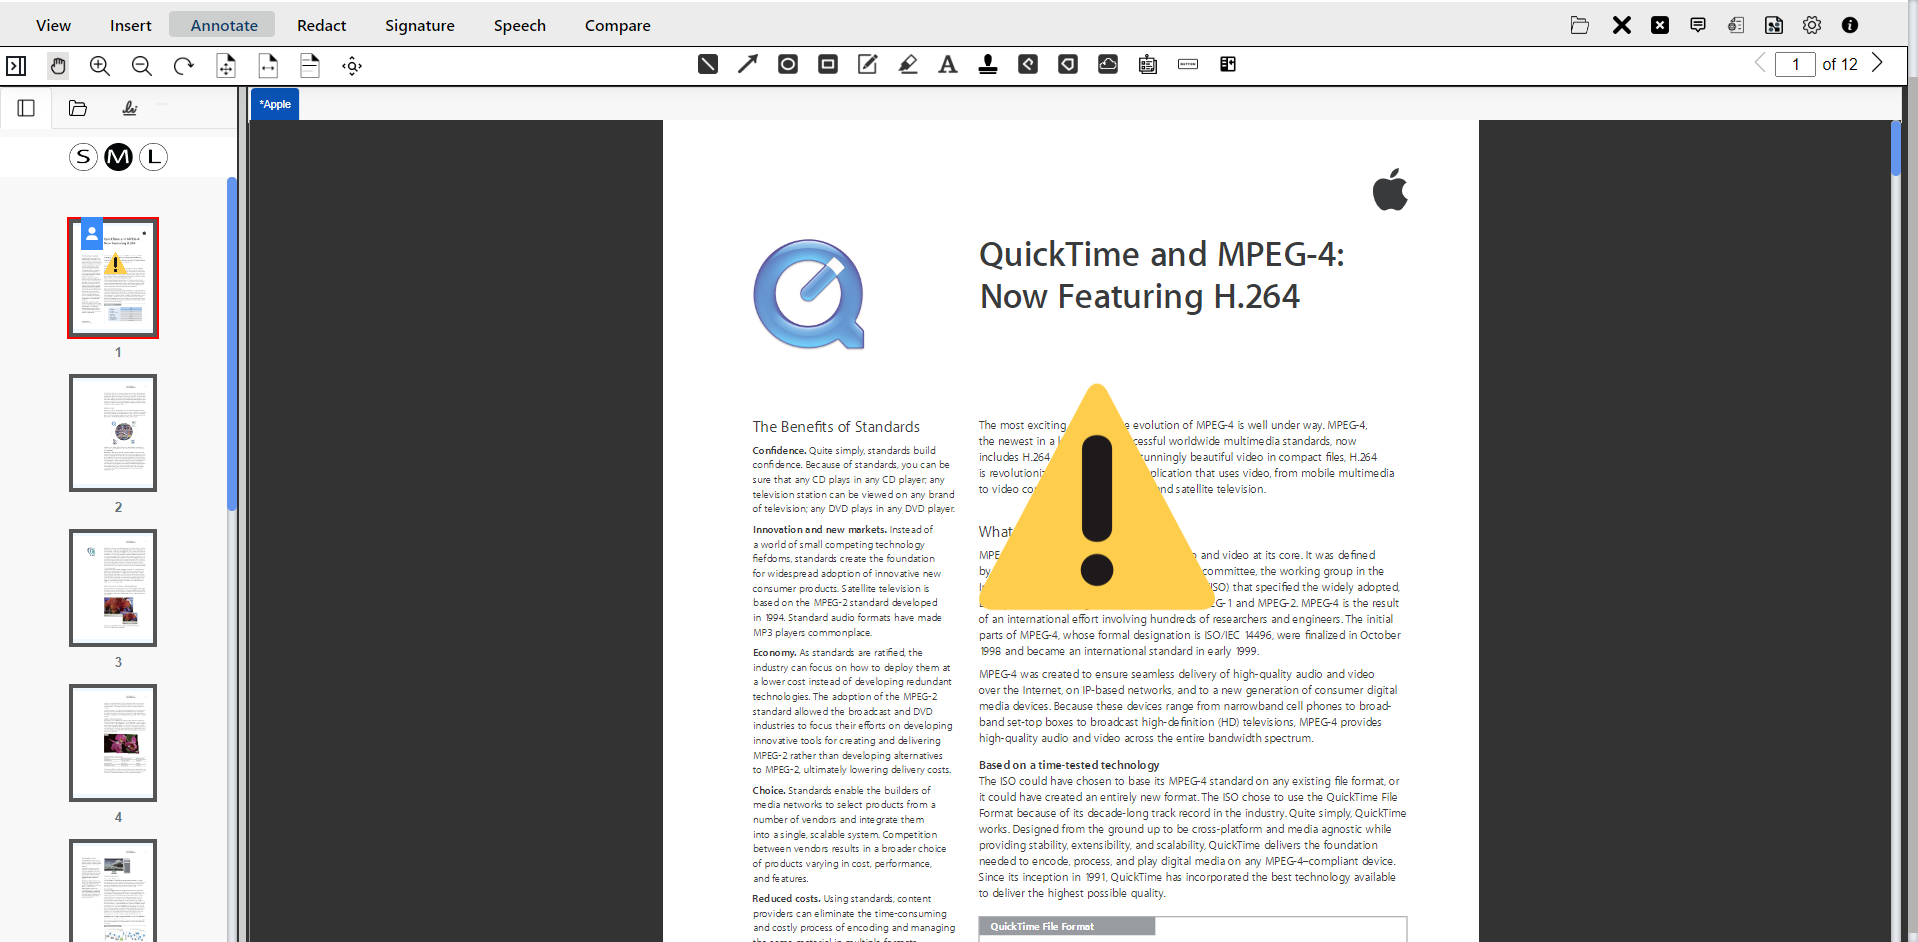
- Stamp Annotation
The Stamp annotation tool enables users to place a digital stamp on the document.

It enables users to add various images or text stamps anywhere on the document. Stamps can be either predefined or custom made by the user or company/organization.To use a stamp, the user can select from the list of available (standard and custom) stamps by clicking on the drop-down stamps menu, choosing a stamp, and then clicking the Select button. Once a stamp is selected, it will appear in the Preview area of the popup window.
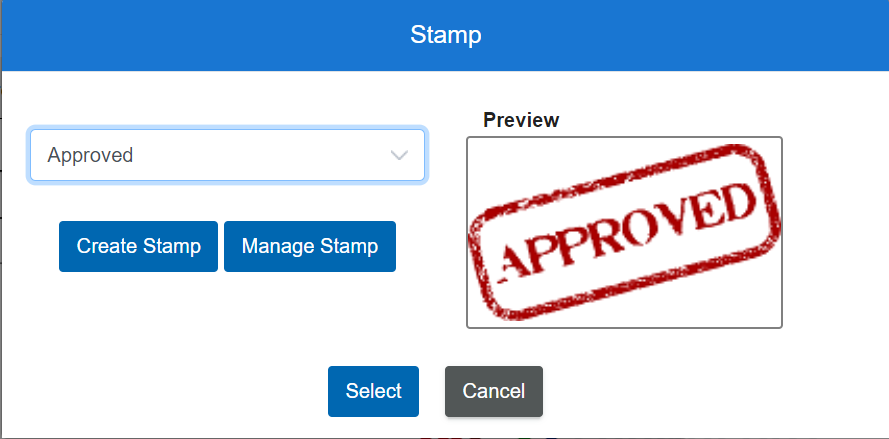
- Standard Image Stamps
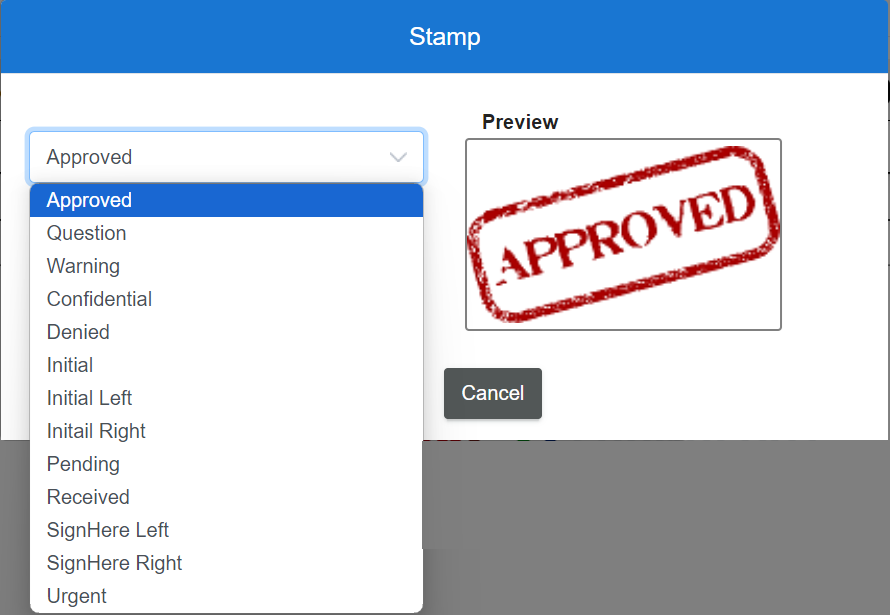
These image stamps can be placed on the document, and the user can move the annotation anywhere on the document and adjust its size.
The user can edit the annotation by right-clicking on it. Choose another image stamp from the stamp list or choose a custom image stamp, and preview the stamp. The annotation can also be deleted from the document using the Delete button.
- Create Stamp
Users can create their own stamps, if they have permission to do so, and would only be available to that particular user. To create a custom stamp, the user selects the Create Stamp button. A dialog box will appear, offering the option to create either a Text or Image stamp.

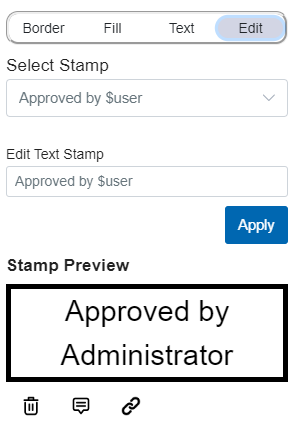
- Text Stamp
The user can create a text stamp annotation with their desired text. The stamp name will be the same as provided in the text stamp field.
The user can add macros, $date and $user, that can be used with the text stamp name to automatically insert the current date and the username into the stamp annotation.
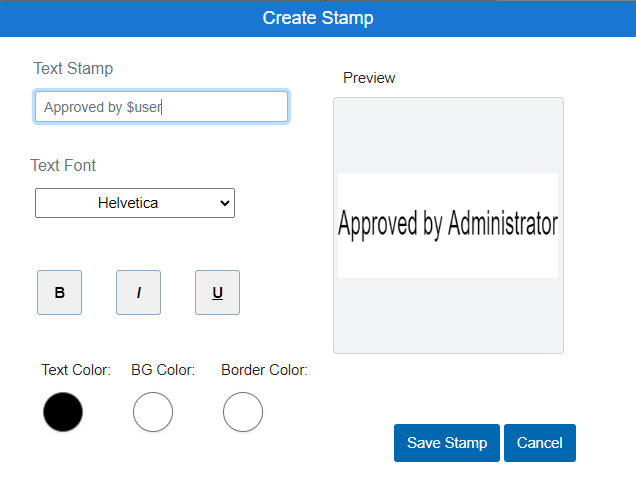
For example, if a stamp with the text “Reviewed on $date” is applied, it will automatically replace the $date with the actual date at the time of stamping. Similarly, $user can be used to insert the name of the user applying the annotation such as a stamp that says “Approved by $user” will replace $user with the current user’s name when applied.
- Text Font: The dropdown menu allows users to choose the desired font for text annotation from the available options. The default font: Helvetica
- Font Style: Bold, Italic, and Underlined formatting options are available to format text in various ways.
- Text Color: The user can choose the text color from a pop window that offers a selection of various colors. The default color: Black
- Background Color: The user can choose the background color from the color chooser. The default color: White
- Border Color: The user can choose the border color of the stamp using the color chooser. The default color: White
When the user creates the stamp, the Preview area will automatically update. After selecting the Save Stamp button, the created text stamp annotation will appear at the bottom of the available stamp list. The user can then choose it from the list and place it on the document.
The user can edit the properties by right-clicking on the annotation. Choose the border color, set the border width, fill the background color, choose the text color, set the font size, select the font style of the text stamp, edit the text stamp, choose another text stamp from the stamp list, and preview the stamp.
The annotation can be deleted from the document using the Delete button.
- Image Stamp
Users can create an image stamp by selecting the Image Stamp option in the dialog box.
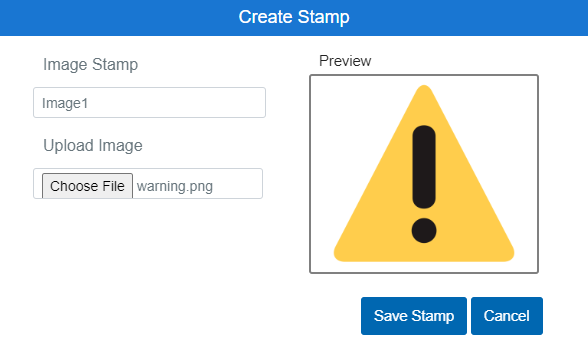
Stamp Name: The user can provide the desired name for the image stamp annotation.
Upload Image: The user can upload an image by either locating it on their system or server using the device’s chooser window, or by simply dragging and dropping it into the designated field.
When the image is uploaded, the Preview area will be updated. After clicking Save Stamp, the created image stamp annotation will appear at the bottom of the available stamp list. The user can then choose it from the list and place it on the document.
The user can edit the annotation by right-clicking on it. Choose another image stamp from the stamp list, upload a new image stamp, adjust the width and height, and preview the stamp.
To delete the annotation from the document, simply click the Delete button.
- Text Stamp
- Manage Stamp
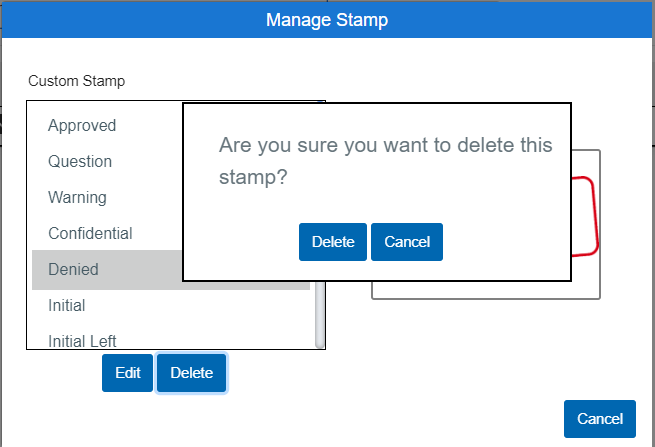
Custom Stamps:
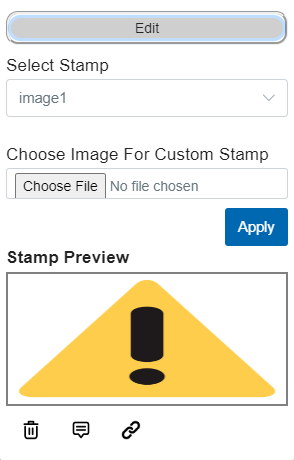
The user can view their custom stamps list at the bottom of the available stamp list. Each custom stamp can only be edited or deleted individually. When the user selects a stamp, it will appear in the Preview area. If they choose to edit a stamp, they will be redirected to the edit window for that specific stamp. To delete the custom stamps annotation, the user needs to click on the Delete button. A pop-up dialog box will appear, asking for confirmation to delete the stamp or cancel.
- Standard Image Stamps
- Polyline Annotation
The Polyline annotation tool enable users to draw a series of connected lines to form a shape on the document.

Users can create a polyline by click, release and the moving the mouse across the document to create the line. Click the mouse button to fix each point of the line.A polyline can have multiple edges, so the user has to double-click to finalize when they are done drawing.
User can edit the properties of annotation by right clicking on the annotation.
Set the border color, adjust the opacity, and set the border width of the polylines. - Polygon Annotation
The Polygon annotation tool provides users with the ability to draw closed polygon on the document.
Users can create a polygon by click, release, and the moving the mouse across the document to create the line. Click the mouse button to fix each point of the line. Users will have to double-click to finalize when they are done drawing and the shape will close to make a polygon.
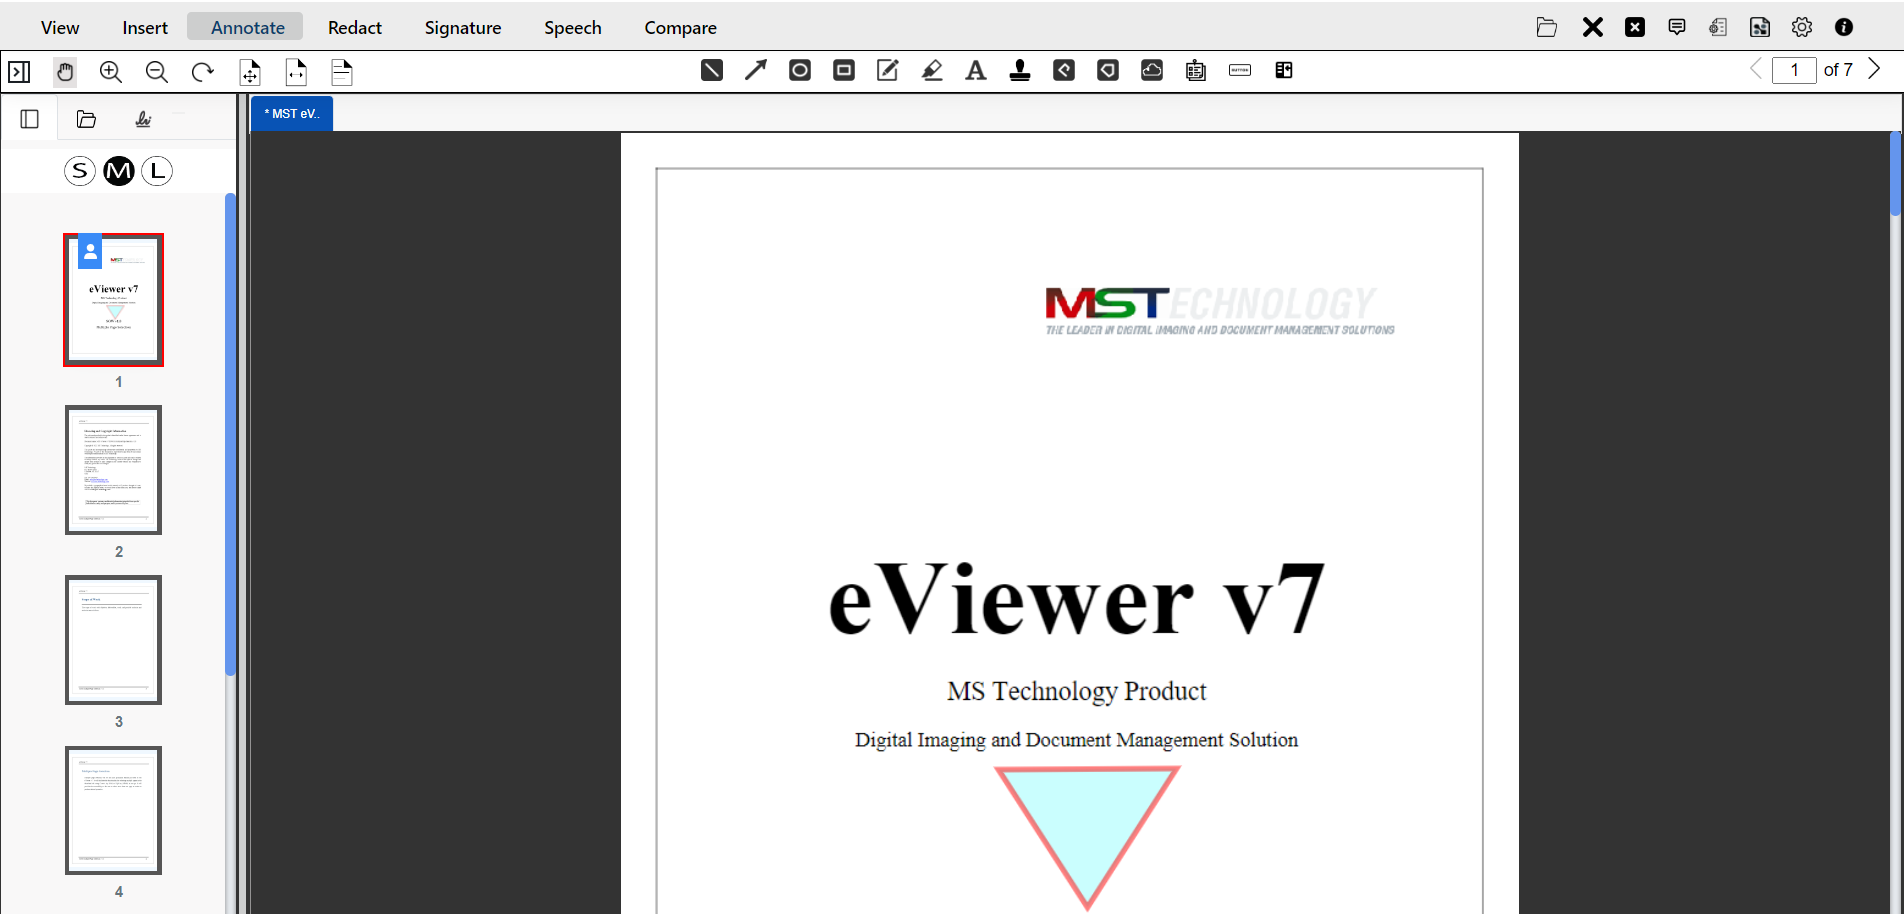
User can edit the properties of annotation by right clicking on the annotation.
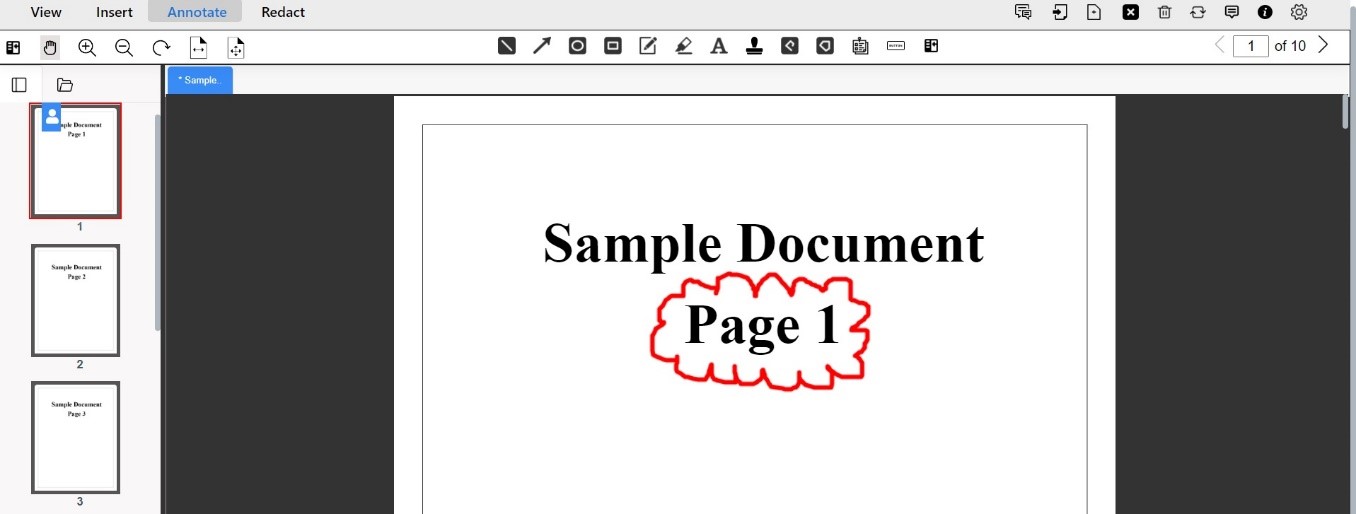
Set the border color, set the border width, fill the background color, and adjust the opacity of the polygon. - Cloud Annotation
The Cloud annotation tool is like a closed polygon with curved (cloud) lines drawn on the document.

Users can create a cloud annotation by click, release, and the moving the mouse across the document to create the cloud line. Click the mouse button to fix each point. The user has to double-click to finalize when they are done drawing the cloud and it will complete the enclosed shape.
User can edit the properties of annotation by right clicking on the annotation.
Set the border color, adjust the opacity, and set the border width of the cloud lines. - Sticky Note
The sticky note is a collaborative annotation that places a sticky note with comments on the document for further review by other users.
Place the sticky note on the document.
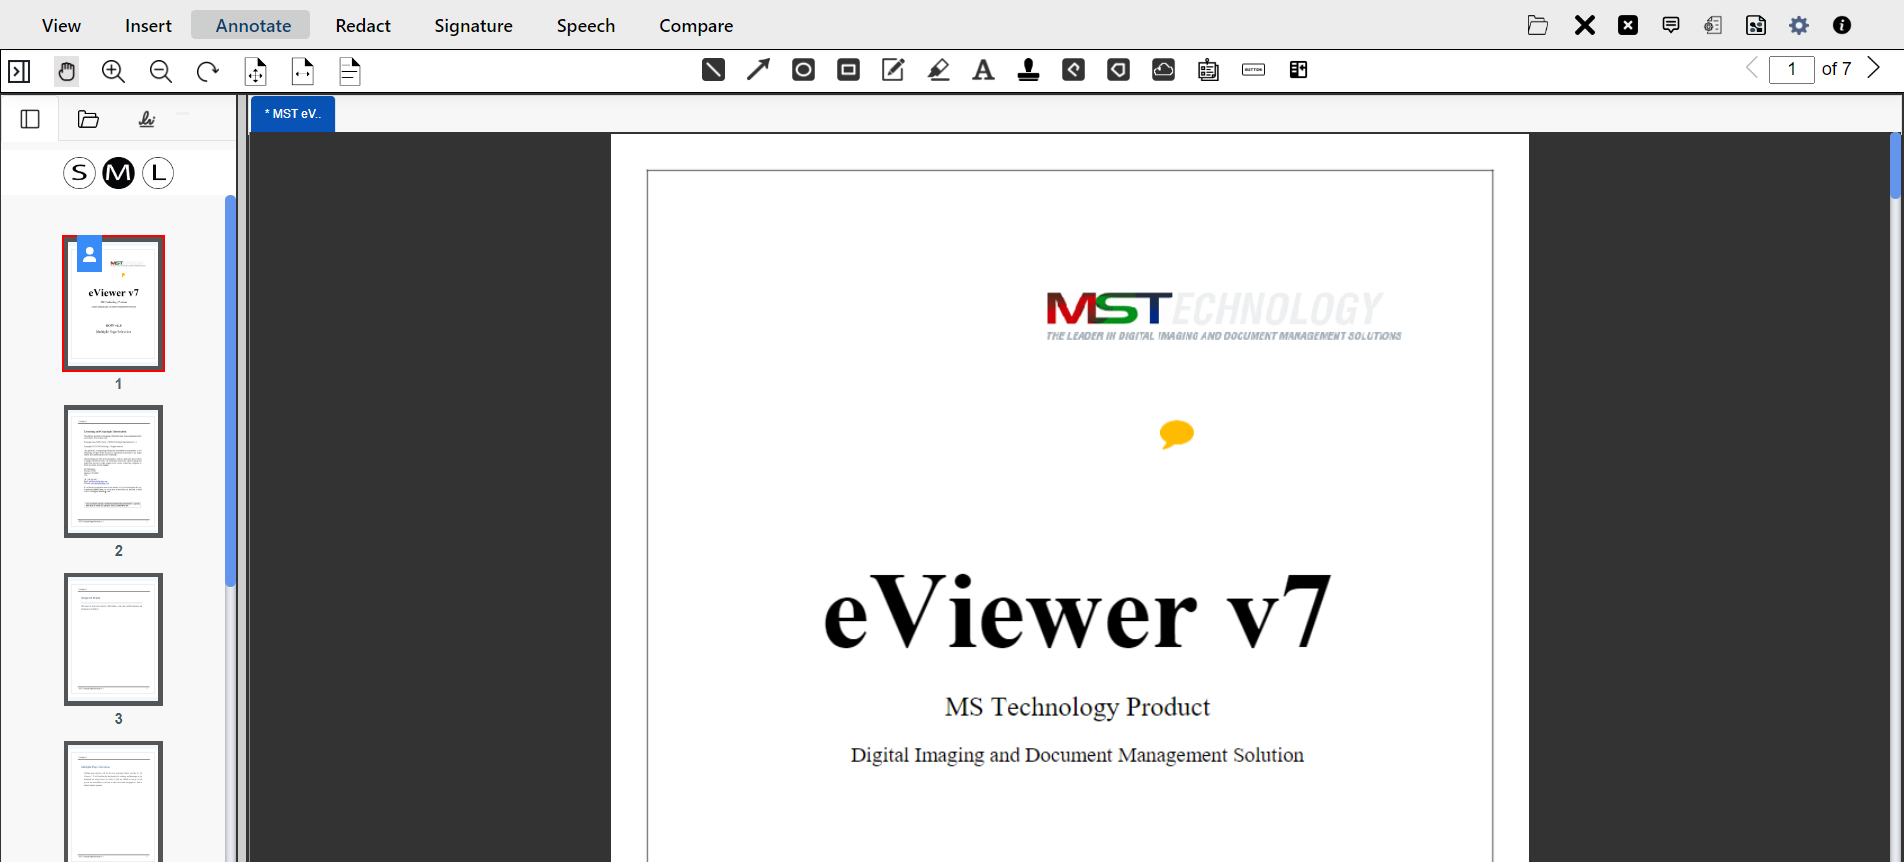
After placing the sticky note, the comment to the sticky note will be visible and editable in the right side panel of the viewer.
To learn more about Adding Annotation Comments, please refer to this relevant information. - Action Button Annotation
The Action Button annotation tool inserts an button on the document to launch a predefined action when clicked on by a user. Each action script can only be created by an Admin user for use throughout the organization.
User can edit the properties of the action button by right clicking on the annotation.
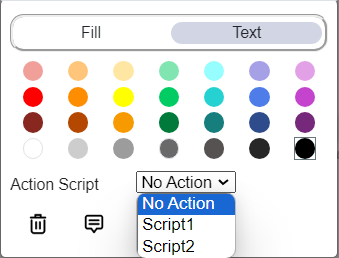
Fill the background color, adjust the opacity, choose the text color, and select the action script of the button. - Adding Annotation Comments
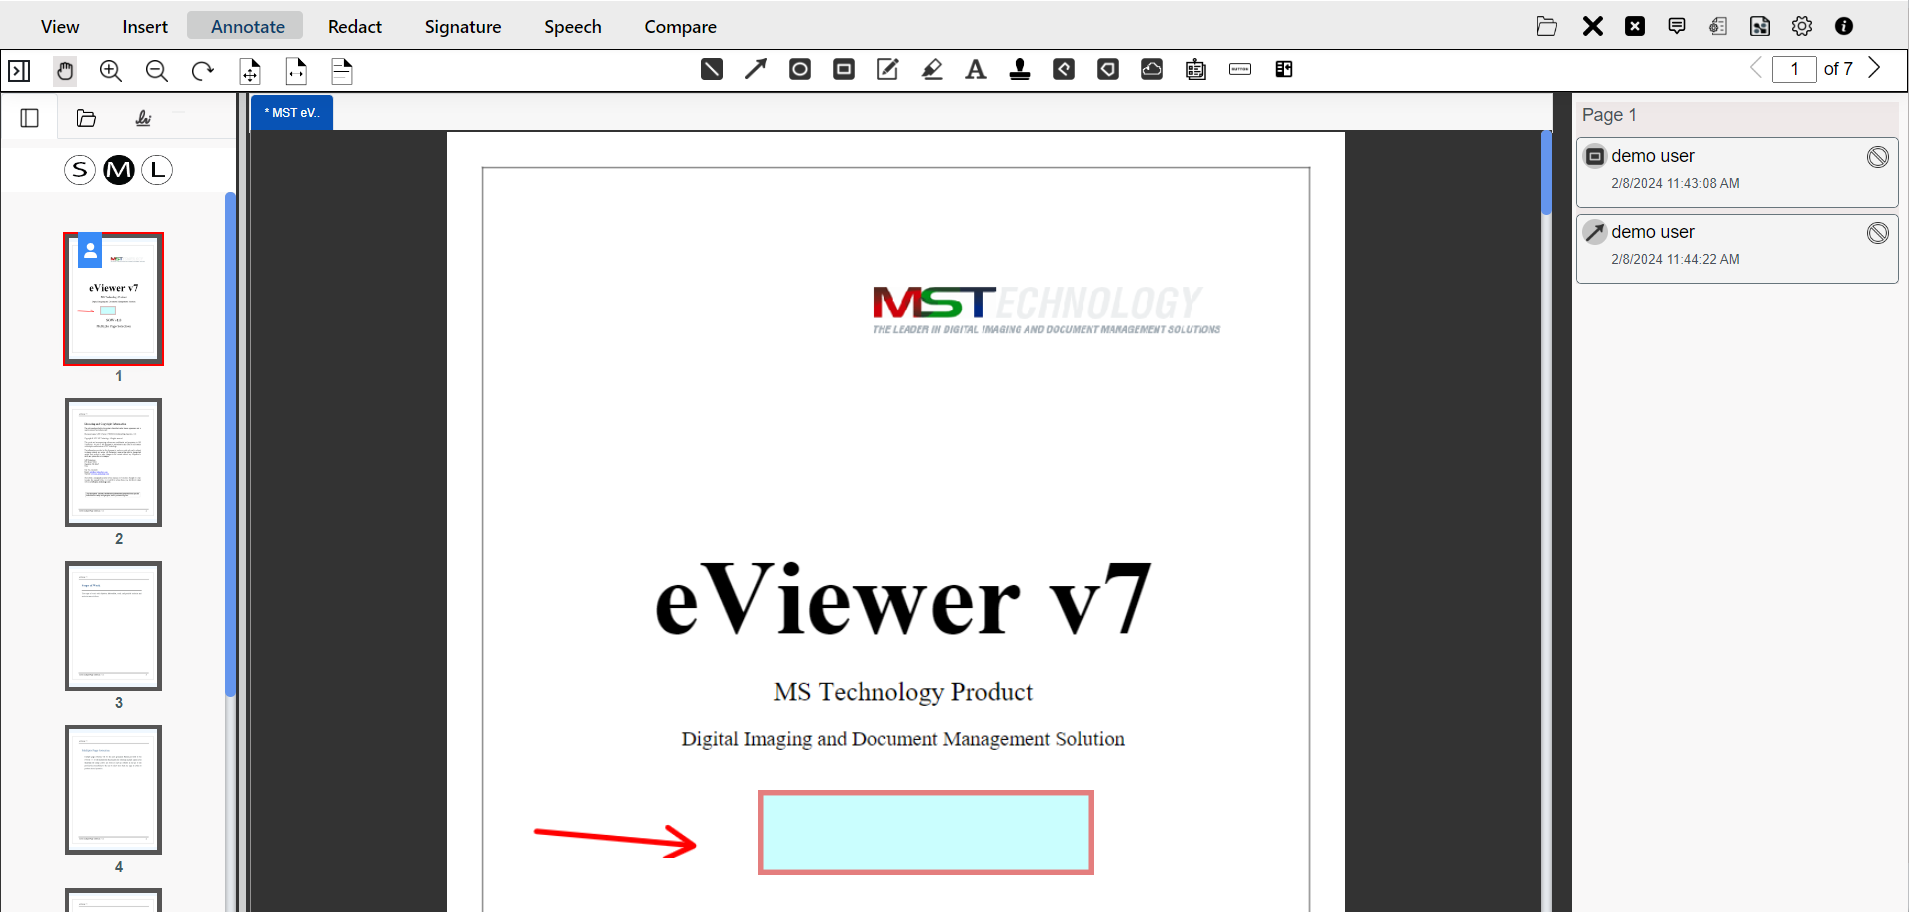
With every annotation, there can be a respective comment to the right side of the document viewing area.
These comments include the miniature representation of the annotation type, the page number on which annotation is being drawn, the username with the date and time of the annotation. Users can also write comment.
Users can mark reply to the comment.
Users can make notes and communicate using further replies.
These comments and replies can be edited and deleted by accessing them via the meatball menu (three horizontal dots).
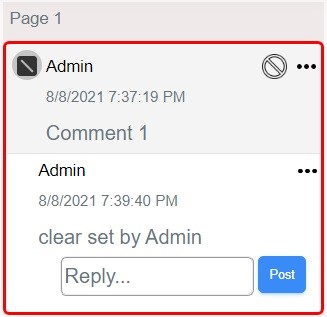
Every annotation has a relevant annotation comment. If there are multiple annotations in the document, then there will be a separate annotation comment for each drawing, and that comment can be easily differentiated.There are certain verification options for each annotation comment. By default, all the comments are mentioned as clear.
- Accepted
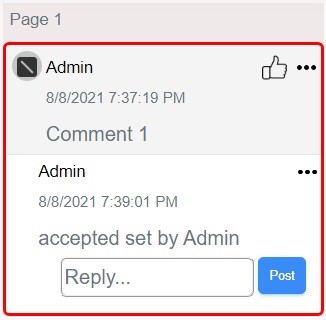
- Rejected

- Cancelled
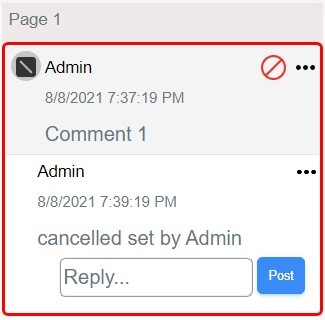
- Completed

- Clear
View Annotation Comments
eViewer v7 provides the ability to view all the annotation comments using the Comments button that is located on the top right panel of the viewer.

Users can view, edit, verify and delete them.
- Accepted
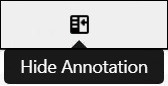
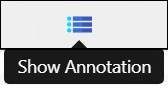
- Hide / Show Annotation
This function provides the user with the option toggle the annotations and their comments to be visible or not.
By default, the annotations are visible (show) in the document.
When the user clicks on the Hide Annotations button, all the annotations as well as the respective comments will be hidden from view in the document.
When the user clicks on the Show Annotation button, all the annotations as well as the respective comments will be visible in the document.
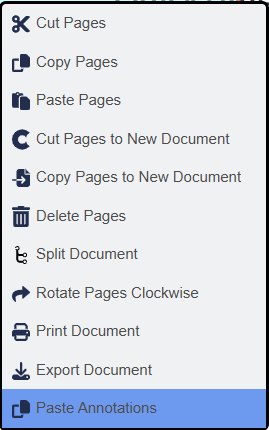
- Cut, Copy & Paste Annotation
The annotation property box includes Copy and Cut option buttons, allowing users to efficiently duplicate or move annotations within the same document or to a different document.

- After copying or cutting an annotation, a Paste Annotation option becomes available in the right-click menu.
- Users can paste the annotation onto the same page, a different page, or into a new document.
- The annotation will be pasted at the location where the user initiates the right-click action.
- Linked Annotation
Users can turn any annotation into a “linked” object by right clicking on the annotation, a dialog box appears, and selecting the link button.

Enter the URL hyperlink or page number for jumping into the particular page within the document and click Link.
For deleting the annotation link, right click on the annotation. The dialog box will appear with a remove link button and by selecting it, the link will be deleted.
- Search Annotation
By default, annotations content can be searched in the Text Search tab. It searches the text in the document and within annotations. The search result displays both results. For annotation search results, it displays an annotation shape icon to the user.
To search only annotations a new checkbox is introduced. When the user clicks on Only Annotations, this will redirect to the annotation shape and comment.
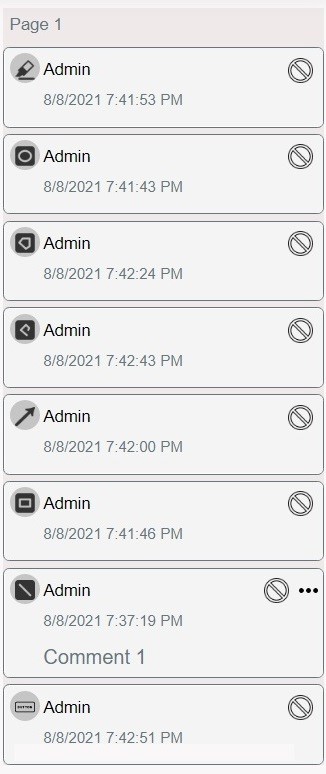
- Filter Annotation
The Filter Annotation feature enables users to display only the desired document annotations based on user selection and annotation type. This ensures that only relevant annotations are visible, enhancing document clarity.Located within the Comment Panel, the Filter button provides the following options:
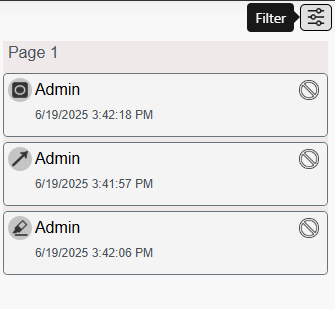
- Filter by User:
Displays a list of users who have added annotations to the document.- By default, all users are selected, and all annotations are visible.
- Users can select one or more individuals to display only their annotations, hiding annotations from other users.
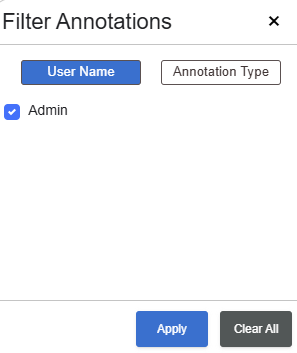
Example:
Selecting Admin will display only the annotations created by the Admin user.
- Filter by Annotation Type:
Displays a list of annotation types created by the selected user(s).- Users can filter by specific types such as Line, Arrow, Circle, Rectangle, Highlight, etc.
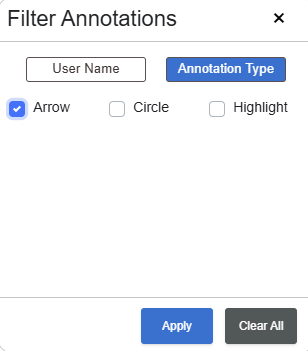
Example:
Users may choose to display only Arrow annotations, hiding all other annotation types.
- Users can filter by specific types such as Line, Arrow, Circle, Rectangle, Highlight, etc.
- Filter by User:
Redact
Documents can contain several different types of confidential information with categories like Names, Social Security Numbers, Account Numbers, Date of Births, Passport Numbers, and more. eViewer v7 provides redaction features that makes the securing these types of data easy.
From the Redact tab, there are a number of redaction functions available: Redact Text, Search & Redact, Redact Area, Smart Redaction, Clear Redaction, Redact Page, and Redact View Mode.

An option to unredact the document is may be available based on user permissions.
A parameter Select User Type defines the type of user when the viewer is initiated.
There are three types of user access: Normal, Super User, and View Only.

- NORMAL: If the user type is set to Normal, then the redaction annotations created or modified by the current user can be unredacted while redactions made by other users remain redacted.
- SUPER USER: If the user type is Super_User, then the entire document can be unredacted and the document has re-rendered with all the redaction annotations displayed editable in transparent grey mode. The Super_User can edit and see through the redactions.
- VIEW ONLY: If the user type is View_Only, then the user is not able to unredact the document.
Once unredacted, the user can resize or remove the existing redactions and then save it to redact again. Exporting or printing the document produces redacted version of the document.
- Redact Text
The Redact Text function enables the user to select and redact sections of text quickly.

The user can select single or multiple lines of the text to redact.

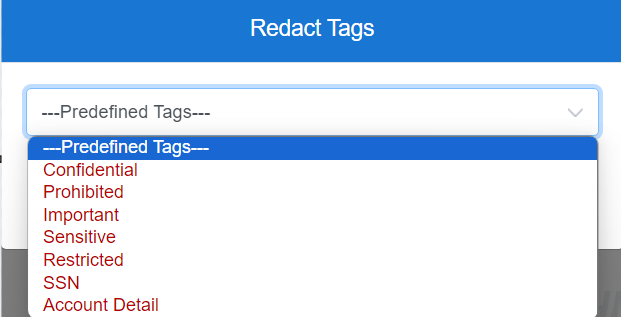
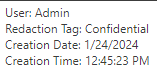
There are many predefined redaction reason tags to describe the use/reason for the redaction.
The selected text is completely redacted from the document. When the user’s mouse hovers overs the redacted area, it will display the redaction details.
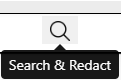
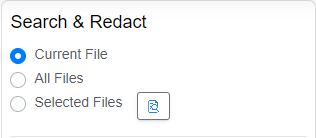
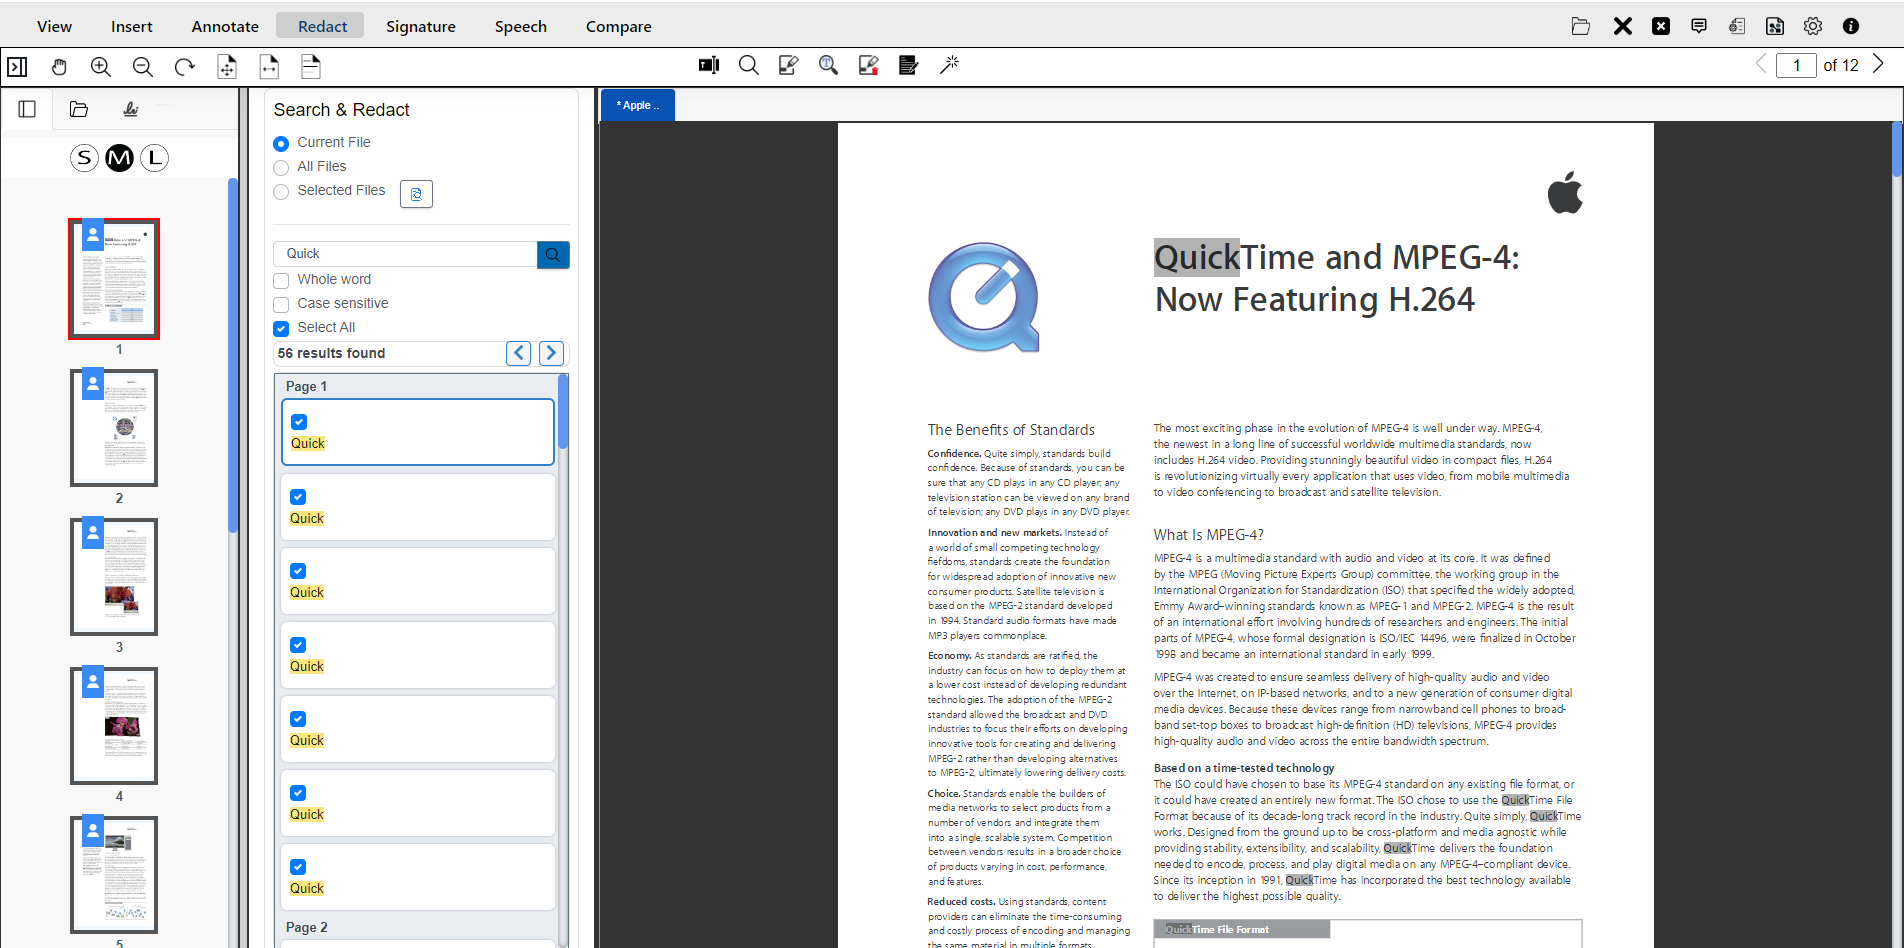
- Search & Redact
Search & Redact enable users to search for specific word(s) throughout all documents rendered in the viewer, if desired, and then apply the redaction on the word(s) matching the search term.
In this panel, three options are provided which users can choose from:- Current File: Search and redact the text in the current opened file in the viewer. By default, this option is selected.
- All Files: Search and redact the text in all opened files in the viewer.
- Selected Files: Enables the user can select multiple documents from a dropdown list to search and redact the text for. A drop-down window will appear to display the list of currently rendered documents for the user to select from.
In the search bar, the user will provide the word to search and redact within the documents.
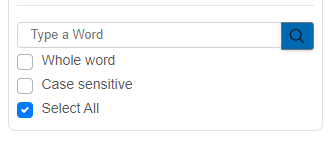
eViewer provide users with redacting functionalities of the Whole word and Case sensitive redaction abilities.- Redacting a word with a Whole word means that it restricts the search and redacts to the word only. These words are separated by a space from both ends.
- Redacting a word with Case sensitive is used to search and redact only for those words that match the word exactly the same as typed in the text box while checking for the capitalization of the alphabets.
- When the Select All option is unchecked, users can view individual results by selecting each page result instead of all results at once. By default, this option is selected.
When searching and redacting the text, the user must choose any one of the predefined Redact Tags to define the use/reason for the redaction.
Review Search Results
The searched text will be redacted in the document based on selected options. By clicking on the results in the result panel, the user will be redirected to the documents and pages where the search text is found.
The user can navigate through the search results and review each occurrence by using the “Next” and “Previous” buttons to move between results.
- Redact Area
Redactions can be drawn on the document using the Redact Area function.
Users click and drag the mouse to apply redaction over the desired area, then release the mouse button to finalize it.
There are many predefined redact reason tags to describe the use/reason for the redaction.
When the user’s mouse hovers the redact area, it will display the redaction details.
- Smart Redaction
Smart Redaction enable users to choose from the predefined redaction data categories. The viewer automatically detects the data type, based on the selected option, within the document and perform redaction on that data type.
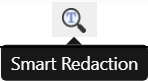
Selecting Smart Redaction function, a dialog box will appear which containing options for data type redaction. Select the desired options for data to redact, and click Ok.
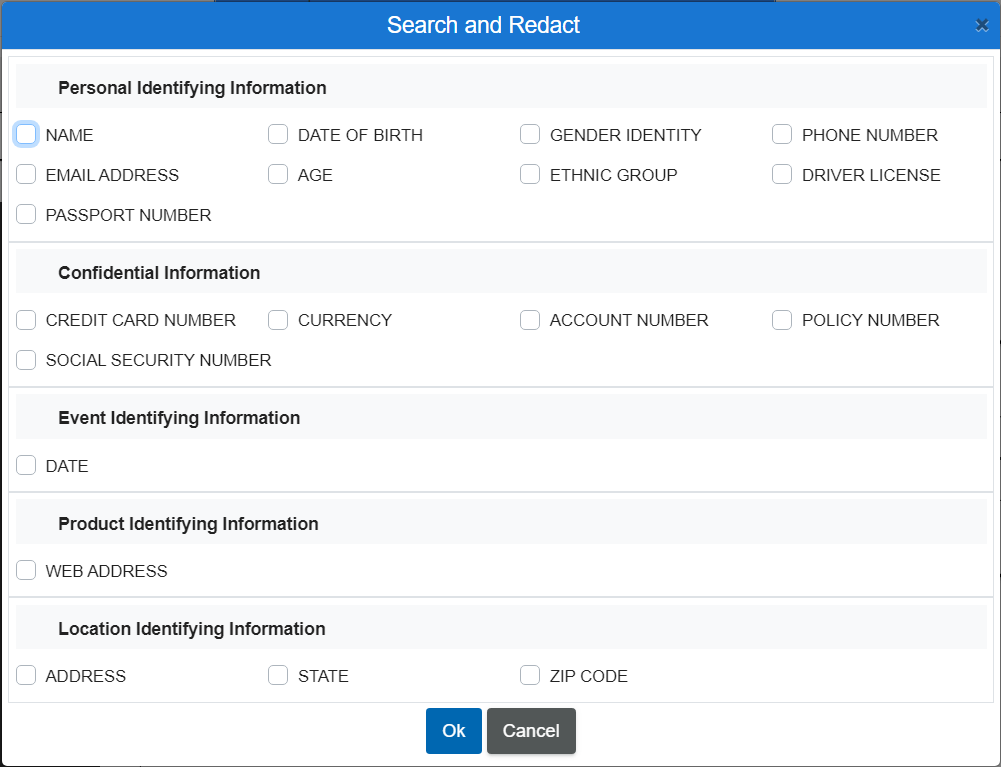
Select the predefined redact reason tags to define the use/reason for the redaction.
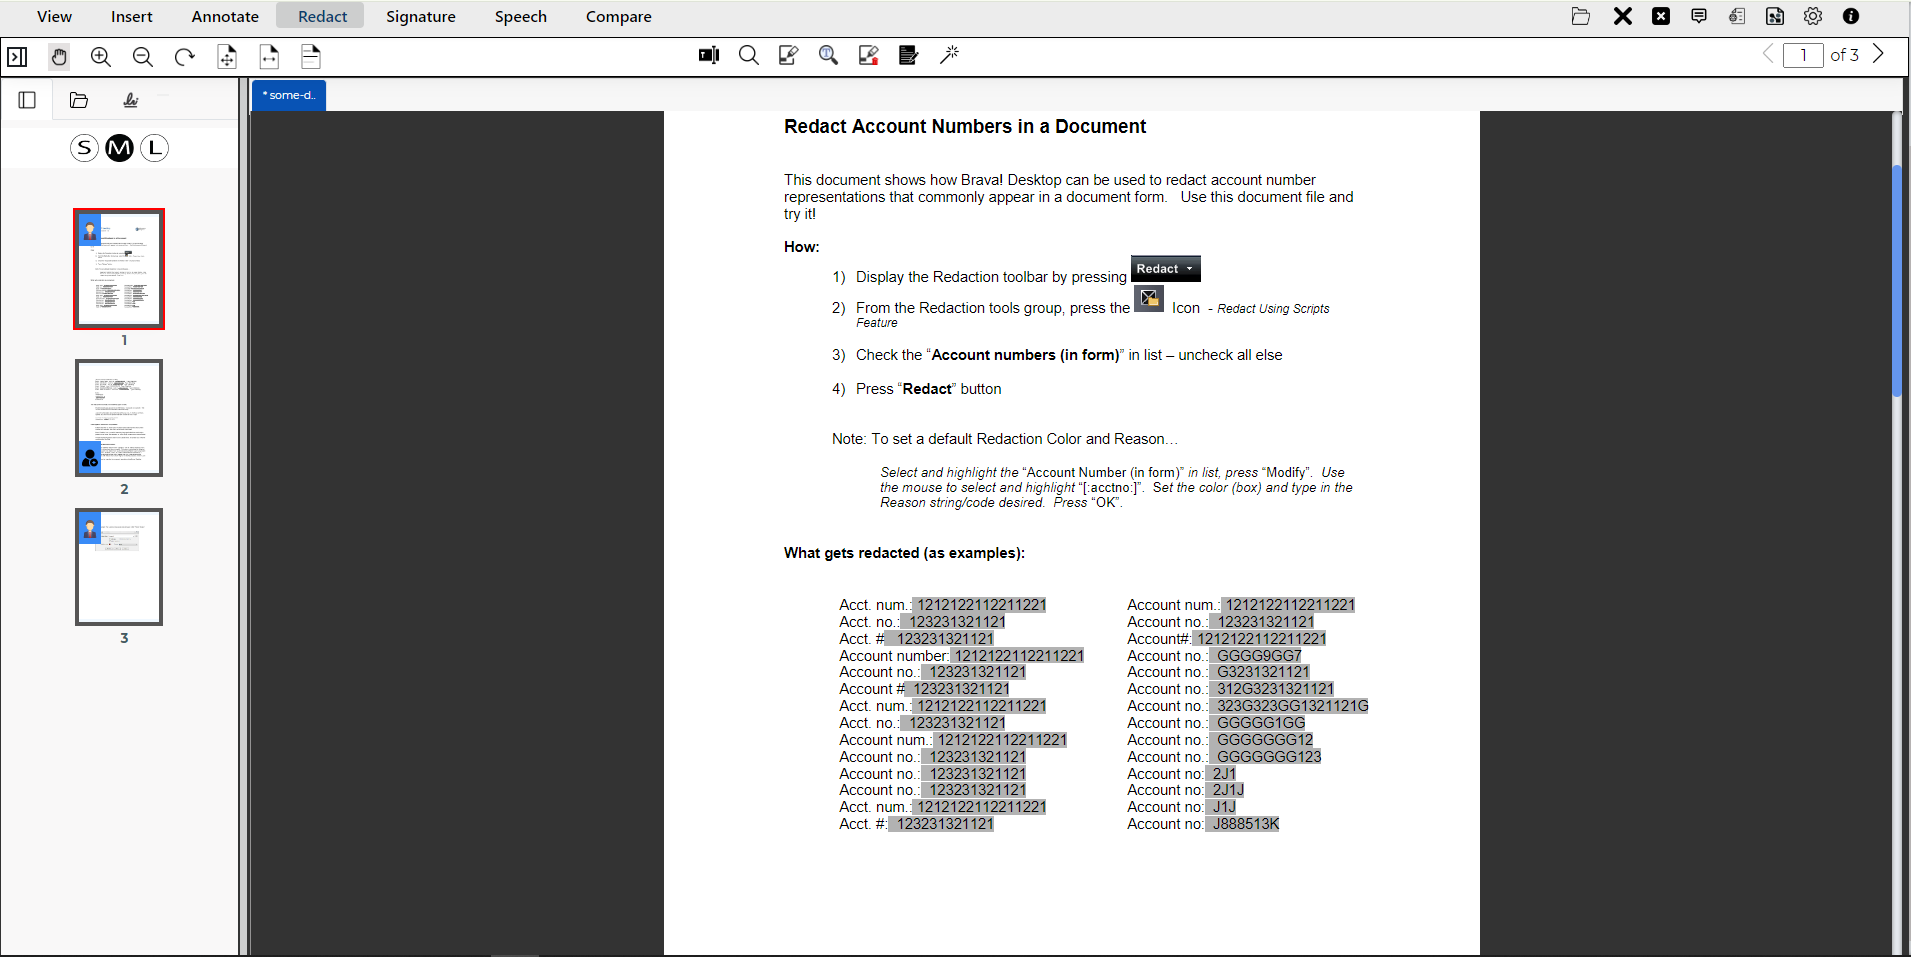
The selected area has now been redacted. - Clear Redaction
Clear Redaction will remove all the redactions from the document.
- Redact Page
The Redact Page function enable users to redact entire page(s) of the document.

To use, click Redact Page button when viewing the page needed to be redacted and choose from a predefined redaction reason tag if required. Once the desired page(s) are redacted, save the file and the document will be permanently redacted.
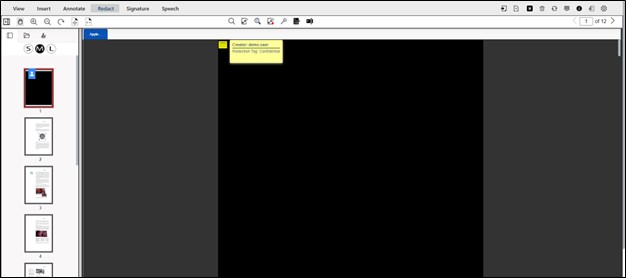
- Redact View Mode
Redact View Mode allows the user to view all the redactions at once. Users can edit or unredact these redactions based on their level of permissions (explained above).
Digital Signature
A digital signature is an electronic form of a signature accessible by the Signature tab on the main viewer ribbon.
Two main features of the Digital Signature function:
- Creating Signature Fields for signing
- Signing document
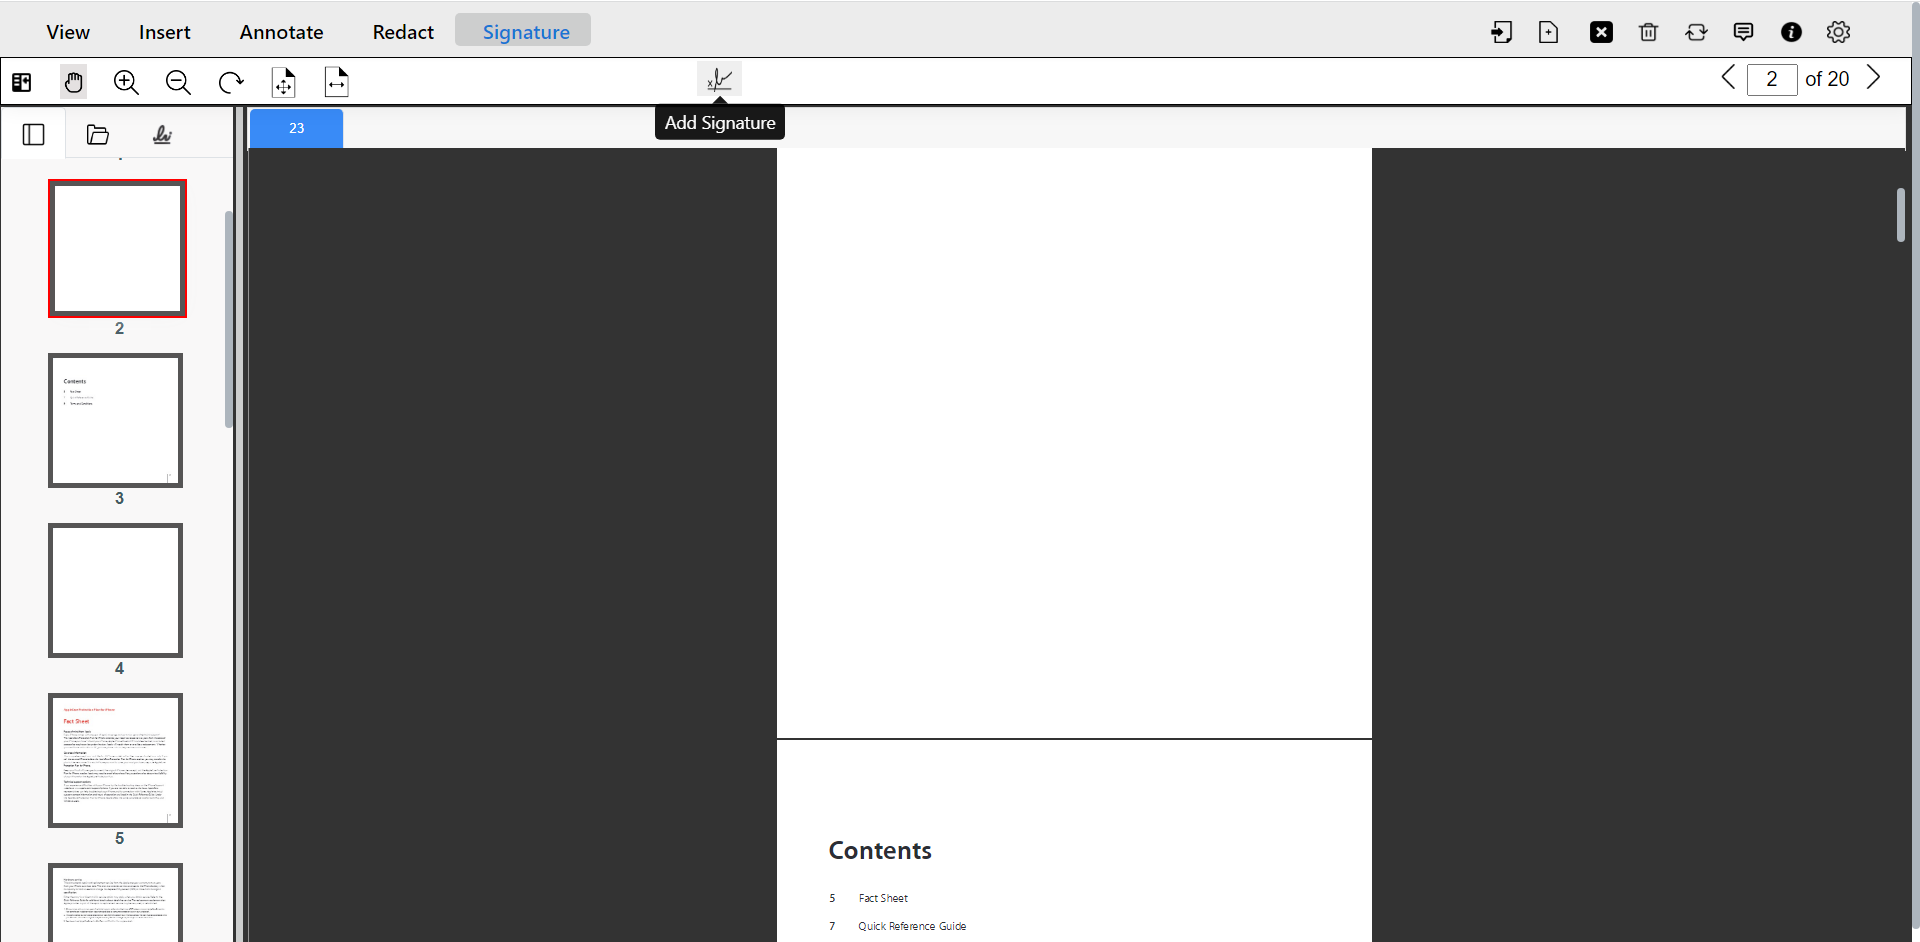
- Creating Signature Fields
Users can create digital signature fields anywhere in the document by selecting the Add Signature button icon. A new signature field can be created on a document by simply dragging and dropping the field to the desired location on the document. Users can create multiple digital signature fields on the document. - Signing Document
eViewer presents users with their existing saved signature (if available). User can choose to add their name, current date and their field labels using the checkboxes. Choose the signature and click Apply.
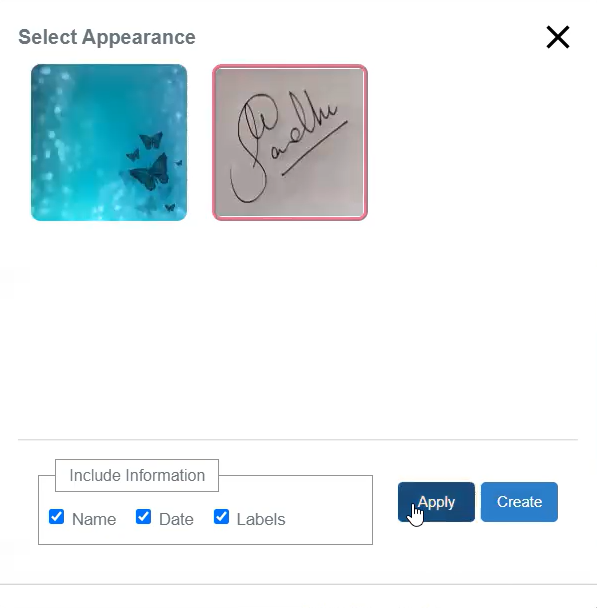
If an existing signature is not available, then a popup window appears having the option to create a new digital signature (via draw, type, or upload options, which can be saved for that user for later use). eViewer provides three color options for designing a signature via drawing or typing. Users can also append the name, date, and labels in the signature by selecting the checkboxes.

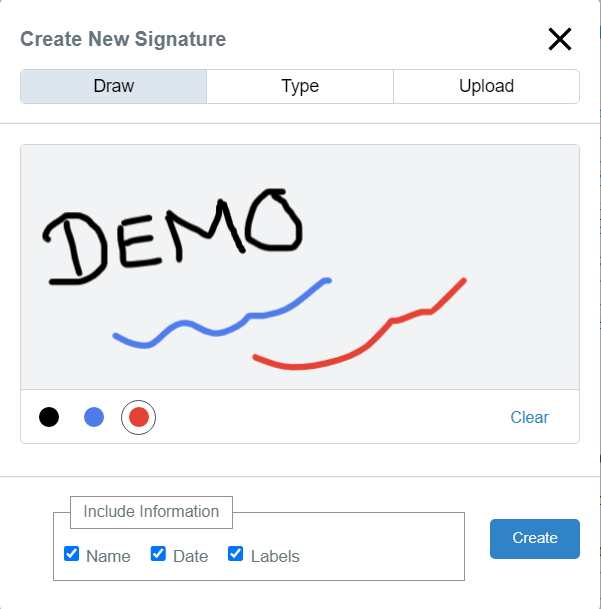
- Draw a Digital Signature
Users can draw the desired signature either by touch or their mouse. The viewer allows the user to set the color of the signature of either black, blue, or red. Click on Create to create the signature, preview it, and then click Apply to attach the signature to the document. If the user requires changes to the signature, then click Cancel and restart the draw signature process.
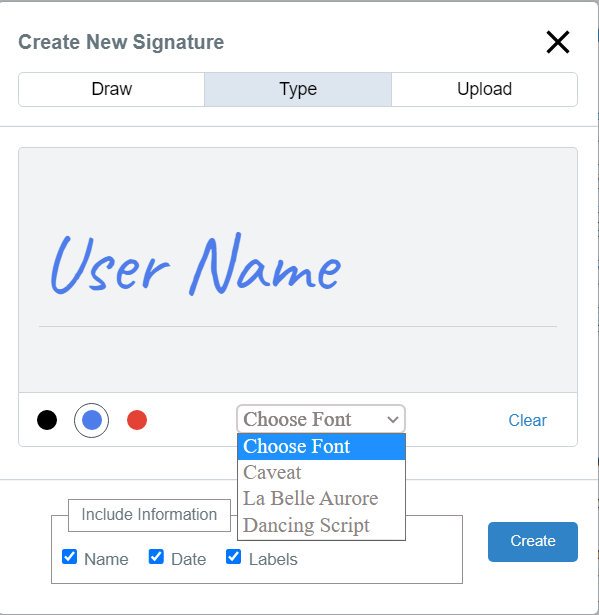
- Type a Digital Signature
To type a signature, a text box appears for users to enter the desired signature text as their signature. Users are able to select the desired font and color, and the signature text is automatically updated. Click on Create, preview it, and then click Apply to add the signature to the document.
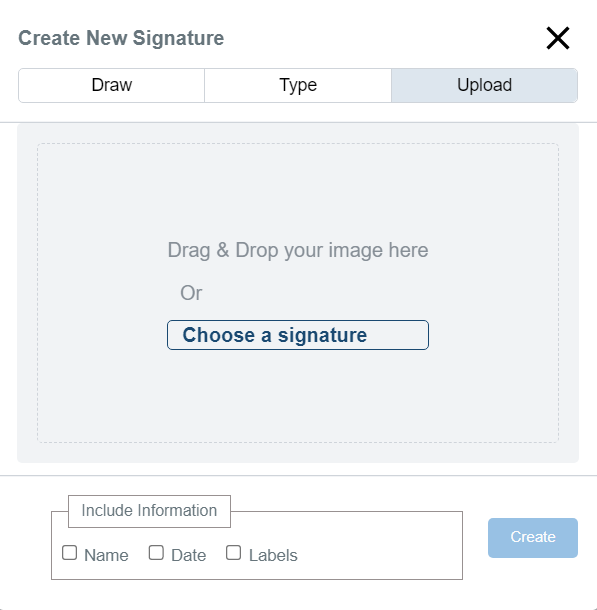
- Upload Digital Signature Image
To use an existing image as a signature, the user can upload the image via the Upload section in the window and provide the image file to be used as a signature. Once the image is uploaded, click Create, and the user can preview the image and the add the signature to the document.

- Draw a Digital Signature
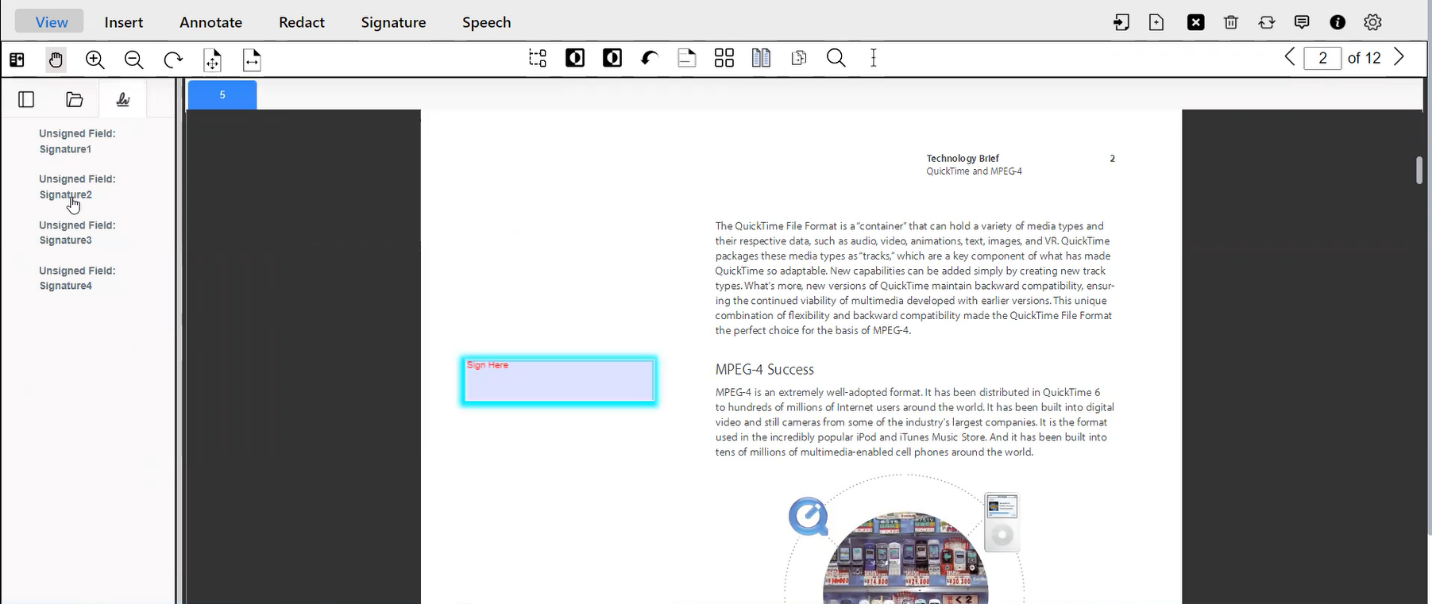
- Sign Document with existing Signing Fields
The Signature Panel displays the details of the empty signature fields presented in the document. User can select a particular field and sign the document in existing signing fields.
Digital Certificate ID
A digital signature can be validated by attaching a digital certificate to the signature. If the user has already added a digital certificate ID to eViewer, select the appropriate digital certificate, enter the digital ID pin or password, and click Apply.
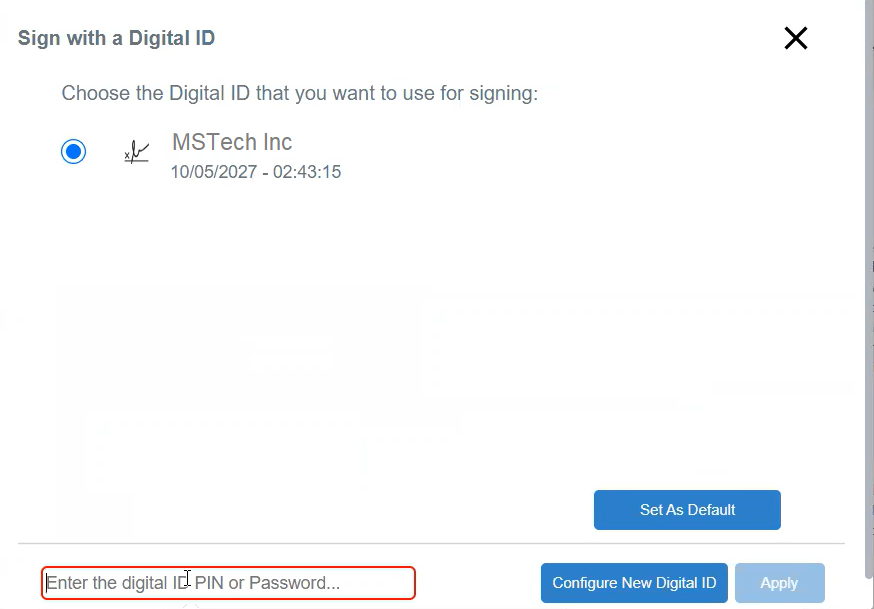
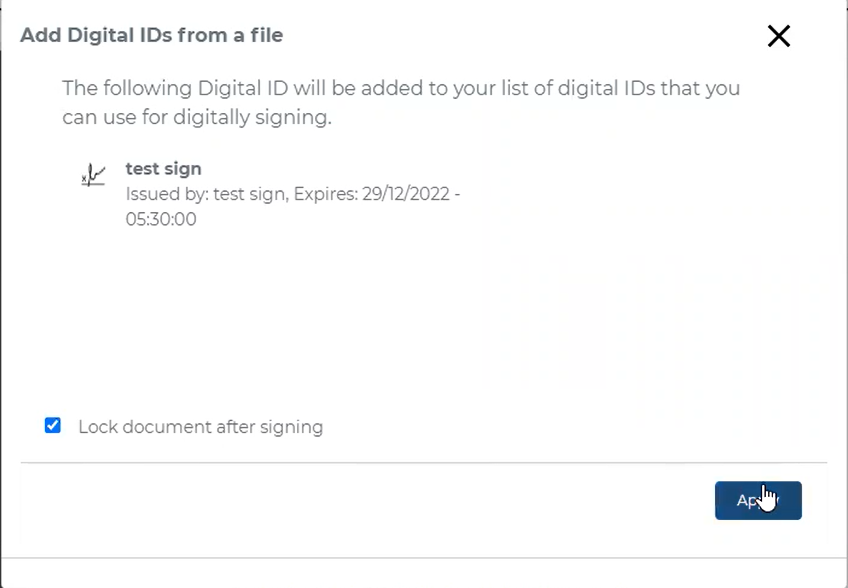
The user can import a digital certificate by selecting configure new digital id. A pop window will appear to add a digital certificate ID file, supports PFX or P12 versions. Click on Browse to find the certificate file and enter the digital ID password. User can select to make this certificate the default. Click Continue to upload the digital certificate to eViewer.

The details of the imported certificate name, issued by, and expiration time appear. Click Apply.
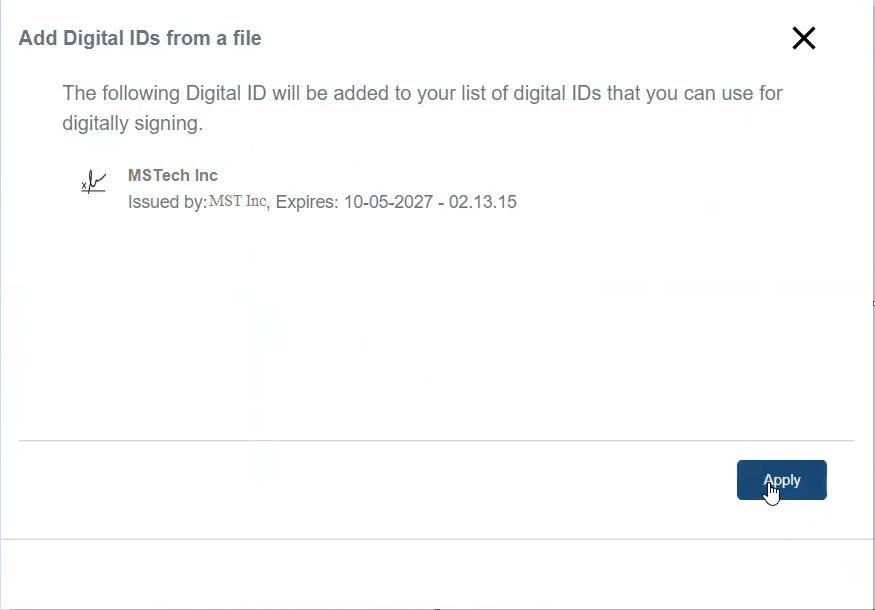
Once applied, the signature is embedded in the document successfully.
Signature Panel
A digital certificate is applied on signature fields after applying the digital signature, validating them such that any modifications to the document and/or signature will invalidate the document. Whenever the user opens a signed PDF document, eViewer will detect whether the document includes digital signatures or not.The Signature Panel displays the details of the digital certificate applied to the document as well as the date, type, and time of the signature. In the event the digital certificate is expired or tampered with, it displays it in the signature panel as invalid or no longer valid, and the reasons for an invalid certificate, and any errors. The signature panel details can be accessible in the left panel adjacent to document thumbnails.
Document Lock
eViewer v7 provides the ability to lock the document to protect the integrity of the document and digital signatures after all parties have signed. When the user selects the Lock document option and clicks Apply, the document will be locked and can be viewed in read-only mode. Neither annotations nor signatures can be added to the locked document. If a document has existing signing fields that have not been signed, this option will be unavailable until all signing fields are complete.
If the Lock document option is unchecked, then the user will allow drawing annotations as well as adding signatures.
Speech Synthesis
eViewer’s speech synthesis feature provides users with a greater level of accessibility of documents by vocally transcribe text on the current page of the document. It is located to the right of the digital signature tab. It includes these functions:
- Previous Page: The user can traverse to the previous page to listen to that page.
- Play: Vocally transcribe the text on the current page.

- Pause: Pause vocally transcribing text and holds the point in the document to enable the user to restart from that point.

- Stop: This stops the transcription function.

- Next Page: The user can traverse to the next page of the document for verbal transcription.

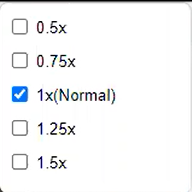
- Playback Speed: For controlling the speed of the audio.
The following speed options are available to the user:
Document Compare
In eViewer, users can compare two document versions side by side. Accessing these features is located in the Compare tab.
To compare documents, follow these steps:
- Go to the Compare tab.
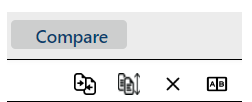
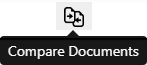
- Click Compare Documents and a pop-up window will appear.
- Select the documents for comparison from the dropdown list. The dropdown menu will show up the list of all rendered documents in the viewer.

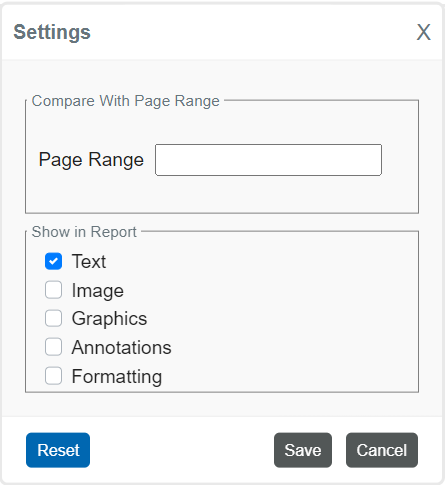
Settings:
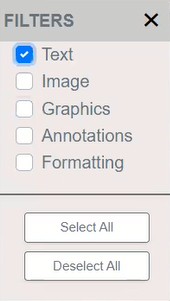
Users can select the initial comparison parameter settings for the document comparison session. These include selecting the page range for comparison of the documents, by default all pages would be compared, and which types of data they want to compare such as Text, Image, Graphics, Annotations, and Formatting.Describing each below:
- Text: It will compare and highlight differences in textual content between two documents.
- Image: It will compare images between two documents to identify alterations or differences in visual elements.
- Graphics: Graphics comparison facilitates assessing changes in diagrams, charts, or other visual representations between two documents.
- Annotations: It will compare the differences between the annotations made on both documents.
- Formatting: It compares differences in font styles, sizes, colors, and other formatting elements.
The user can select one or all options and Save the selection.
- Click Compare to initiate the document comparison process.
eViewer will analyze the selected documents, highlight the details between them, and display the comparison results.
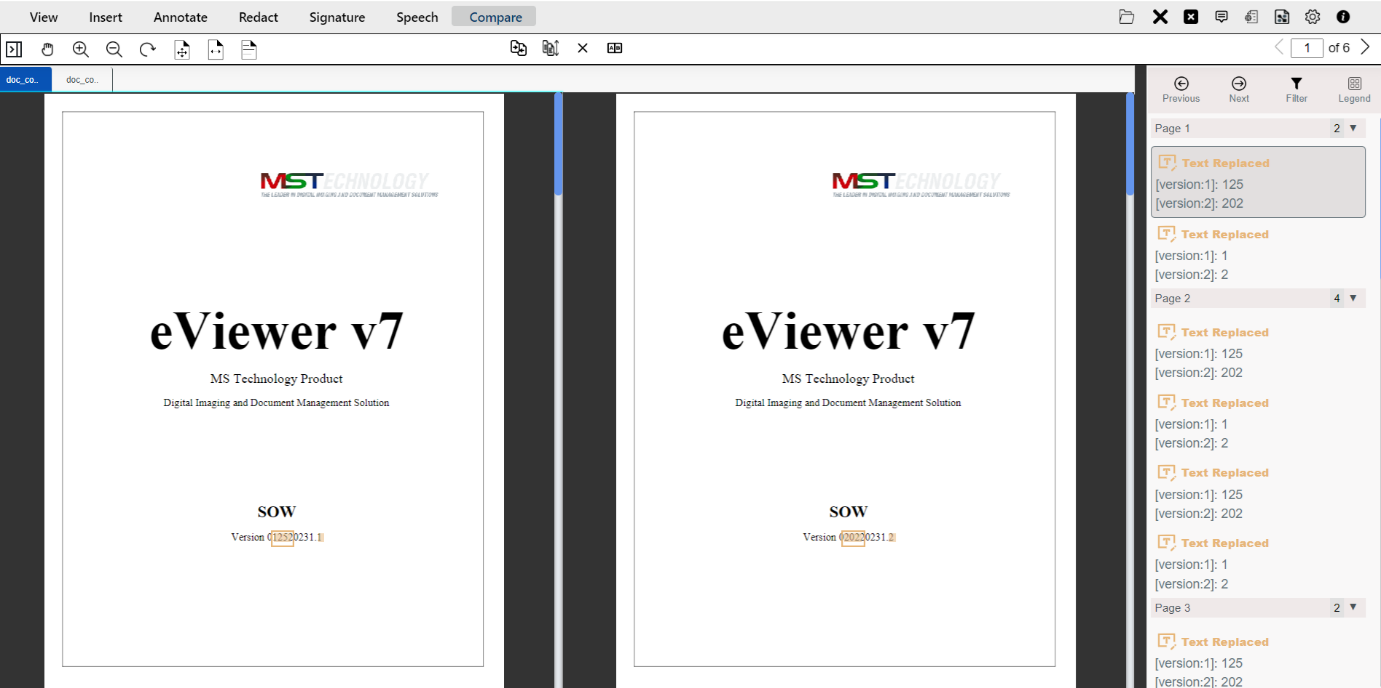
Comparison Result Window:
It provides a consolidated overview of the differences between the two documents.
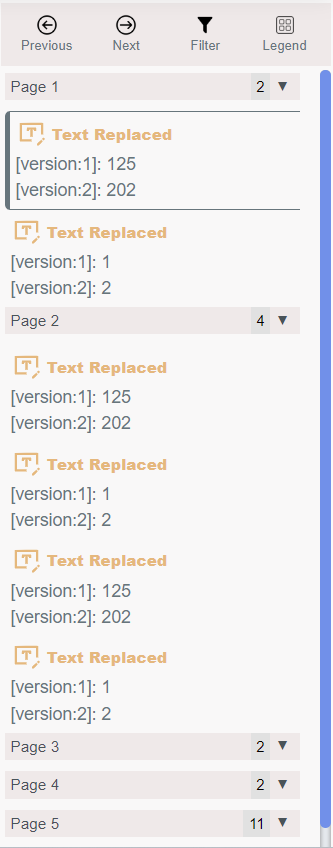
Previous/Next:
The next and previous page buttons allow users to navigate between pages to view identified differences in both documents. Clicking on the result will navigate the user to the page where changes occurred.

Filter:
Click Filter, and choose the type of differences of comparison data to highlight in the documents.
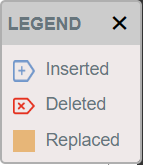
Legend:
It will indicate the specific type and color of a data difference (deleted, inserted, or replaced).
Sync Scrolling:
Click Sync Scrolling, to synchronize the changes made to a document and reflected in the other document such as page scrolling, zoom-in and zoom-out, and page scaling options (Fit to Window, Fit to Width, and Actual Size).
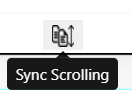
When the user starts the sync scrolling, the viewer will display a confirmation pop-up showing that the sync operation has started successfully.

When the user stops the sync scrolling, a pop-up shows that the sync operation has stopped.

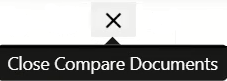
Close Compare Documents:
Once the user has completed the document comparison, close the comparison view to return to the normal document view.
Compare Panel:
Click Compare Panel, to show or hide the comparison results.
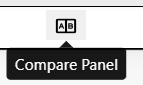
By default, the comparison results panel is displayed in the viewer.
App Bar of eViewer v7
The app bar of eViewer consists of the following functions: Options, Close Current File, Close All Files, Document Switching, Comments (annotation/ checkpoints), Metadata, Notes, User Preferences, and Version Info.

- Options
Options comprises of the following functions: Insert Document, Save, New Document, Print Document, Export Document, and Download.

Insert Document
Users can insert additional documents in the viewer by selecting the Insert Document.
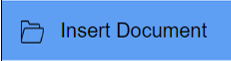
A dialog box will pop up that provides the option to select a document to insert into the viewer.
Save Document
Save document will store all modifications and additions in the document.

The documents are saved as PDF or TIFF file formats, and the relevant annotations information will be saved in JSON format.
New Document
New Document generates a blank PDF document in eViewer.

A blank document with no pages will be open in the document viewer area.
Print Document
eViewer v7 provides the function to print documents from the viewer.
For printing a document, select Print Document, a dialog box will appear in the viewer which will show various options for printing the document.
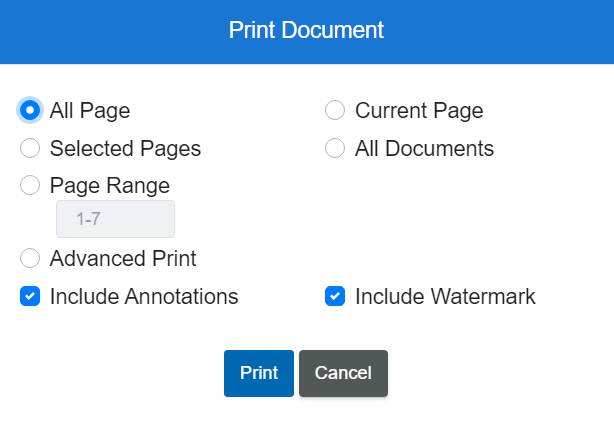
Users can print the document using normal printing options or the Advanced Print option, which merges multiple pages of the same or different documents to make a new one.- Standard Print Functions
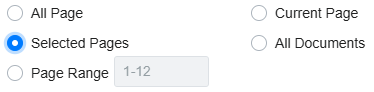
Print document dialog box consist of the following options:- All Pages: All Pages prints all the pages of a document. By default, it is selected.

- Current Page: Current Page prints only the page visible in the document viewing area of the viewer.

- Selected Pages: Selected Pages prints the pages that are selected in the thumbnail panel.

- All Documents: All Documents prints of all documents which are opened in the viewer.

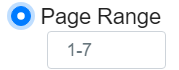
- Page Range: It prints the entered array of page numbers (“from a starting page” to an “ending page number”). For instance, 1-4 will print pages 1, 2, 3, and 4. Users can also provide a single page number instead of the range, like 3.
- Include Annotation: If users want to print the annotations along with the document, then include annotations checkbox needs to be selected, and by default it is checked. Users can uncheck it if there is no requirement for any annotations to be printed.

- Include Watermark: If users wants to print the watermark along with the document, then include watermark checkbox needs to be selected, and by default it is checked. Users can uncheck it if there is no requirement for any watermark printed.

- All Pages: All Pages prints all the pages of a document. By default, it is selected.
- Advanced Print
eViewer offers an Advanced print feature that allow users to print pages from multiple documents simultaneously. With this feature, users can create their custom print task list to select all or a specific range of pages from different documents and print them in just one go.
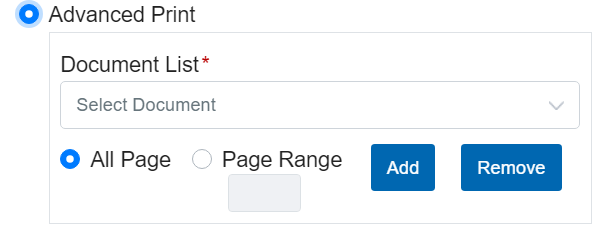
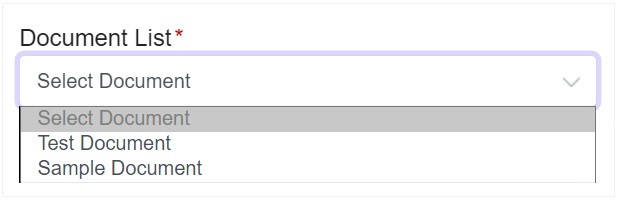
Advanced print document feature consists of the following options:- Document List: A dropdown list of all those documents which are currently open in eViewer v7.
- All Pages: All Pages means a series of all the pages of a document without any manipulation. This option is by default selected.

- Page Range: Page Range means an array of ‘from page number’ to ‘to page number’. User can also provide a single page number instead of the range.
- Add: Add button will add the combination of selected document from the dropdown list, their respective choice regarding all pages or page range, and add them to the list for printing the document.

After adding the pages from various documents which are being rendered in eViewer, as shown below:

- Remove: Remove button will delete all the information about those pages which has been added previously for printing the document.

After selecting the desired row and click on Remove button, that row will be deleted from the given list.
- Print Button: As soon as the user clicks on the Print button, the document will be printed fulfilling all the above requirements.

- Document List: A dropdown list of all those documents which are currently open in eViewer v7.
Export Document
eViewer v7 provides the feature to download the document to the user’s workstation.

For exporting a document, click on the Export Document option, a dialog box will open in the viewer, which will show various options for exporting the document as per the user’s choice.
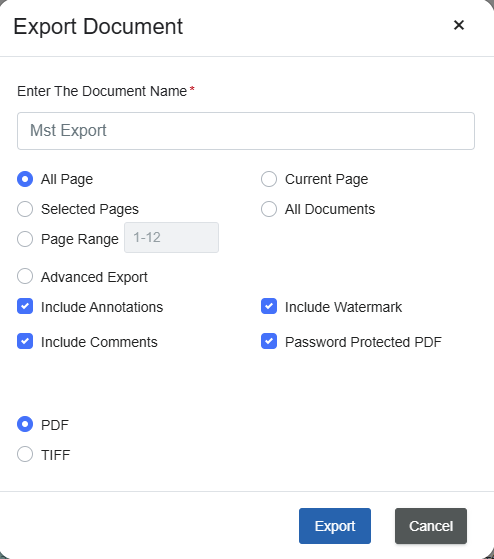
- Standard Export
Export document dialog box consist of the following options:- Document Name: Provide the Document Name for the name of the final exported document.

- All Pages: All Pages of a document will be exported. By default, it is selected.
- Current Page: The Current Page which is currently in view in the document viewing area of the viewer will be exported.
- Selected Pages: The Selected Pages in the thumbnail panel will be exported.
- All Documents: All Documents rendered in the viewer will be exported.
- Page Range: The specified page range will be exported. The input array, which includes the starting and ending page numbers (for example, 1-4), will export pages 1, 2, 3, and 4. Users can also provide a single page number instead of the range, like 3.
- Document Name: Provide the Document Name for the name of the final exported document.
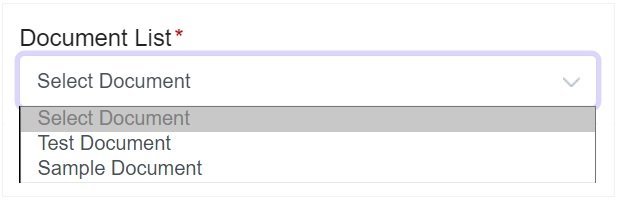
- Advanced Export
eViewer offers an Advanced Export functionality that allow users to export documents in PDF or TIFF format by selecting specific pages or a range of pages from multiple documents. This feature enables users to create a custom list and export the desired pages in the preferred format.
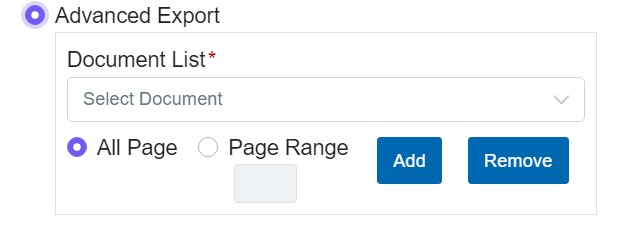
Advanced export document feature consists of the following options:- Document List: A dropdown list of all those documents which are already being open in the document viewing area of eViewer v7.
- All Pages: All Pages means a series of all the pages of a document without any manipulation. This option is by default selected.
- Page Range: Page Range means an array of “from page number” to “to page number”, or a single page number instead of the range.
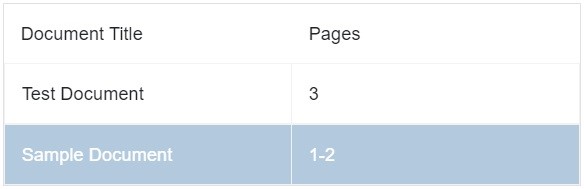
- Add: Add button will add the combination of selected document from the dropdown list, their respective choice regarding all pages or page range, and add them to the list for exporting the document.

After adding the pages from various documents which are being rendered in eViewer, as shown below:
- Remove: Remove button will delete all the information about those pages which has been added previously for exporting the document.
After selecting the desired row and click on Remove button, that row will be deleted from the given list.
- Include Annotation: If the user wants to download the annotations along with the document, then include annotations checkbox needs to be selected, and by default it is checked. Otherwise user can uncheck it if there is no requirement for any annotations to be download.
- Include Watermark: If the user wants to download the watermark along with the document, then include watermark checkbox needs to be selected, and by default it is checked. Otherwise user can uncheck it if there is no requirement for any watermark to be download.
- Include Comments: If the user wants to download the comments along with the document, then include comments checkbox needs to be selected, and by default it is checked. Otherwise user can uncheck it if there is no requirement for any comments to be download.

- Password-Protected PDF: This feature allows users to export a document as a password-protected PDF, provided the original file is not already protected. This ensures that only individuals with the correct password can open or modify the document, safeguarding against unauthorized access.

When the Password Protected PDF option is selected during export:- A dialog box prompts the user to enter a password.
- Clicking Submit exports the PDF as a password-protected file.
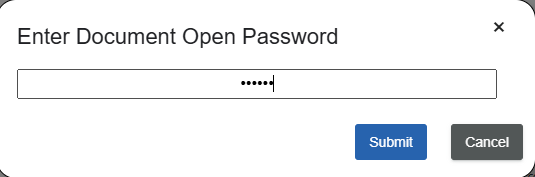
When the document is reopened, users must enter the correct password to access its contents. - Export as PDF: If the user wishes to download the exported document in the Portable Document Format (PDF) form, then he should select the PDF option. By default, PDF checkbox is selected.

- Export as TIFF: If the user wishes to download the exported document in the Tagged Image File Format (TIFF) form, then he should select the TIFF option.

- Export Button: As soon as the user click on the export document button, a file will be downloaded either in the document or image file form fulfilling all the above requirements.

- Document List: A dropdown list of all those documents which are already being open in the document viewing area of eViewer v7.
Download
It allows the users to download the document excluding current changes.

- Standard Print Functions
- Close Current File
Close Current File will close the document which is currently viewed in the viewer.
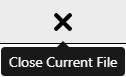
If the document is unsaved, then it will provide an alert to save it. Example:

- Close All File
Close All Files will close all the rendered documents in eViewer at once.
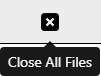
If any of the documents have not been saved, then eViewer will provide an alert to the user. If there is more than one unsaved document being closed, it will provide an alert for each document. - Document Switching
To switch to a specific document among multiple open documents in the viewer, use the Document Switching button.
When initiated, a pop-up window will appear displaying a drop-down list of all open documents in the viewer, including their type. This allows users to navigate easily to a specific opened document.
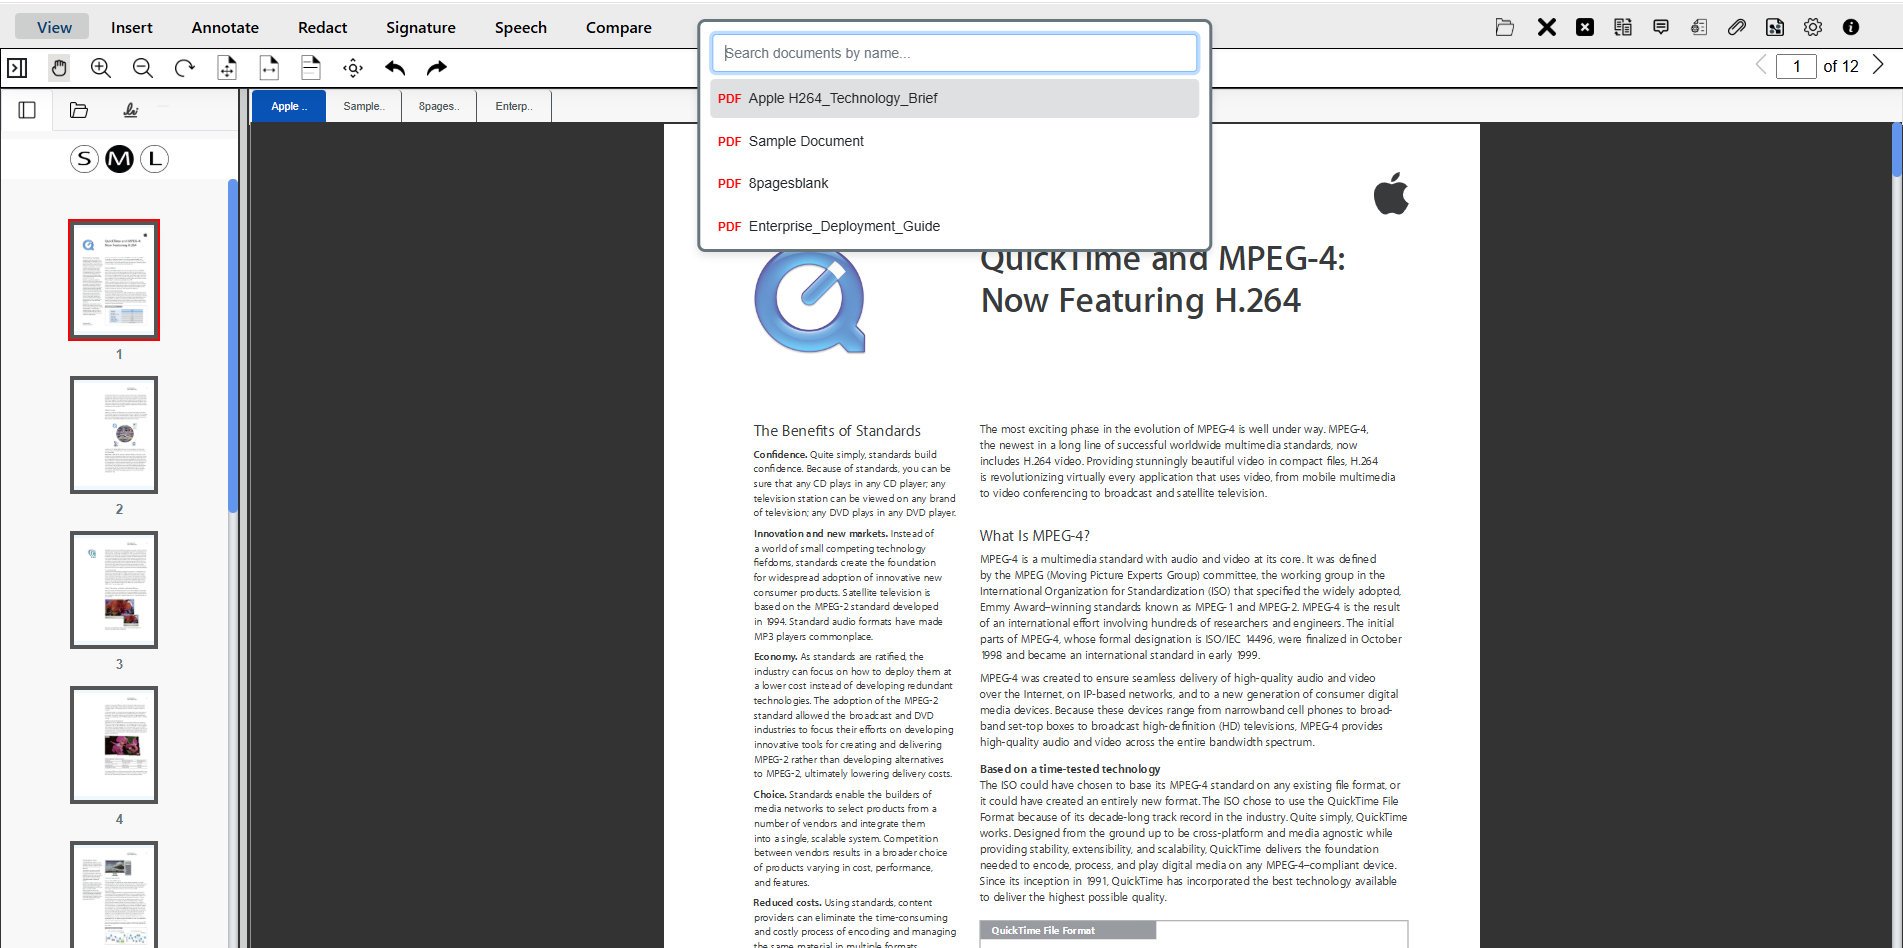
Additionally, users can search for a document by typing its name in the provided search field, helping them quickly locate the desired document. - Metadata
eViewer enables users to view, edit, and save metadata information associated with any document. The metadata information of any file can be created, updated, and saved back to your Enterprise Content Management ECM system or repository. The metadata includes any information about the document as defined by the CM (content management) based on the use case business logic.In the eViewer to view and edit the metadata of the displayed document, click Metadata button.

The Properties dialog box appears that presents the available metadata details, through which the user can view and update according to their permission levels.
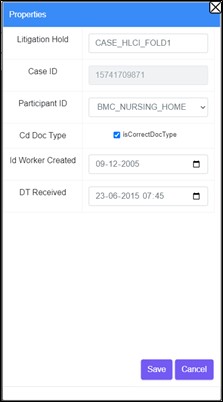
Document Properties
It includes several fields that display the information of the document. The user can view, edit and save any information that can be set by the document creator. These fields may have some constraints that validate the required value. Once the fields have been updated, the user can click the Save button. - Notes
When a document is uploaded in the viewer from the Documentum repository, any existing notes associated with the document will be accessible.

Clicking the Notes button will display all notes added to the document, including the date and time they were added, as well as the name of the person who added each note.
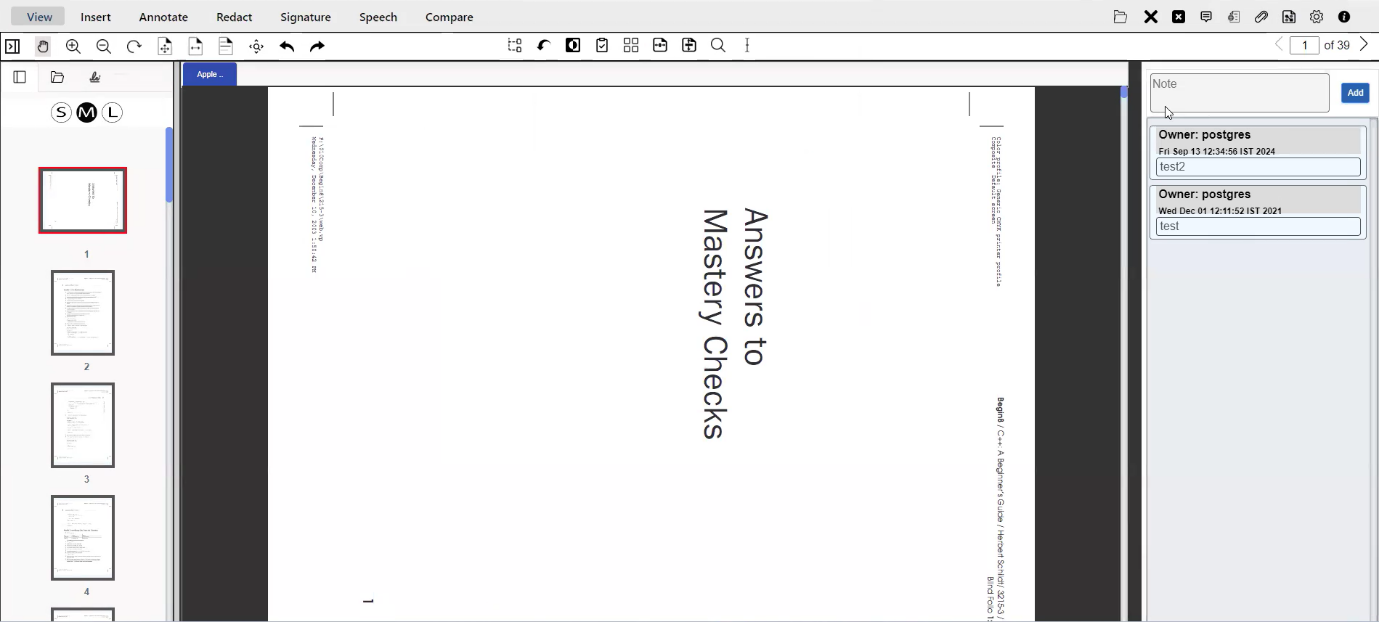
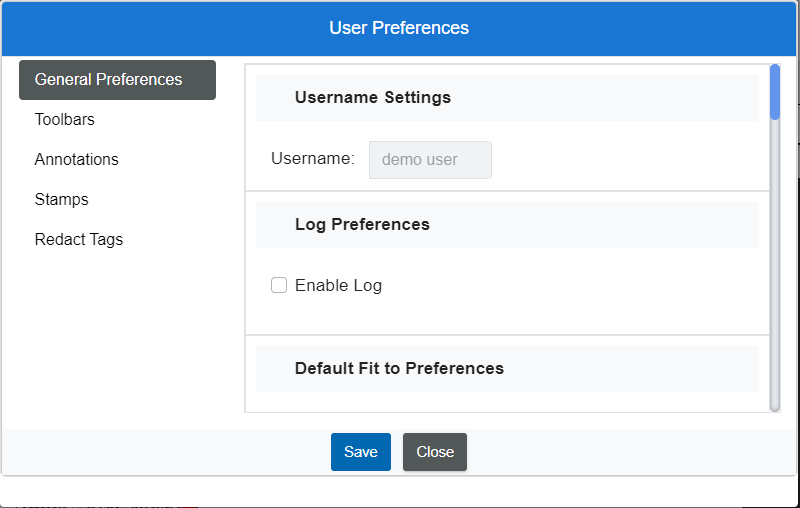
Additionally, users have the option to add their own notes by clicking on the Add button. - User Preferences
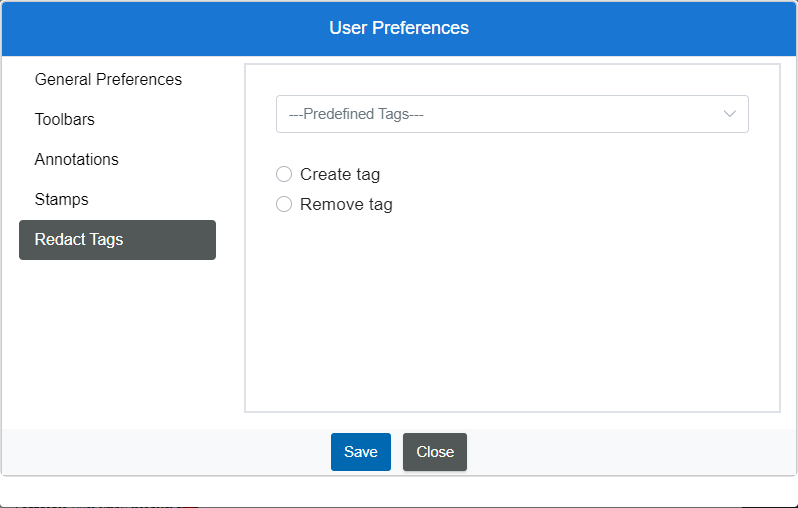
eViewer v7 provides several User Preferences options.
The following are the available user preferences category options:- General Preferences
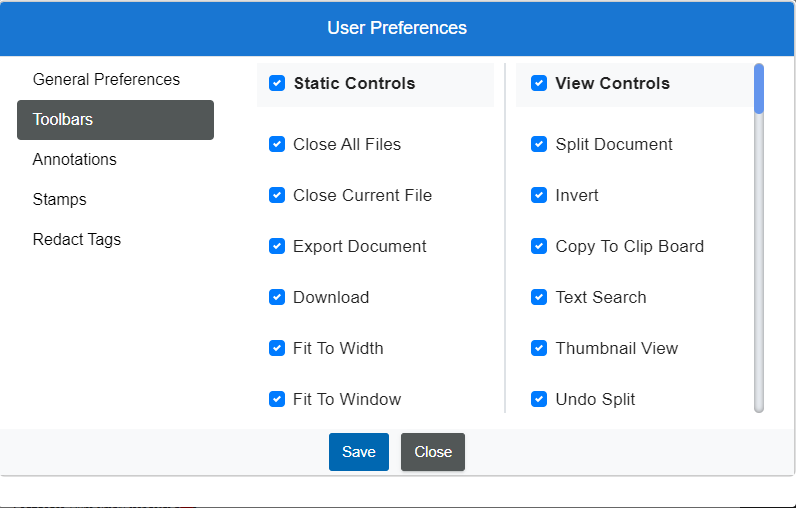
- Toolbars
- Annotations
- Stamps
- Redact Tags
- General Preferences
- Toolbars
- Annotations
- Stamps

- Redact Tags
- Version Info
It will show the version number of eViewer v7 which the user is accessing.

For example:

Document Grouping
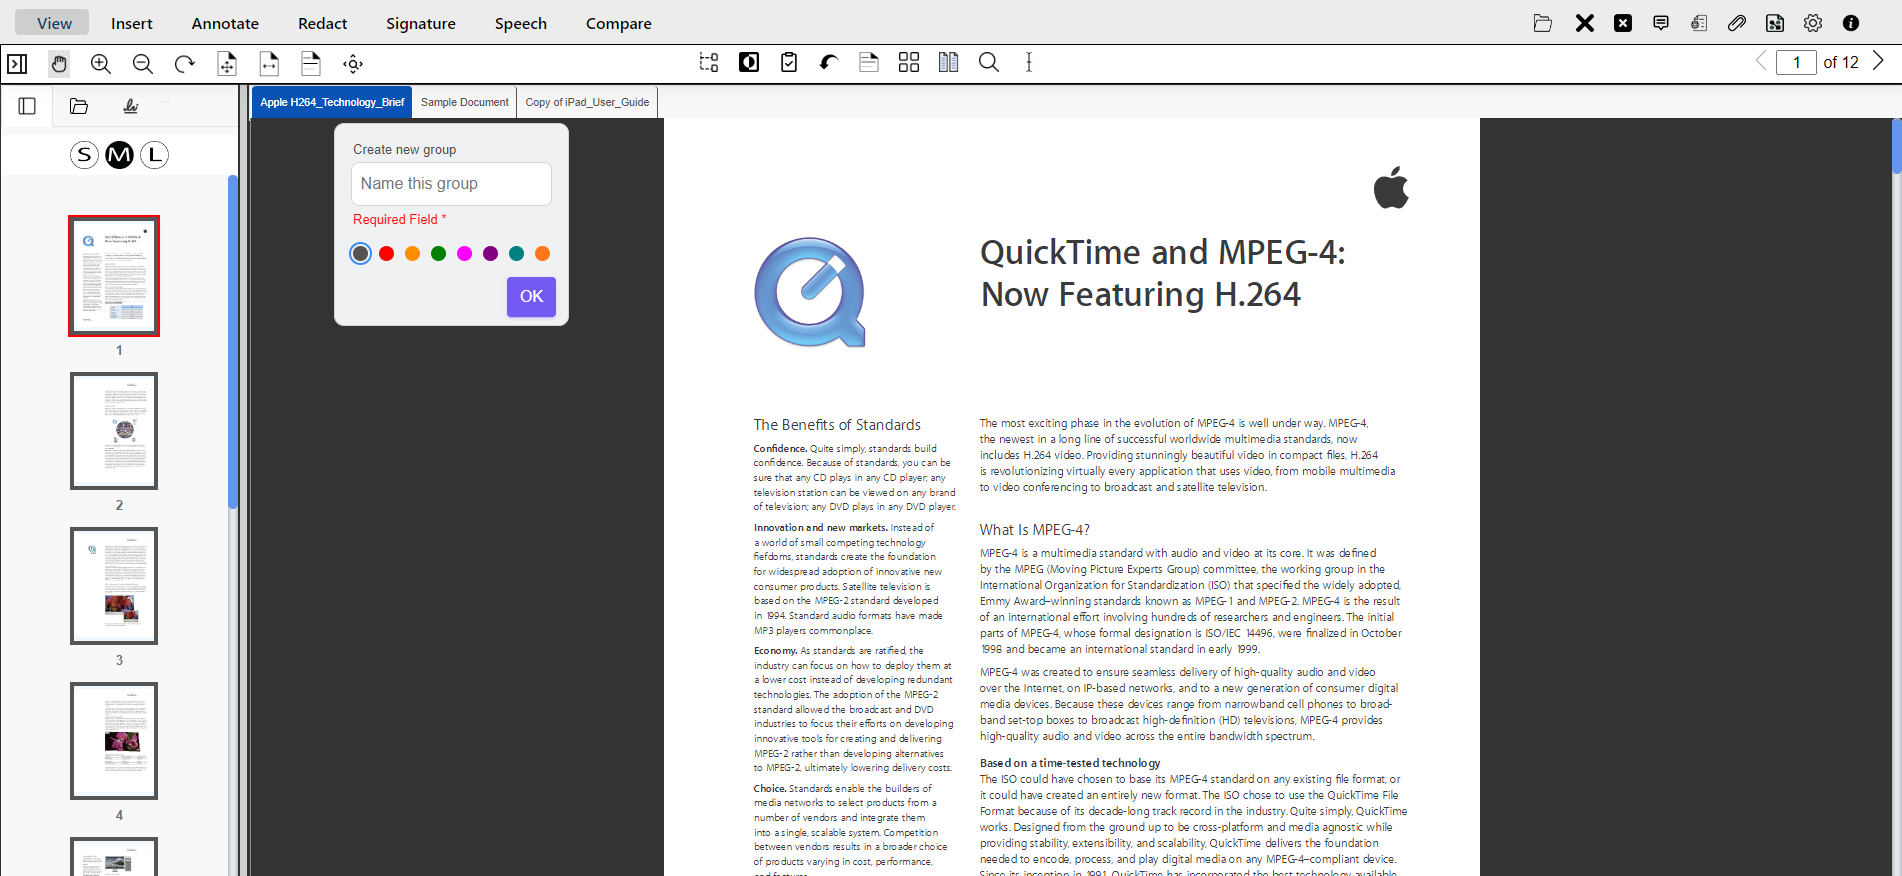
eViewer provides Document Grouping that allows users to manage and organize multiple open document tabs in groups. This feature allows the user to group related document tabs together, making navigating easier and more efficient. When a document is open in the viewer, the user can choose a specific group for the document to which the document belongs and customize these tab groups.
By right-clicking on the document tab, the user can create a new group, add the tab to it, assign a name for the group, and/or choose a color for it.
Once the group is created, by right-clicking on it a pop-up menu will appear with the following options:
- Edit Group: The user can edit the group.
- Add to new group: The user can add the document from an existing group to a new group.
- Remove from group: This will remove a specific document from the group.
- Ungroup: This will delete the group, but all documents within the group will remain the same.
- Delete Group: This will delete the group and close all documents within the group.
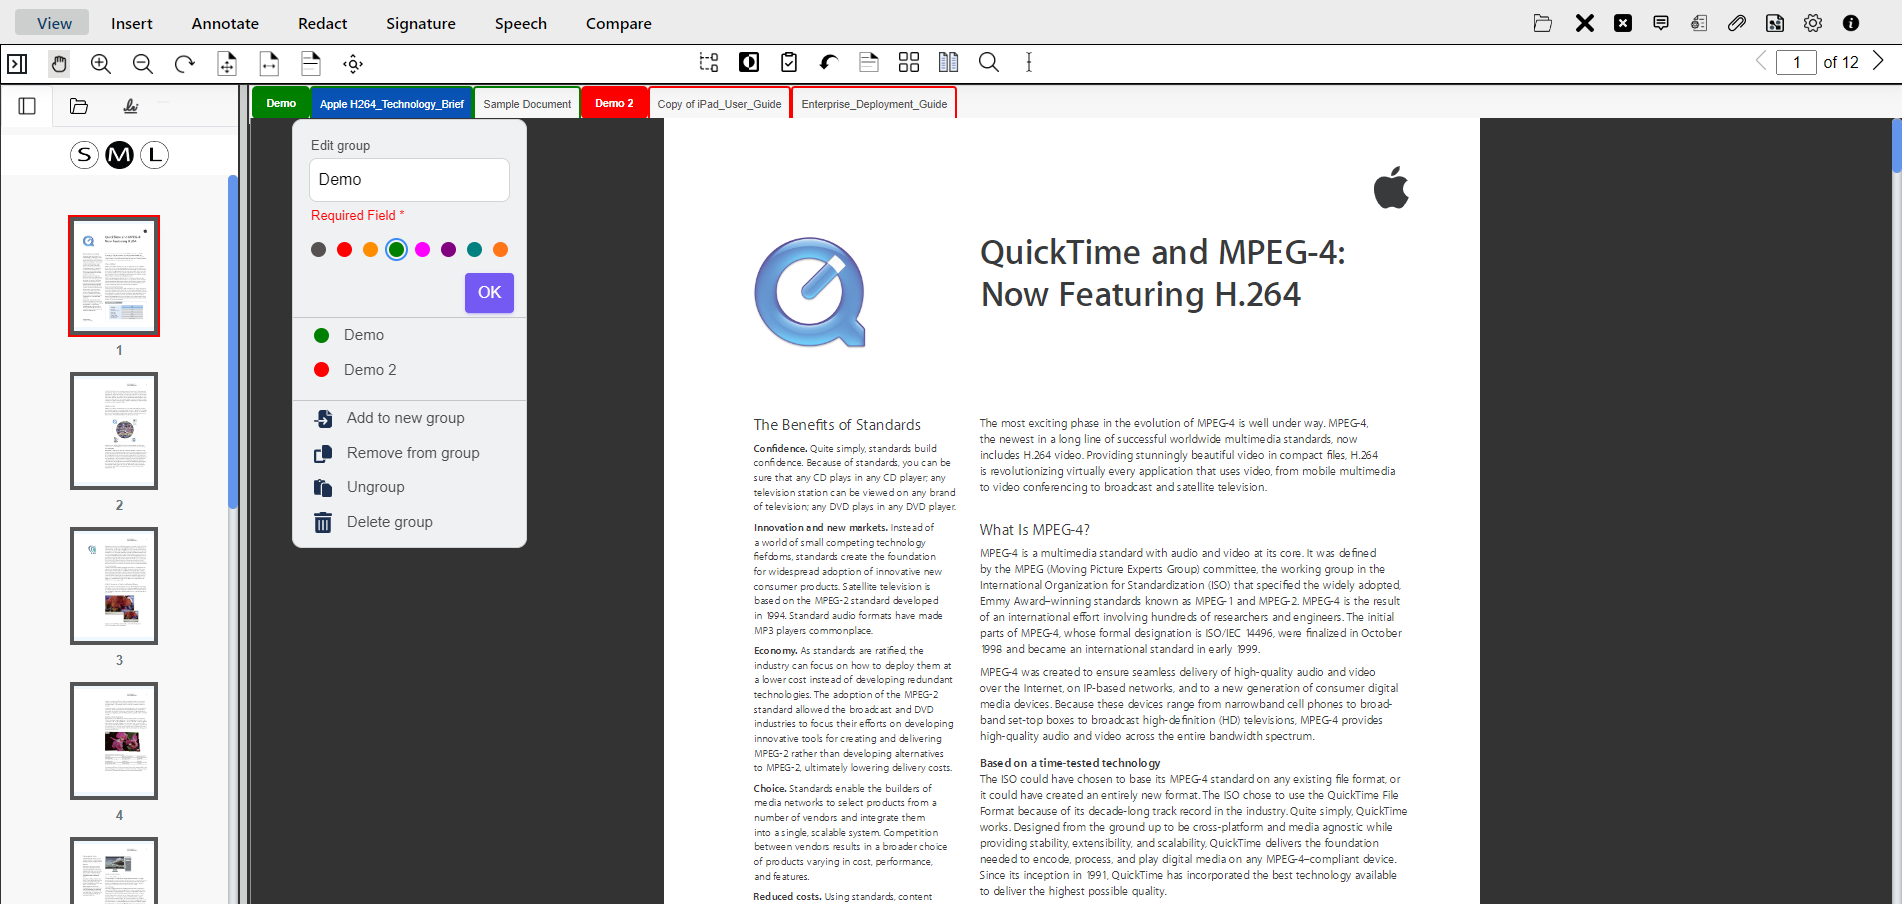
Existing Groups: The viewer will display the list of existing groups. Users can add documents to the existing groups by selecting the desired group.
Collapsing and Expanding Groups: When the user clicks on the group, all the document tabs in that group will collapse. Clicking it again will expand all the document tabs within that group.
Audio Video Support
The Audio/Video feature in eViewer 7 enhances the viewing experience by allowing seamless playback of multimedia files directly within the viewer, eliminating the need for external players. It supports various formats: audio files in MP3, WAV, and OGG, and video files in MP4, AVI, and WebM.
Once a media file is loaded in the viewer, click the play icon (▶) to start the audio or video playback.
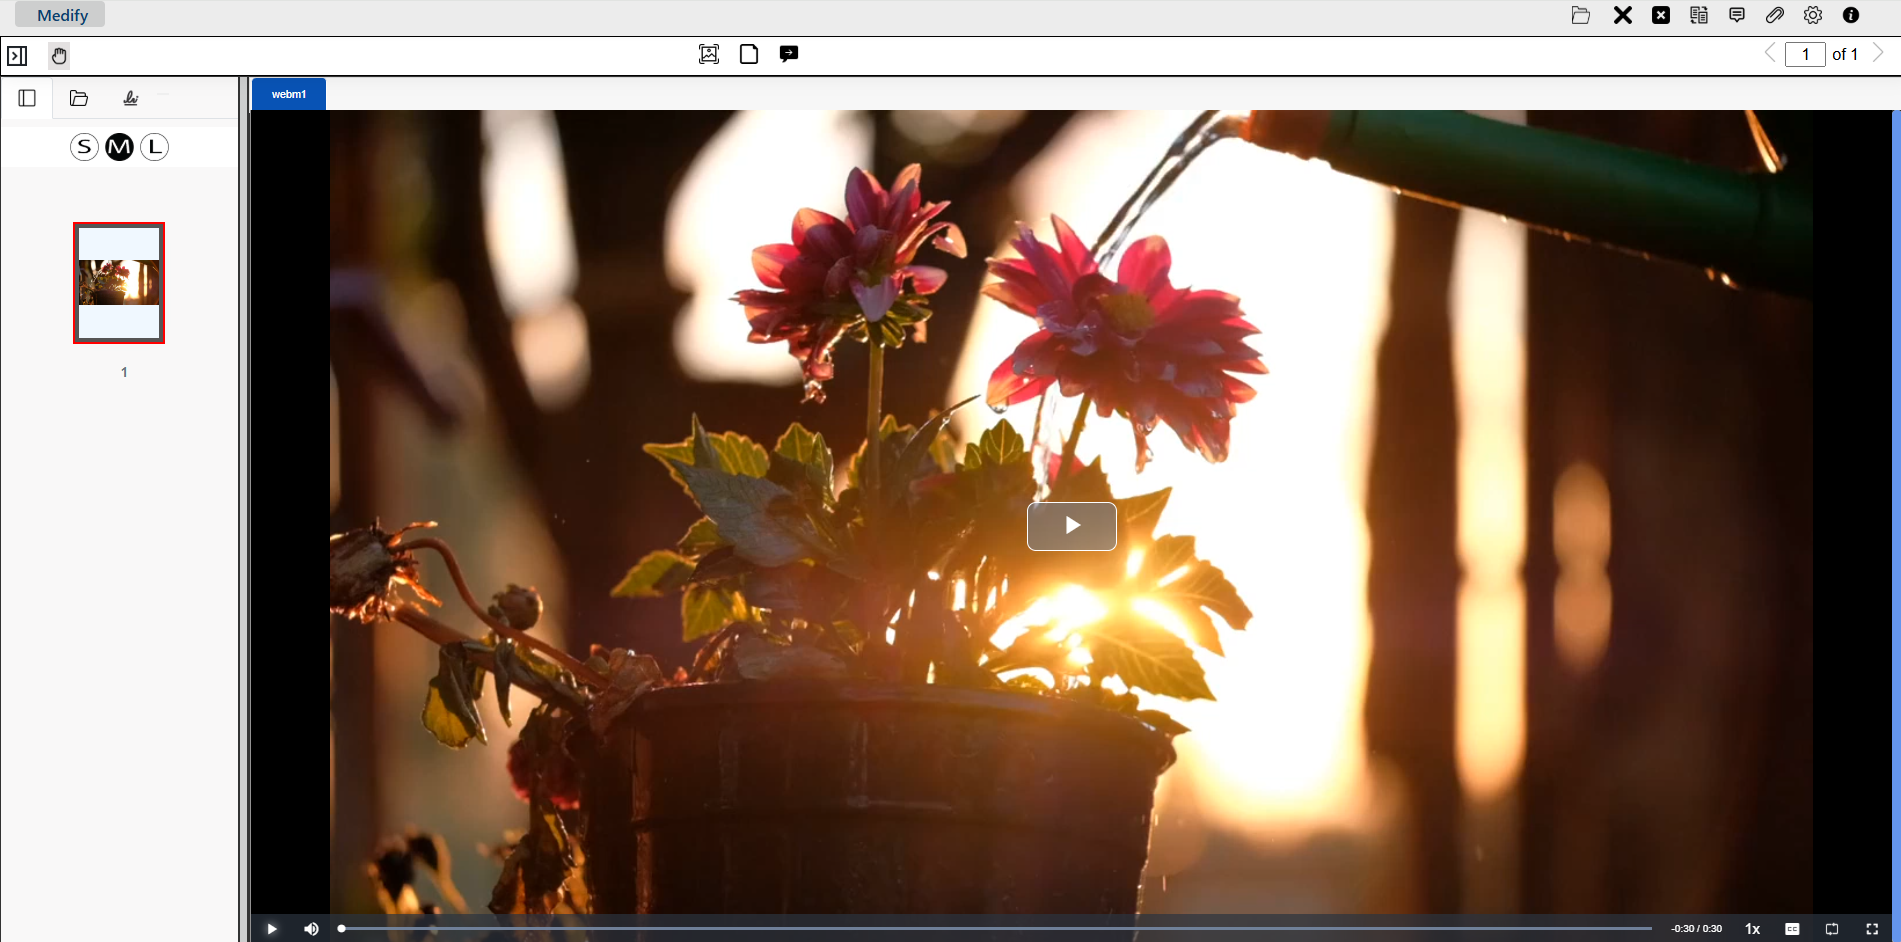
eViewer offers playback controls within the media player feature.
Playback Controls:
- Play/Pause: Click the play/pause button to start or stop the media.
- Volume Control: Use the volume slider to increase or decrease audio output.
- Seek Bar: Drag the seek bar forward or backward to skip to different parts of the media file.
- Playback Speed: Adjust the playback speed of the media file, allowing for faster (1.5x, 2x) or slower (0.5x, 0.25x) playback.
- Caption/Comments: Choose whether to display the captions or comments (if they’ve been added by users).
- Loop: Enable continuous replay of the media file without needing to restart it manually.
- Full screen: Click the full-screen icon to expand the video to full screen.
Video Snapshot
The Video Snapshot feature enables users to capture a single frame of a video in order to bring attention to it and/or add comments on it. To use this feature, click the Add Snapshot button to capture a specific frame from the video file. The user can add comments that will appear in the viewer’s comment section. Each comment will be attached to the video-captured frame.
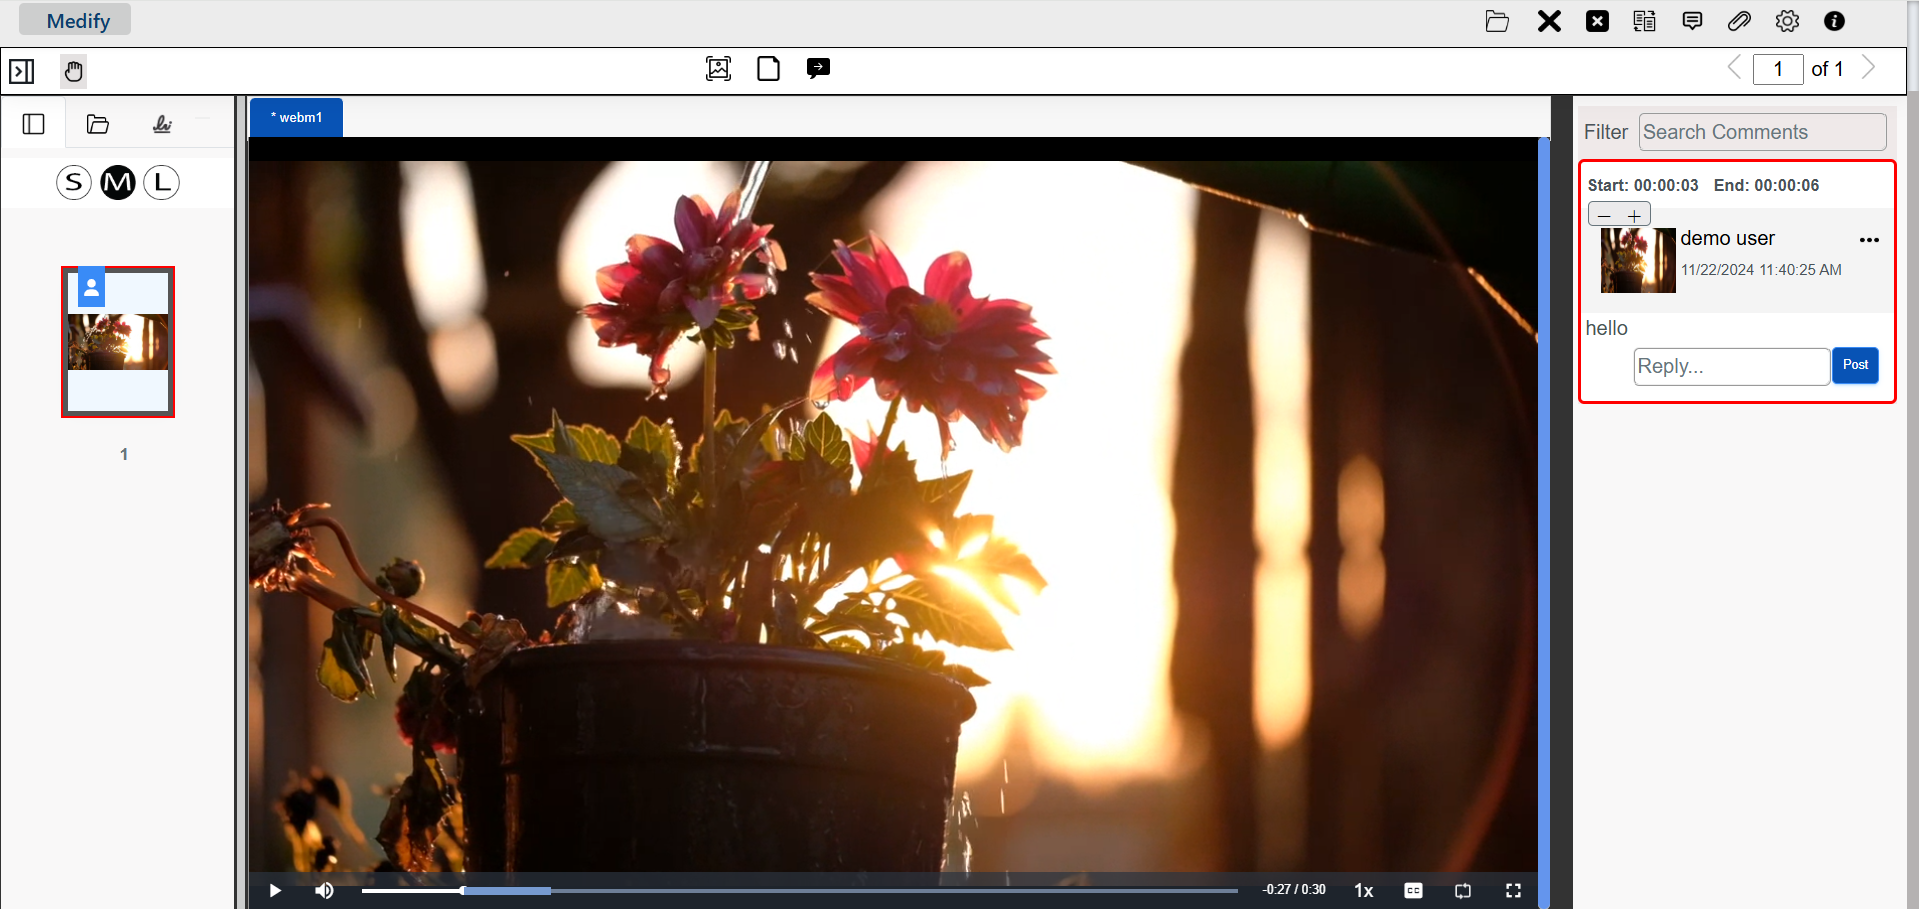
Comments and replies can be edited or deleted by clicking the More Options icon (three horizontal dots) next to them. Each comment will indicate the date, time duration, and the user who added it. The “Start” and “End” options specify the duration for which the comment is visible on the seek bar, which can be adjusted using the (+) and (-) buttons. The length of the marker on the seek bar shows how long the comment will be visible. Clicking on a comment in the comment section, will pause the video, if playing, and navigate to the corresponding marker on the seek bar where the comment was made.
When you hover over a marker in the seek bar, it will display the start time of the comment and its text. Clicking on a marker in the seek bar will highlight the specific comment in the comment section.
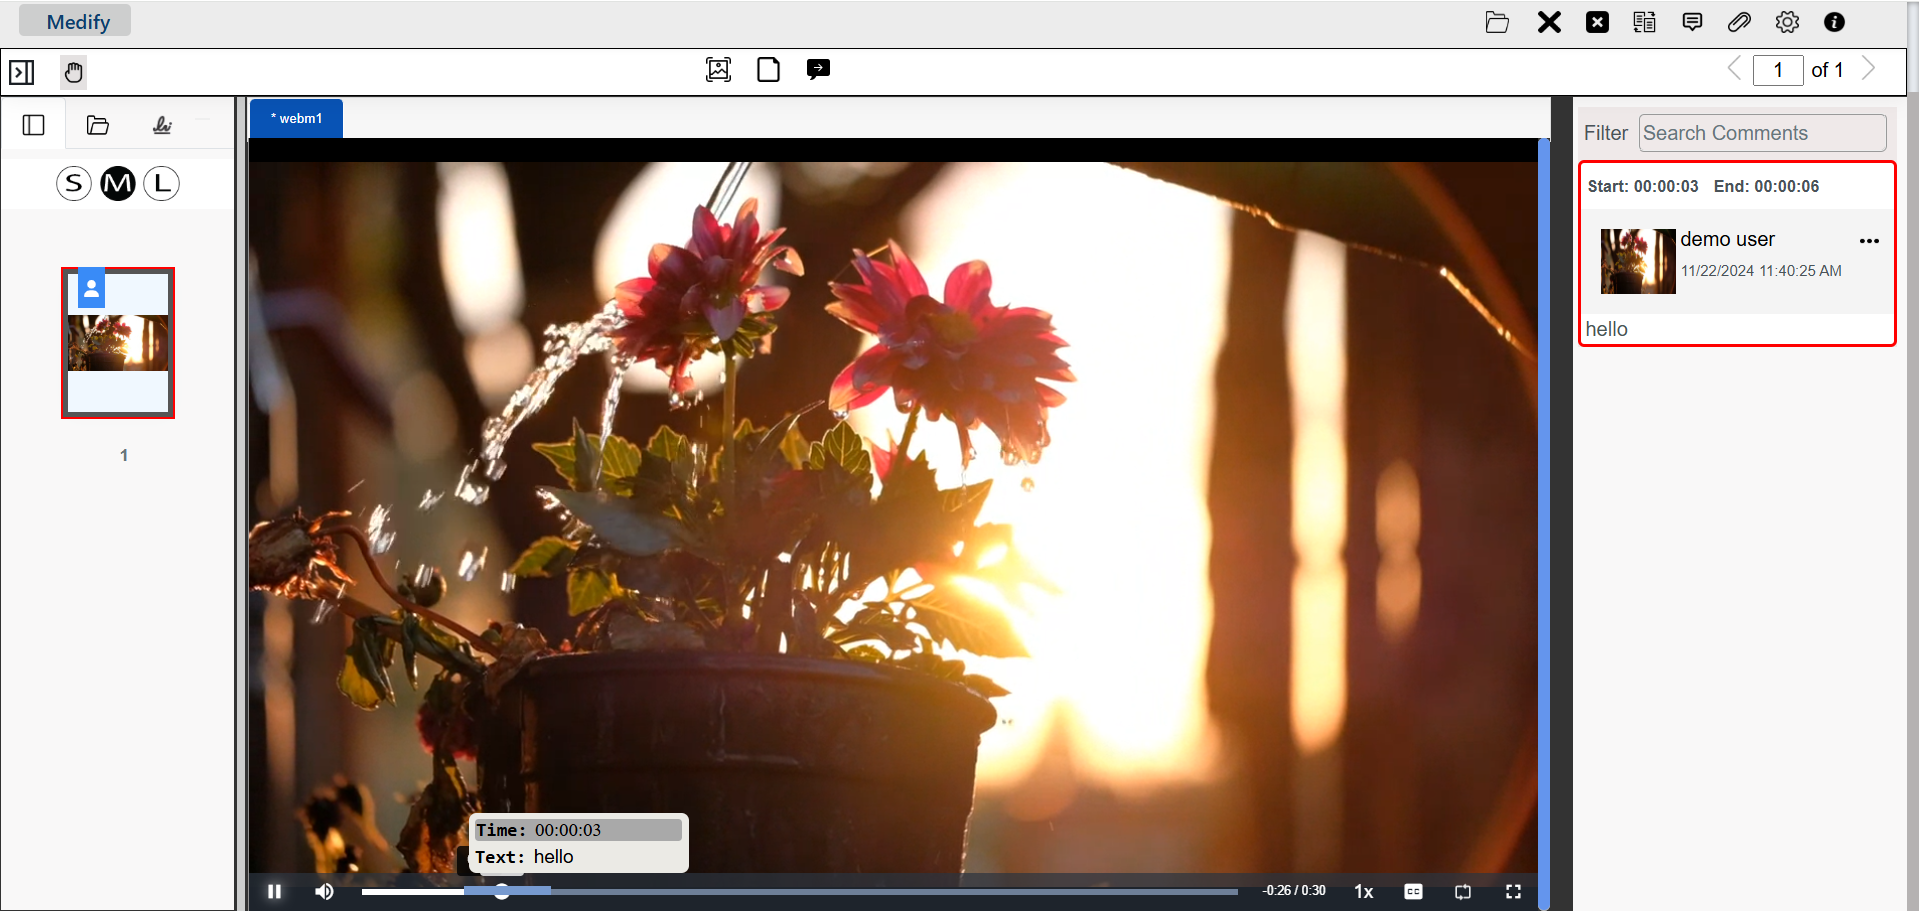
Users can search for comments using the Filter option, which allows users to search for specific text within all comments and displays the matching results.
Open As New Document
The video snapshot can also be opened as a separate document tab within eViewer, where the user can utilize all standard functionalities on it like cropping, annotations, etc.

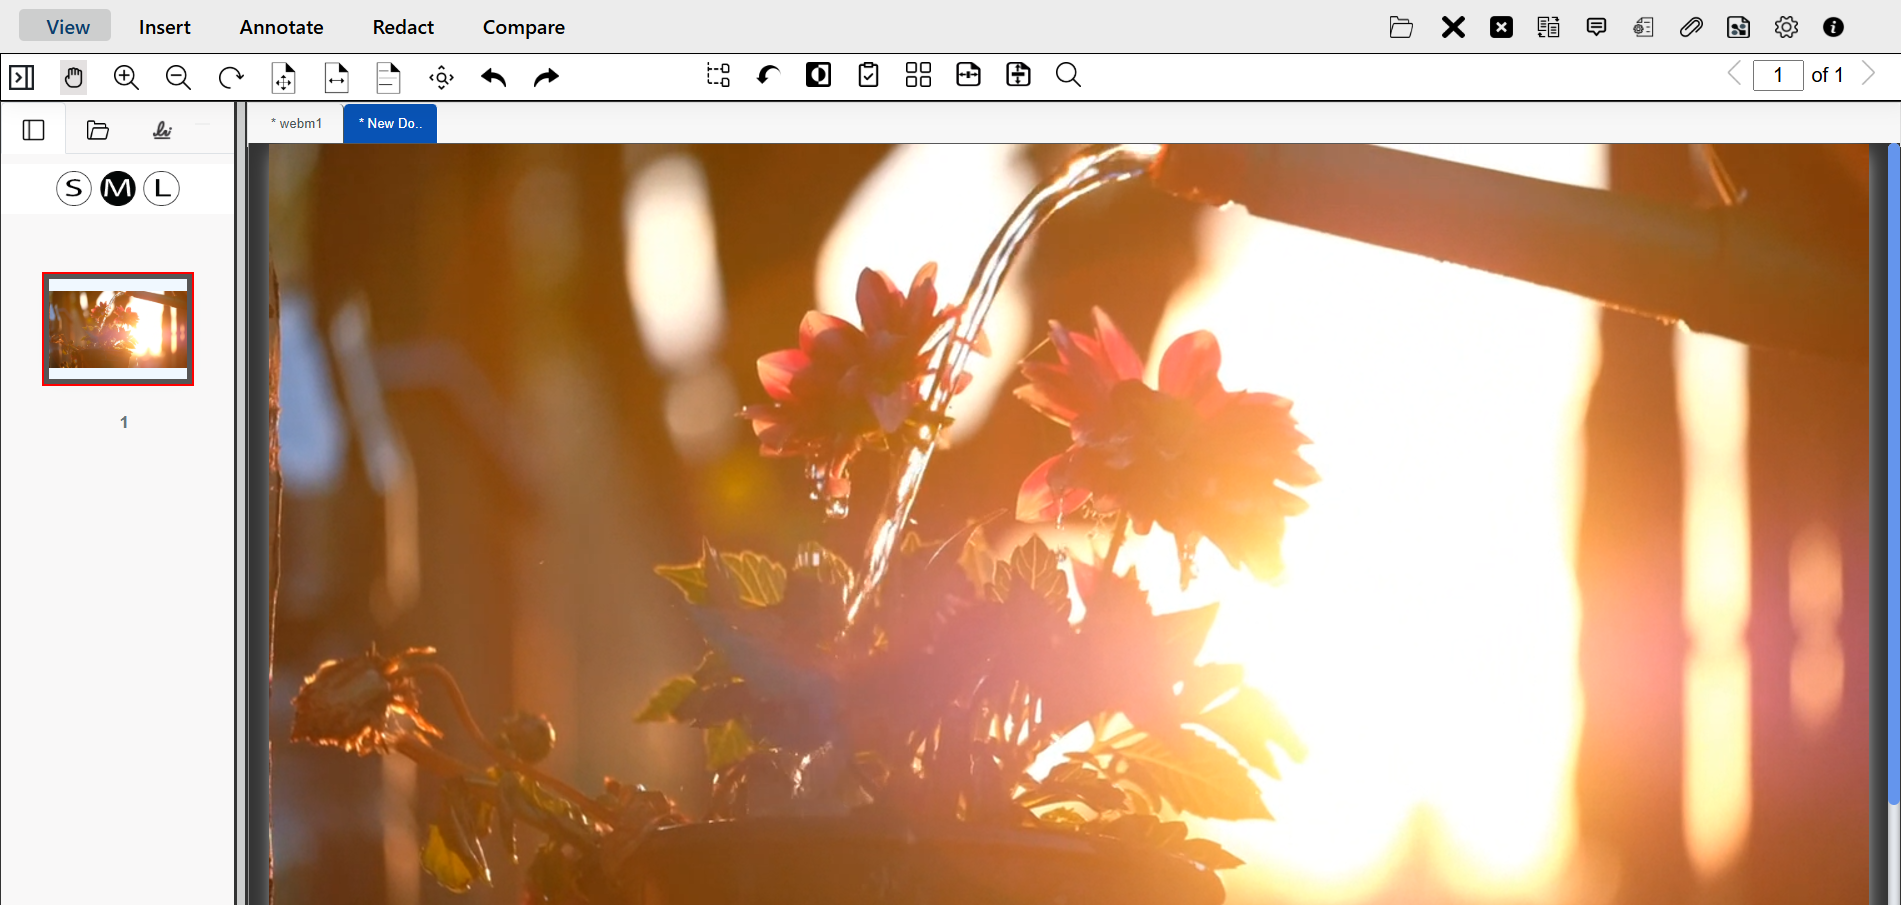
Show Commenting in Subtitle
This displays the text of the comments as subtitles at the bottom of the video in the media player.
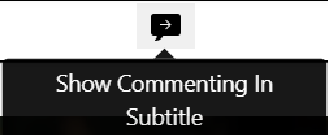
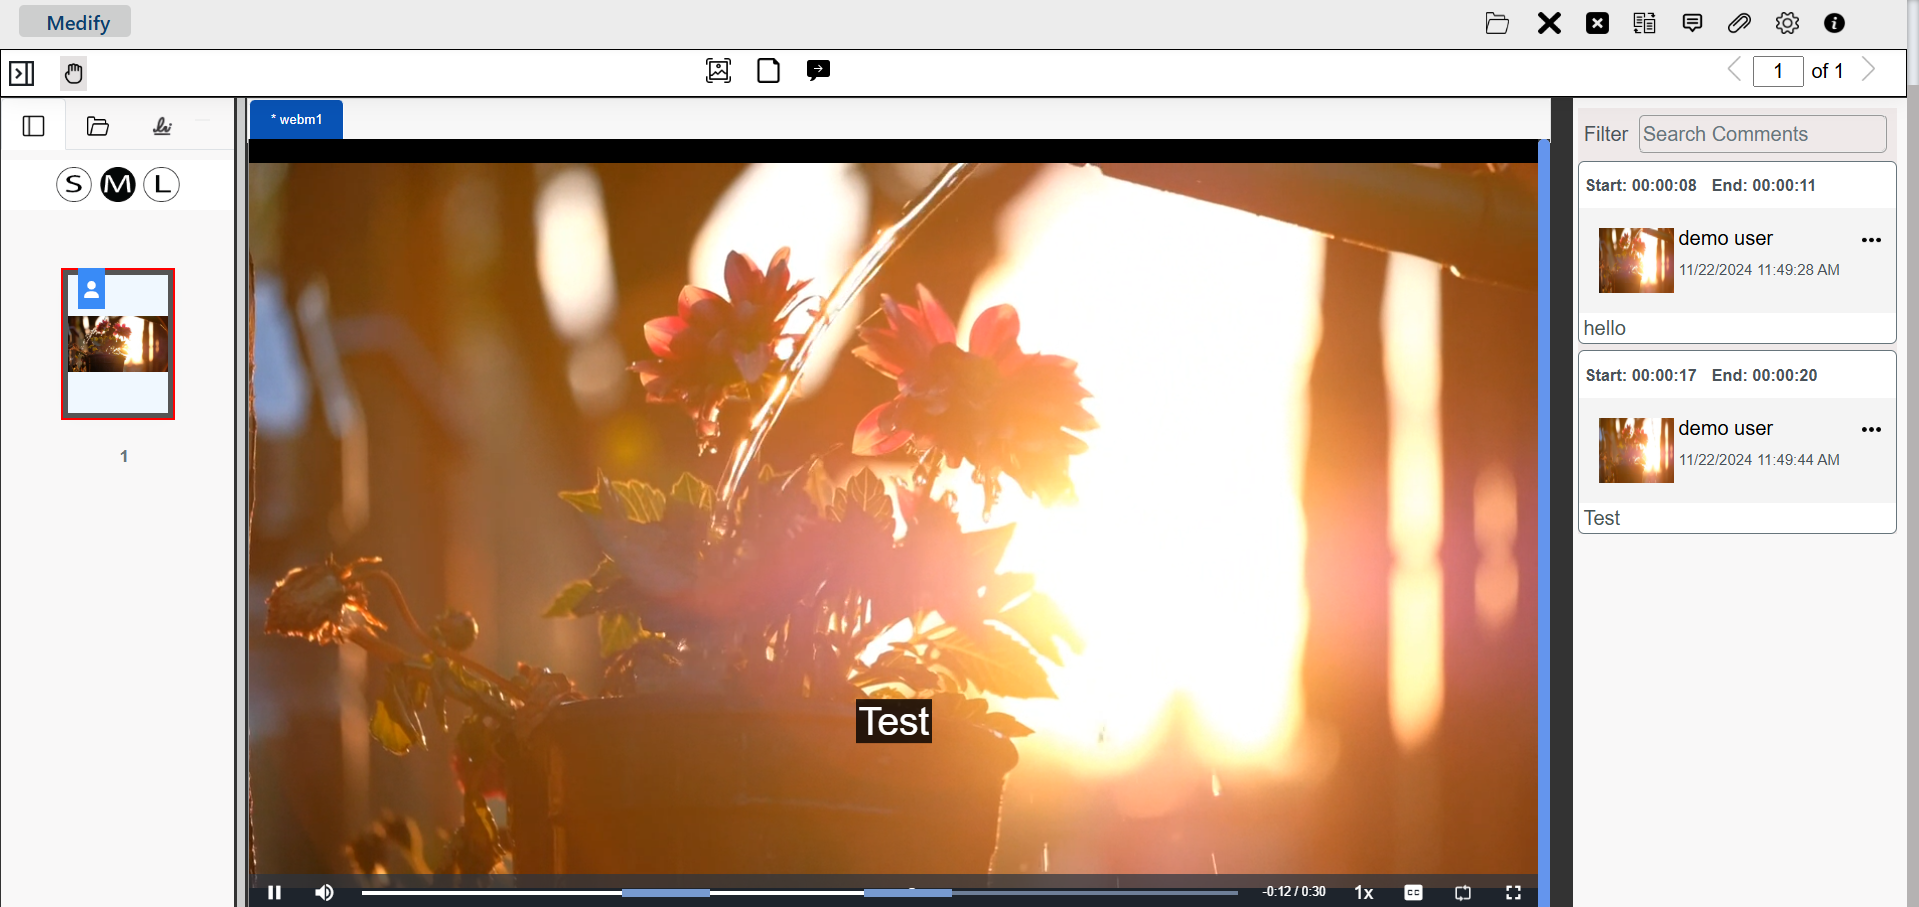
PDF Editing & Flattening
With eViewer version 7, users can fill in PDF form fields by simply selecting the fields to fill in the appropriate content in the field options. These field options include the text box, checkbox, drop-down, and radio button. PDF form fields are, by default, fillable in the viewer.
In the case there are PDF form fields that the creator does not want anyone to edit, eViewer supports this by providing the PDF Flattening functionality that makes the PDF form fields into read-only mode and cannot be edited.
In the viewer, the PDF flattening feature is disabled by default. To change the editable form to non-editable, simply enable the PDF Flattening feature in the user preferences file, or in the viewer follow these steps:
- Open the PDF form in eViewer.
- Click User Options in the top right corner.
- Click Preferences> General Preferences> and Enable PDF Flattening.
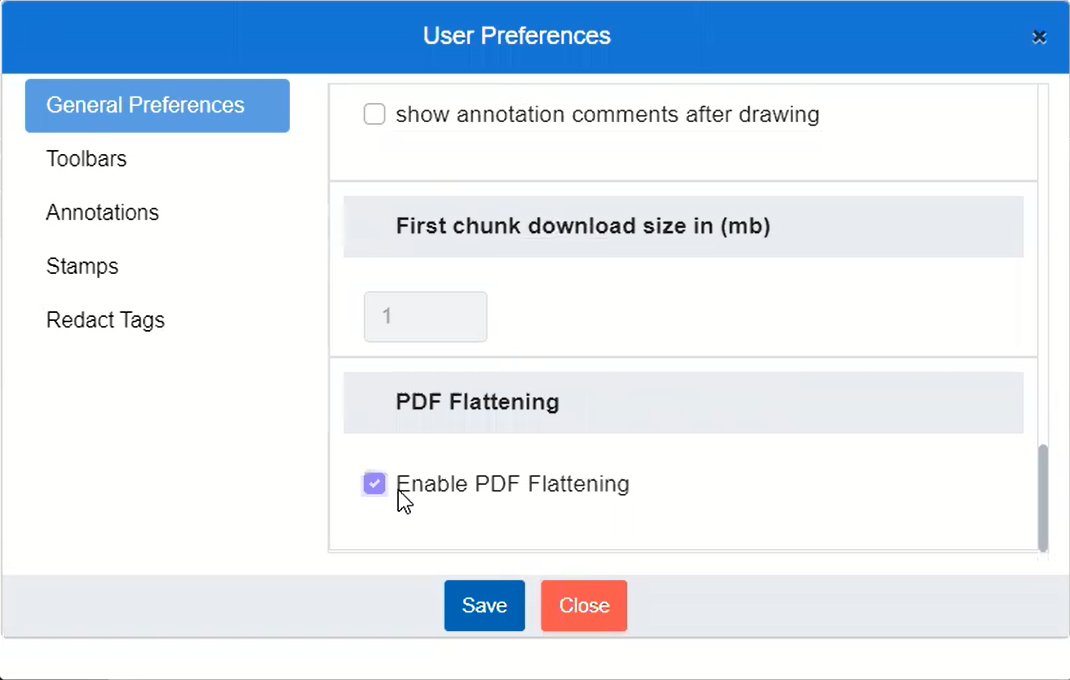
- Click Save.
As shown, the previous PDF interactive and fillable forms are no longer fillable.
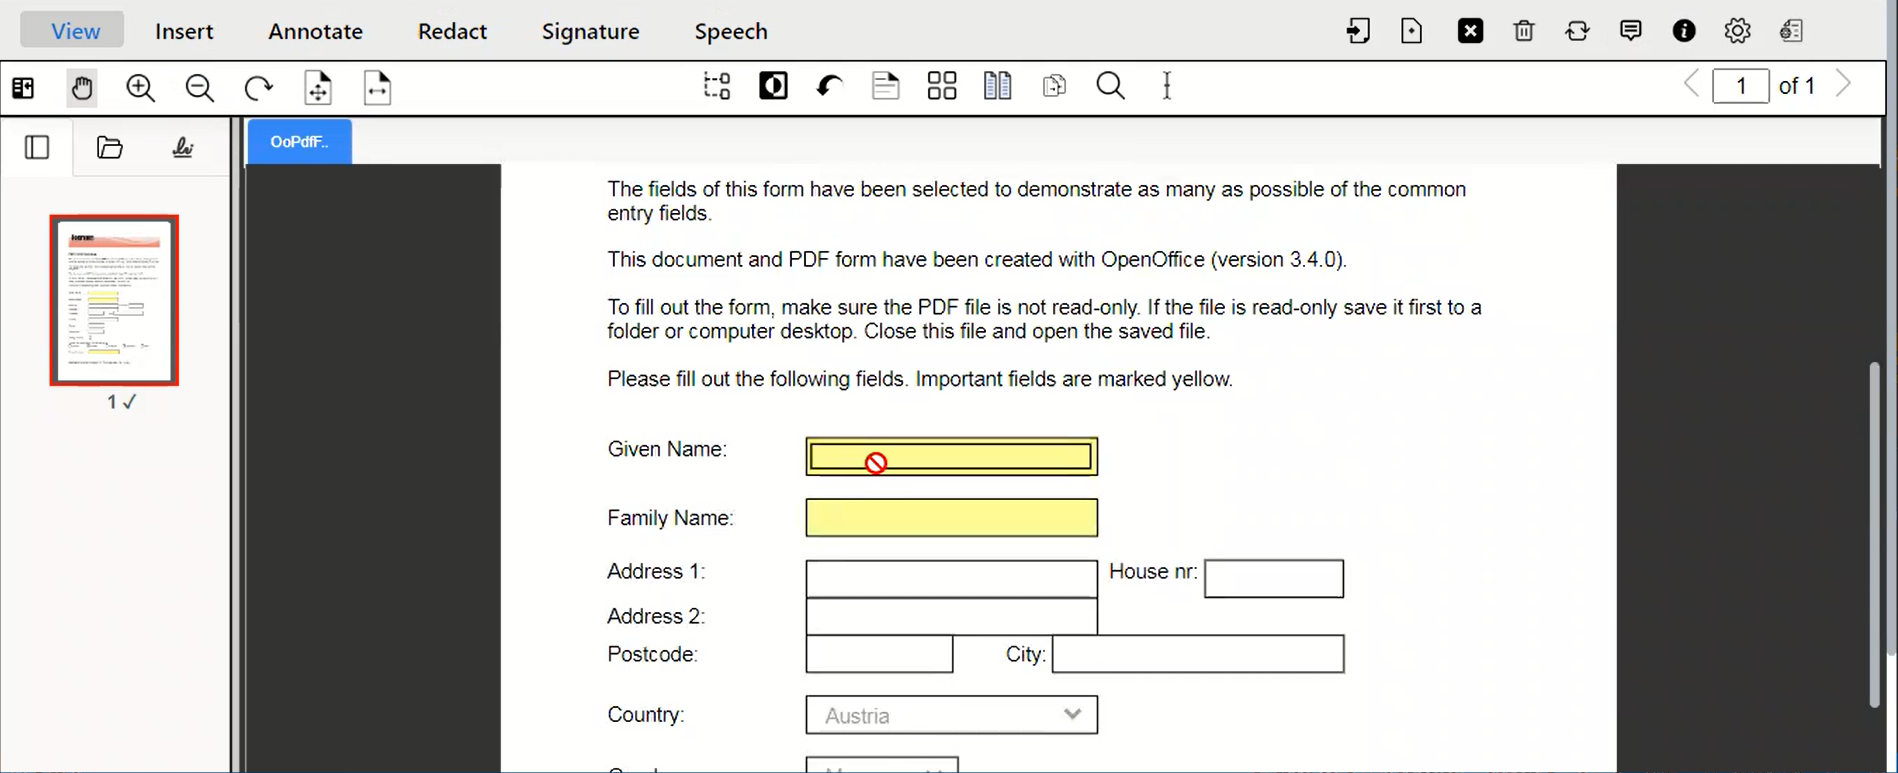
Scan Document
User can scan the document through a scan document button located on the top right tab of the blank eViewer v7.
Selecting this button, the scanner function activates and starts the scanning process.
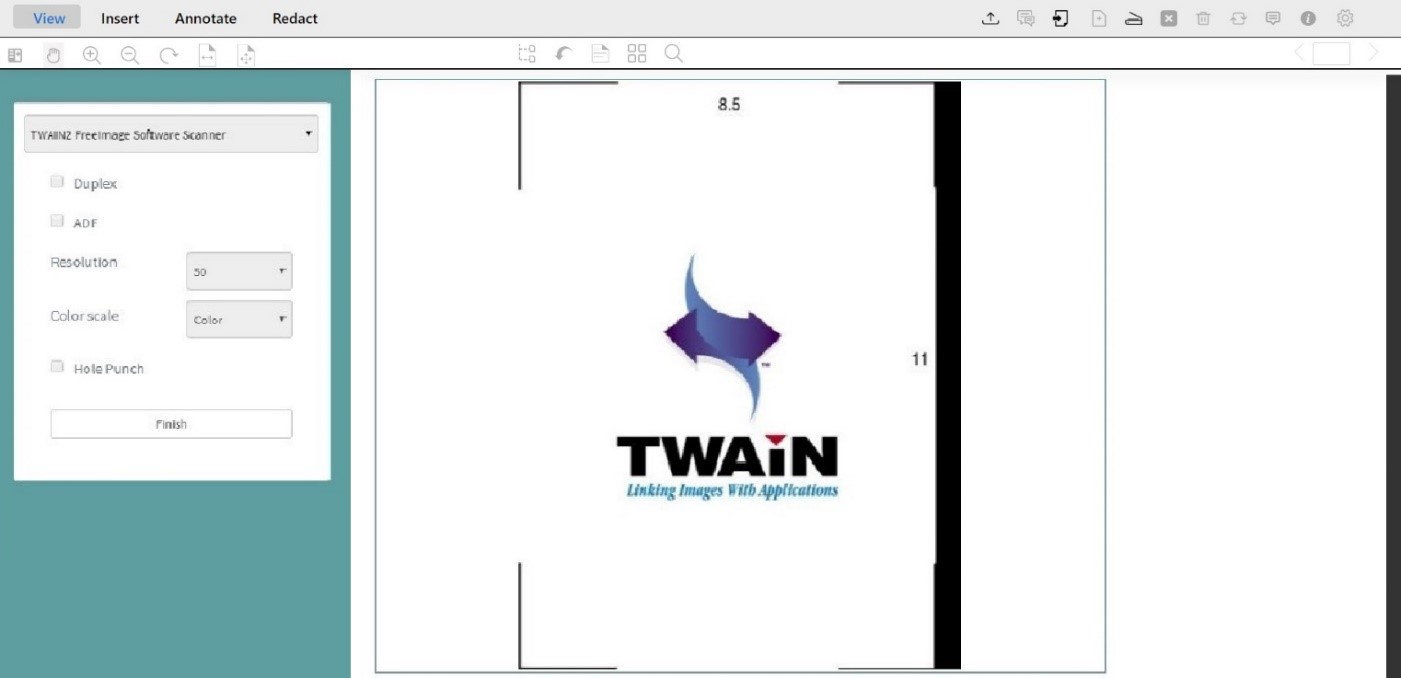
eViewer v7 offers multiple options for scanning the document. It comprises of two modes: Duplex and ADF. Users can also adjust the Scan Resolution and Color Scale of the scanned document. Once all the options are selected, press the scan button to begin the process.
Rendering of Password Protected PDF Files
eViewer enables users to open and display password-protected PDF files. When opening the PDF file within the viewer, eViewer detects if the file is password protected. If it is password protected, a dialog box will appear, requesting the user to enter the password into the designated field. An eye button  is provided in a password dialog box which enables the user to toggle the hide/show of the password entry.
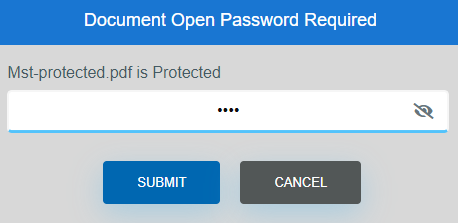
Once the correct password is entered, click on the Submit button, and the PDF file will be rendered in the viewer.
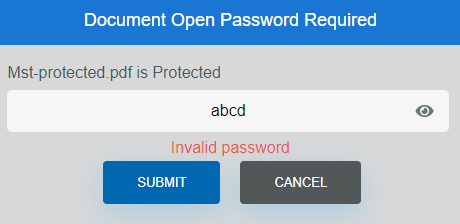
If the password is incorrect, an error message will be displayed prompting the user to try again.
Shortcuts
If the user right clicks on the document viewing area of the viewer, these shortcuts will provide them assistance to perform common tasks easily.
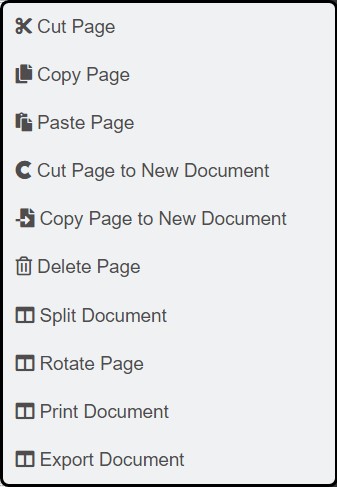
There are some shortcut key combinations to use eViewer v7 efficiently.
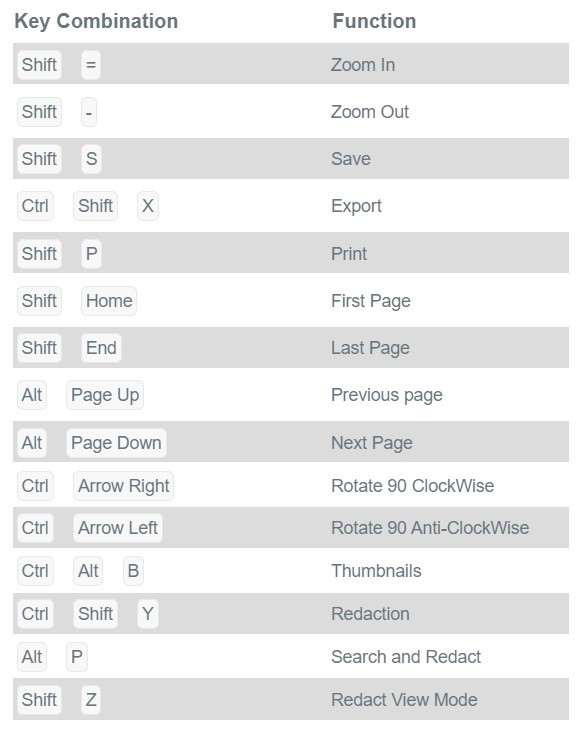
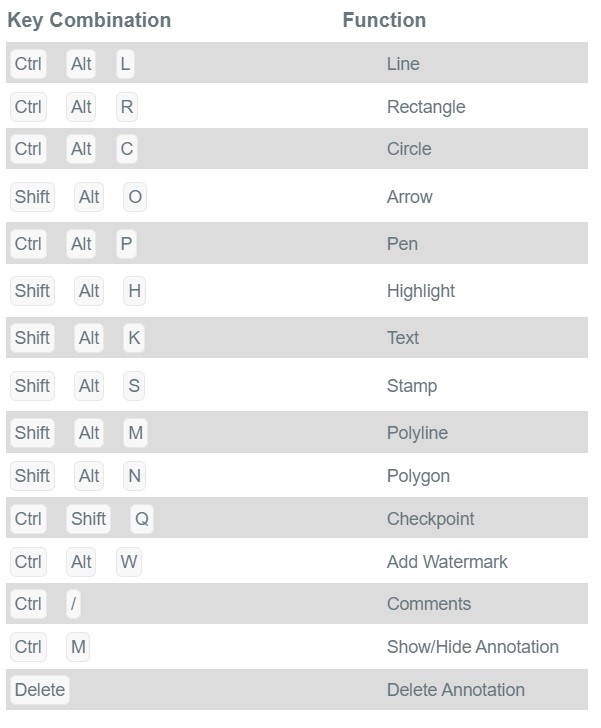

Support for IBM Content Navigator
eViewer v7 provides seamless integration with IBM Content Navigator (ICN), enabling users to view, annotate, and interact with documents stored in enterprise content repositories such as IBM FileNet P8, IBM Content Manager 8 (CM8), and IBM Content Manager OnDemand (CMOD). This integration offers a modern, feature-rich, customizable document viewing experience directly within the ICN interface, streamlining document workflows and ensuring a consistent user experience across your enterprise.
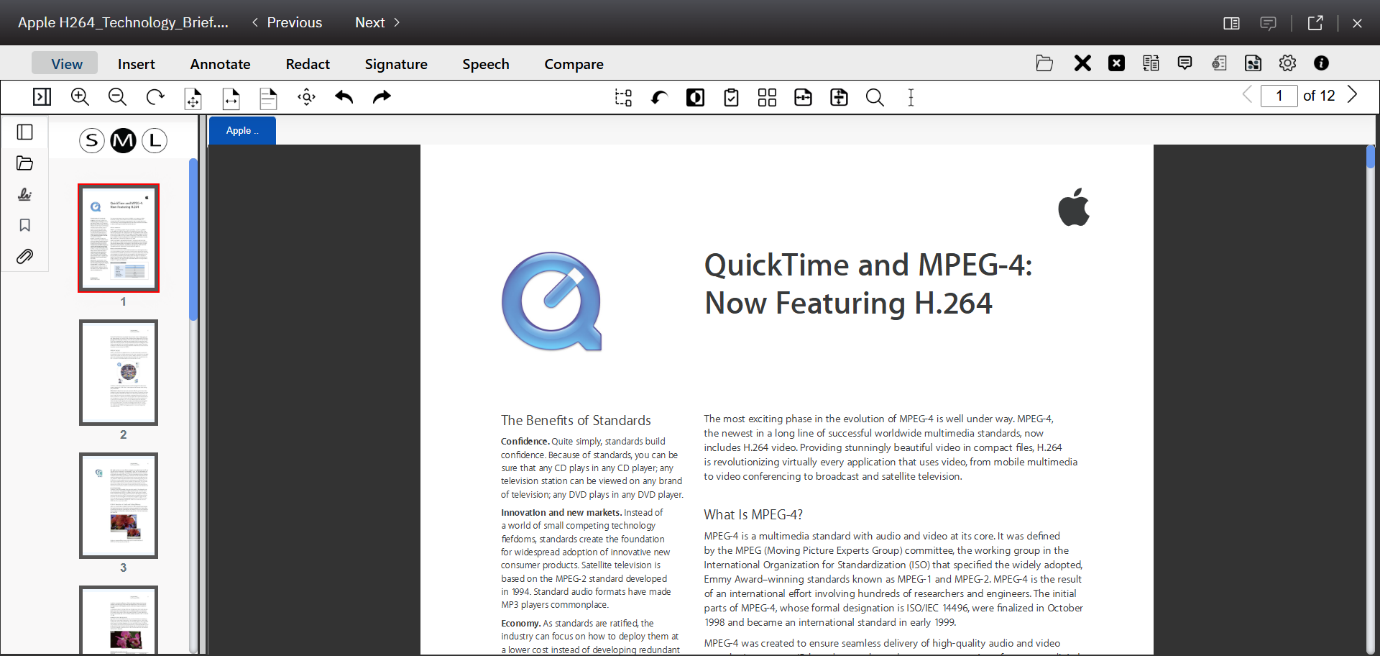
Key Features
With eViewer integrated into IBM Content Navigator, users can:
- Render documents directly in the browser managed by and stored in FileNet P8, CM8, and/or CMOD repositories.
- Open and interact with a wide range of document formats, including:
- MO:DCA and AFP
- MS Office documents (DOCX, XLSX, PPTX)
- TIFF and other image files
- And more
- Utilize advanced eViewer capabilities, including:
- Smart Redaction
- In-document text search and extraction
- Annotations (highlight, shapes, sticky note, etc.)
- Stamps and watermarks
- Page navigation and thumbnail views
- Support for embedded attachments and bookmarks
- Respect repository-based security and permissions, ensuring secure document handling aligned with organizational policies.
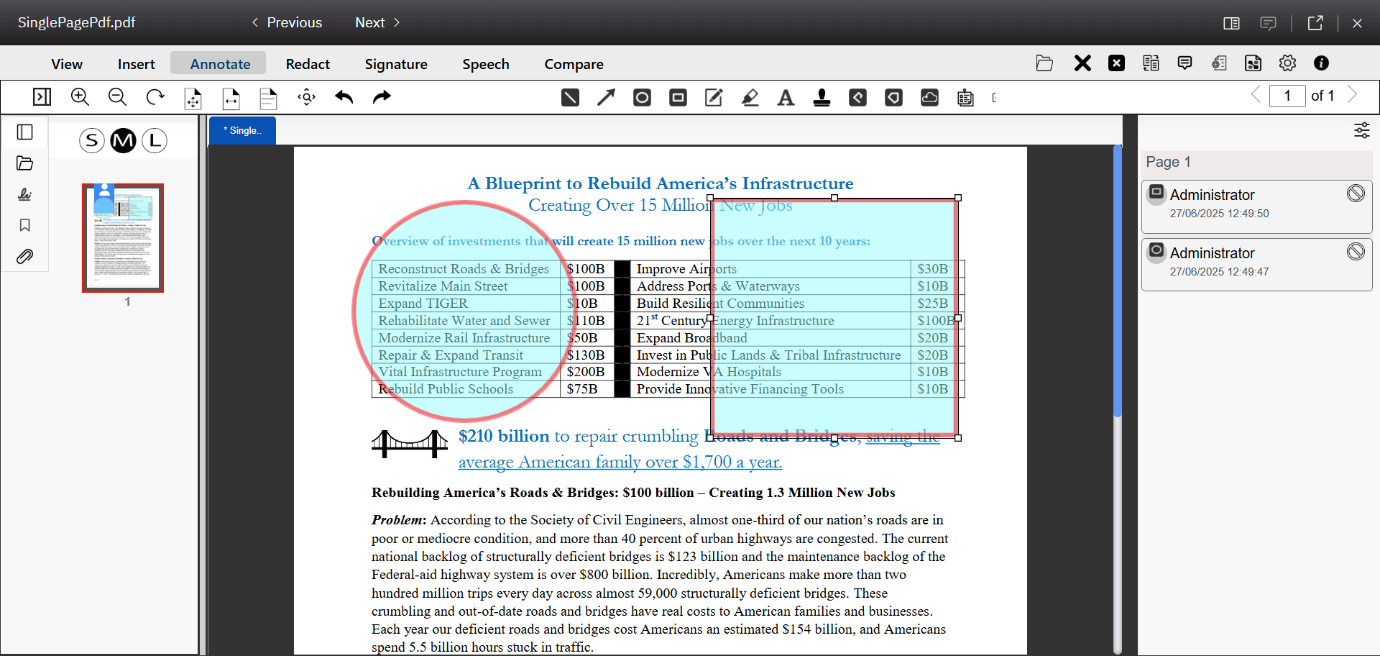
Workflow Summary
The following steps outline how users interact with eViewer within IBM Content Navigator:
- The user logs into IBM Content Navigator.
- ICN authenticates the user and grants access to FileNet P8, CM8, and/or CMOD repositories.
- The user selects and opens a document from the repository.
- The document is rendered within the ICN interface using eViewer.
- The user can annotate, navigate, search, and perform other supported viewer actions based on their permissions.
Benefits
eViewer provides a consistent, enhanced document viewing experience for IBM FileNet P8, CM8, and CMOD repositories. Key benefits include:
- Seamless in-browser access to documents, eliminating the need for external applications.
- Built-in tools for annotation, redaction, watermarking, and collaboration, enhancing productivity.
- Customizable user experience
- Fully browser-based deployment, requiring no client-side installation and simplifying access for users.
Additional Resources
For detailed information about integrating eViewer v7 with IBM Content Navigator, please refer to the integration guide.
Support for SharePoint Online
Overview
eViewer seamlessly integrates with Microsoft SharePoint Online, providing users with the ability to view, annotate, redact, and interact with documents stored in SharePoint libraries, all directly within the browser. The integration ensures secure document access while preserving native SharePoint permissions. With eViewer, organizations benefit from a consistent, high-performance document viewing experience across all file types supported, even multimedia files, stored within SharePoint.

Key Features
The eViewer integration with SharePoint delivers several powerful capabilities:
- Complete Browser-Based Viewing
No client installation required; access documents directly from your web browser. - Broad File Format Support
View a wide variety of document types stored in SharePoint, including:- Microsoft Office (Word, Excel, PowerPoint, MSG, EML, and more)
- TIFF and other image files
- Multimedia (Audio and Video files)
- And more.
- SharePoint-Level Security
Maintains native SharePoint permissions and access controls to ensure document security and access. - Comprehensive Annotation Tools
Collaborate directly within the SharePoint interface using features such as:- Comments
- Redactions
- Highlights
- Stamps
- Sticky Notes
- And more.
- Optimized Performance
Delivers fast, responsive document rendering, even with large data files or limited network connectivity.
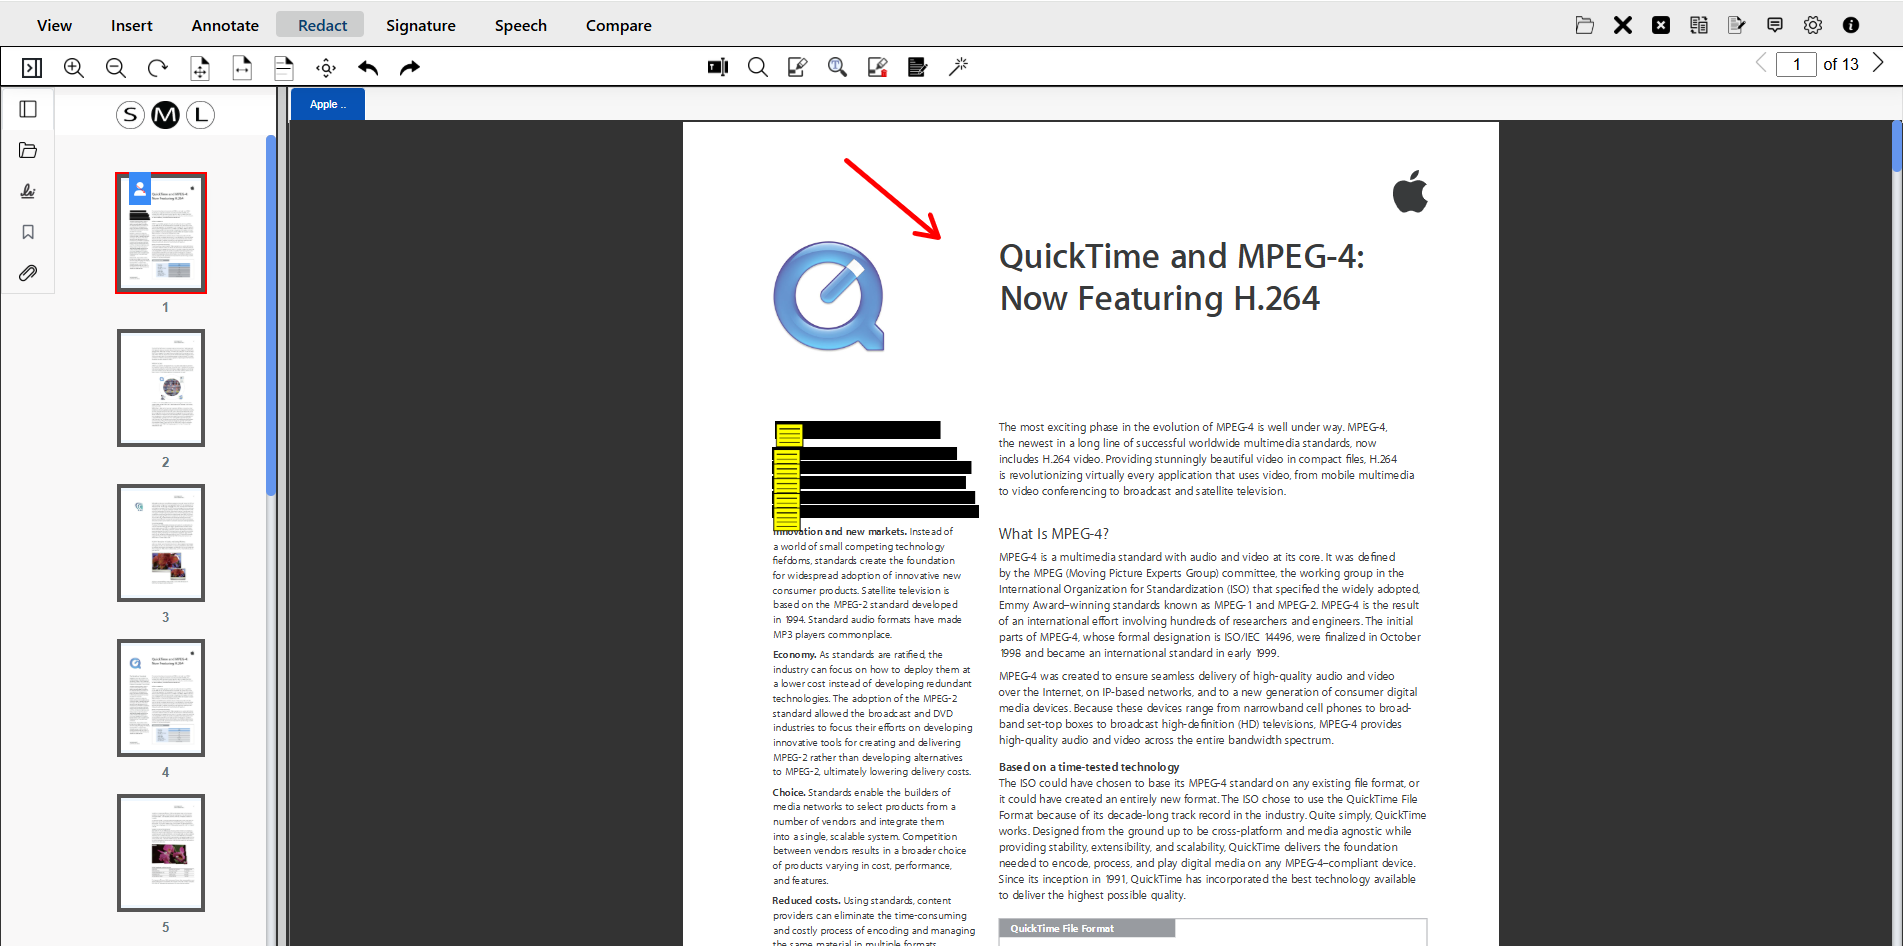
Workflow Summary
The following steps outline how to access and interact with documents and other files in eViewer through SharePoint:
- Navigate to the relevant SharePoint document library.
- Select the desired document and click the “Open with eViewer” button (as configured).
- The document will open in eViewer in a new browser tab.
- Utilize available tools to:
- View, zoom, and navigate pages
- Search within the document
- Add annotations, comments, or redactions
- Save any annotations or changes directly back to the SharePoint document.
Integration Benefits
Integrating eViewer with SharePoint offers several advantages for organizations:
- Seamless Document Viewing
Access and view documents directly within SharePoint document libraries, no need to download or open files in native applications. - Enhanced Collaboration
Enable real-time collaboration with colleagues through shared annotations, comments, and form-filling capabilities. - Multimedia Annotating
Annotate multimedia files using comments, shapes, and other annotation tools to enhance the collaboration experience. - Improved Document Security
Documents remain securely stored within the SharePoint ecosystem throughout the viewing and annotation process. - Embedded Attachment Viewing
Access and view embedded attachments within supported document types.
Additional Resources
For detailed information about integrating and configuring eViewer v7 with SharePoint Online, please refer to the complete integration guide.