Sections
- IBM WebSphere Deployment
Deployment of Viewer Component
This section details the creation and deployment of the eViewer WAR file on the IBM WebSphere. Make sure the file name of eViewer 7 is in the following format:
eViewer7.0.xx
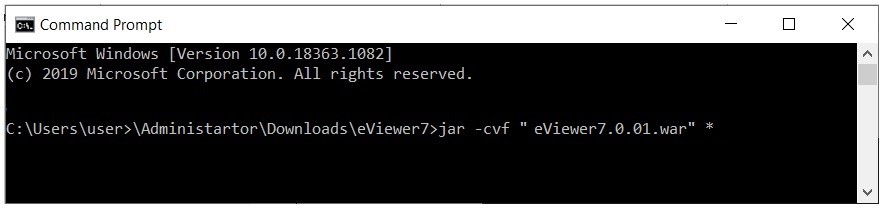
Step 1: Use the following command to generate the war file:
jar –cvf “.war” *
For example: Open the command prompt and input the path of the location of eViewer7.0.xx file. Then the command to make it a war file.
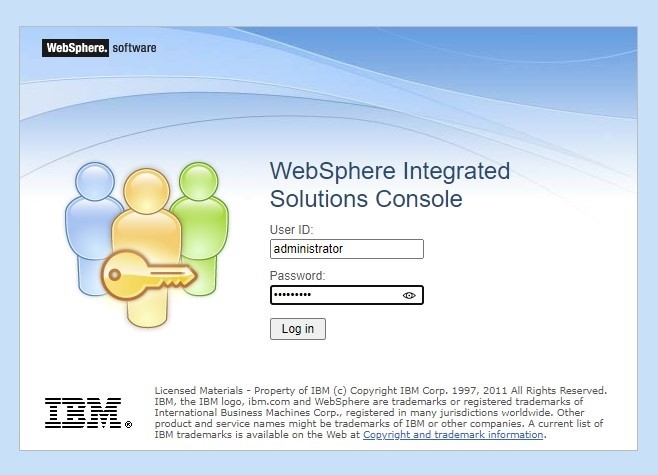
Step 2: Access the IBM WebSphere console and log into WebSphere.
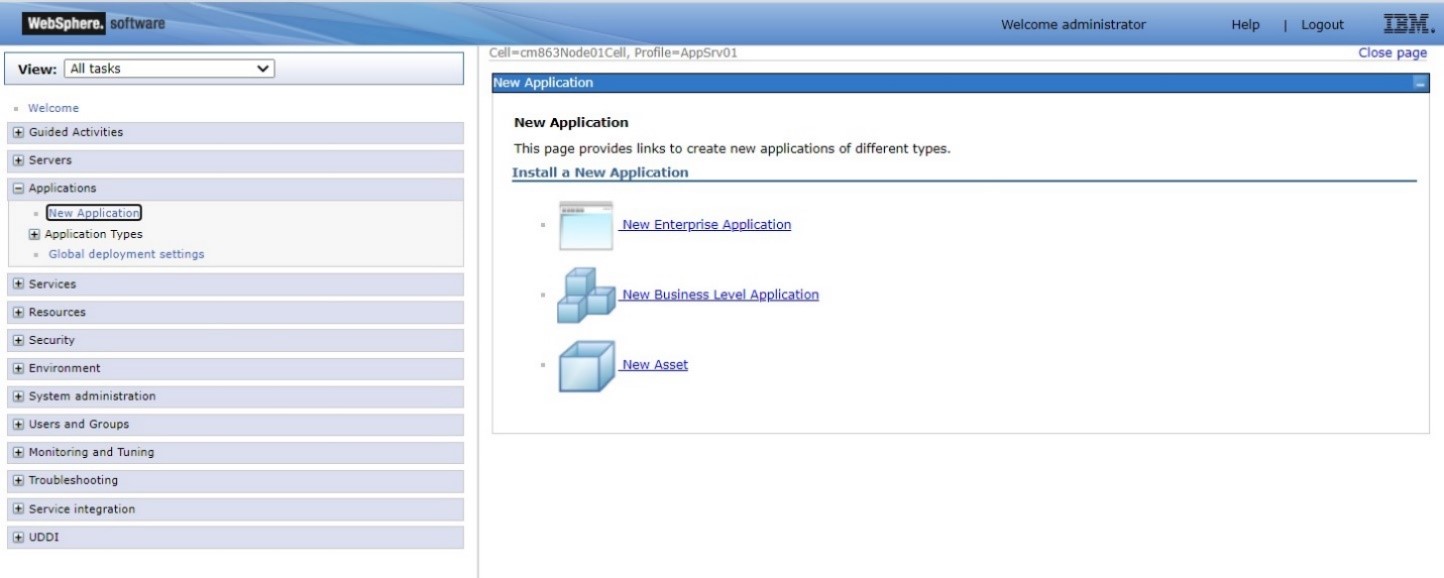
Step 3: Go to Applications and select “New Application”. Next, select the “New Enterprise Application” in order to deploy eViewer in WebSphere.
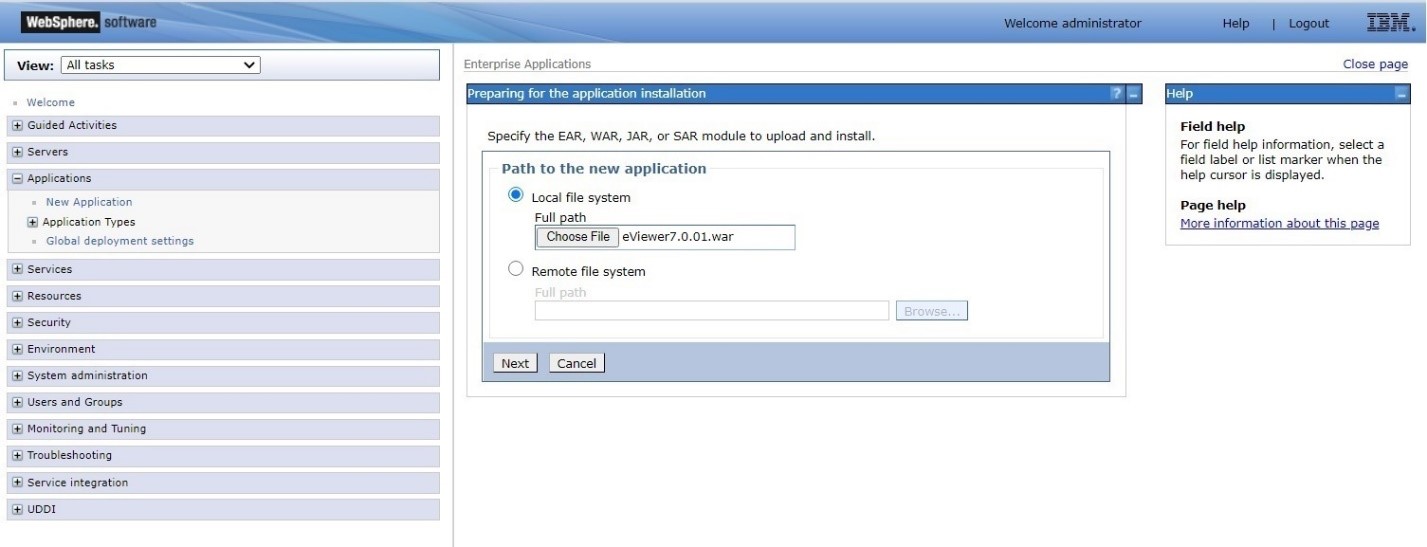
Step 4: Select the location of the eViewer7.0.01.war file and then select “Next”.
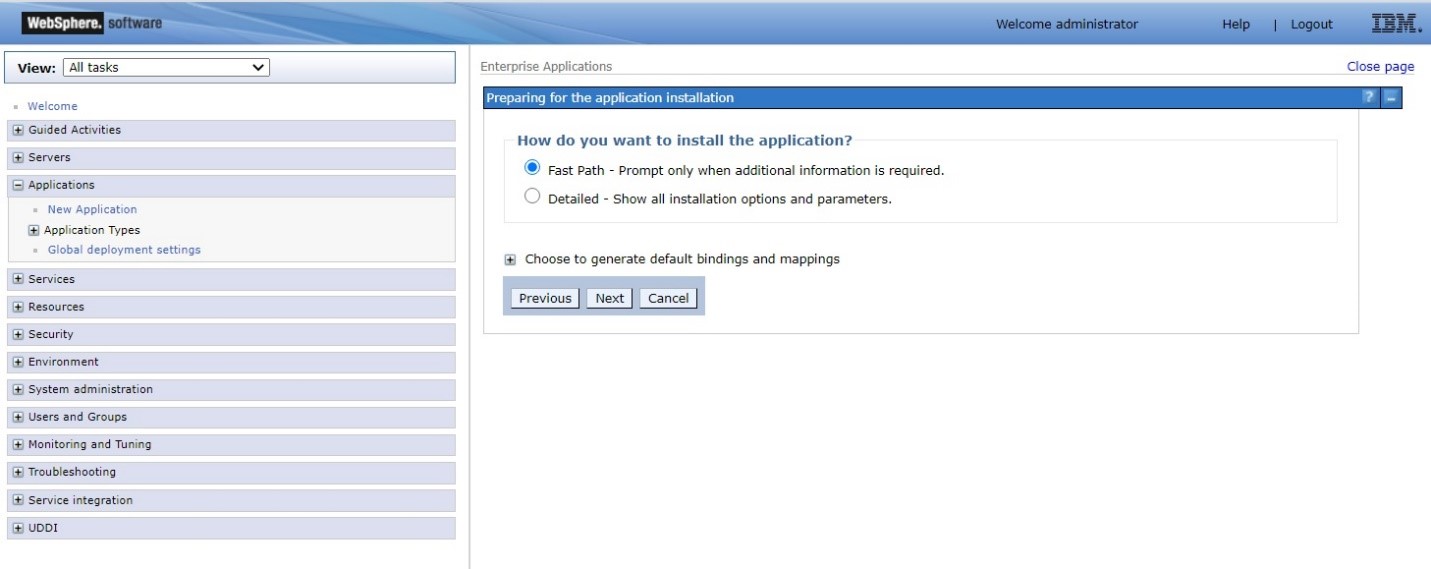
Step 5: Select the “Fast Path – Prompt only when additional information is required” option and the click “Next”.
Step 6: Add and verify the installation details for the “Application Name” and “Application Build ID” fields, then click “Next” to go to the Step 2.

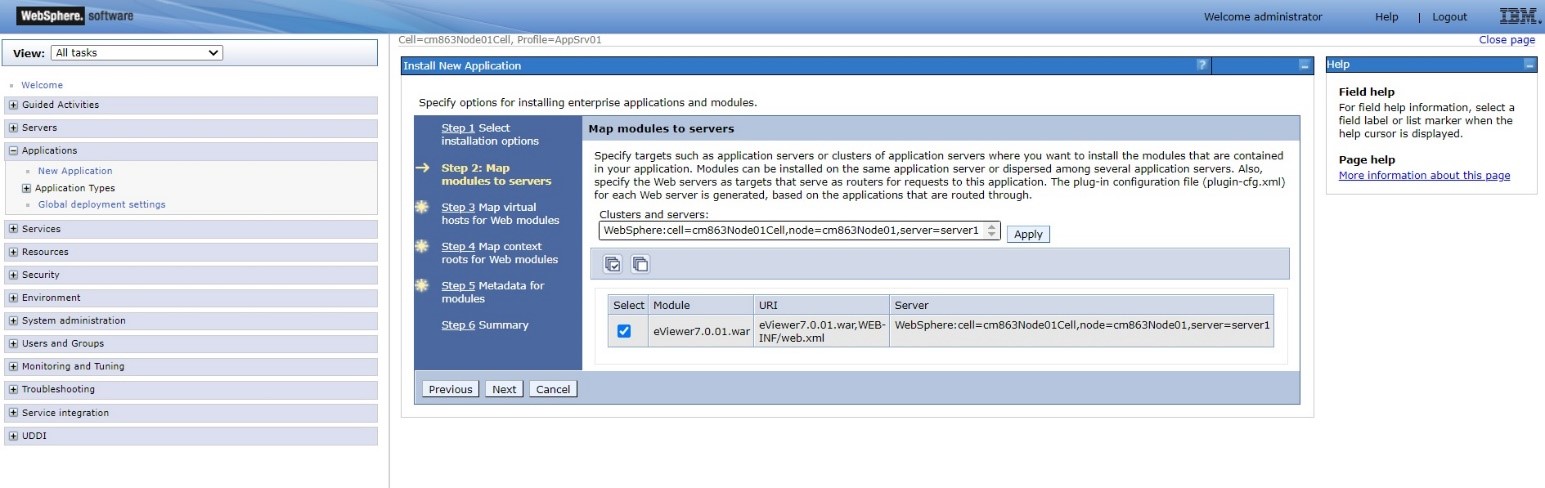
Step 7: For Step 2: Map modules with server, it will show all the modules which needs to be mapped with the IBM application services. Select the eViewer7.0.01.war module and then select Next.
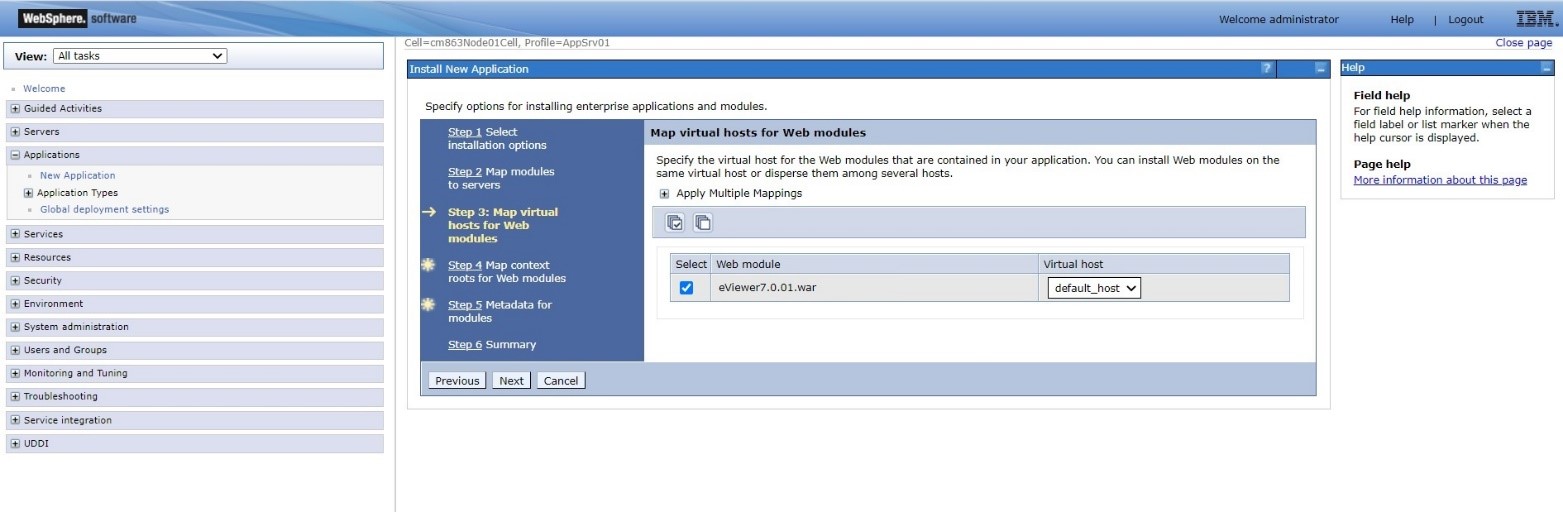
Step 8: Select the desired “Virtual host” from the dropdown menu and then select Next.
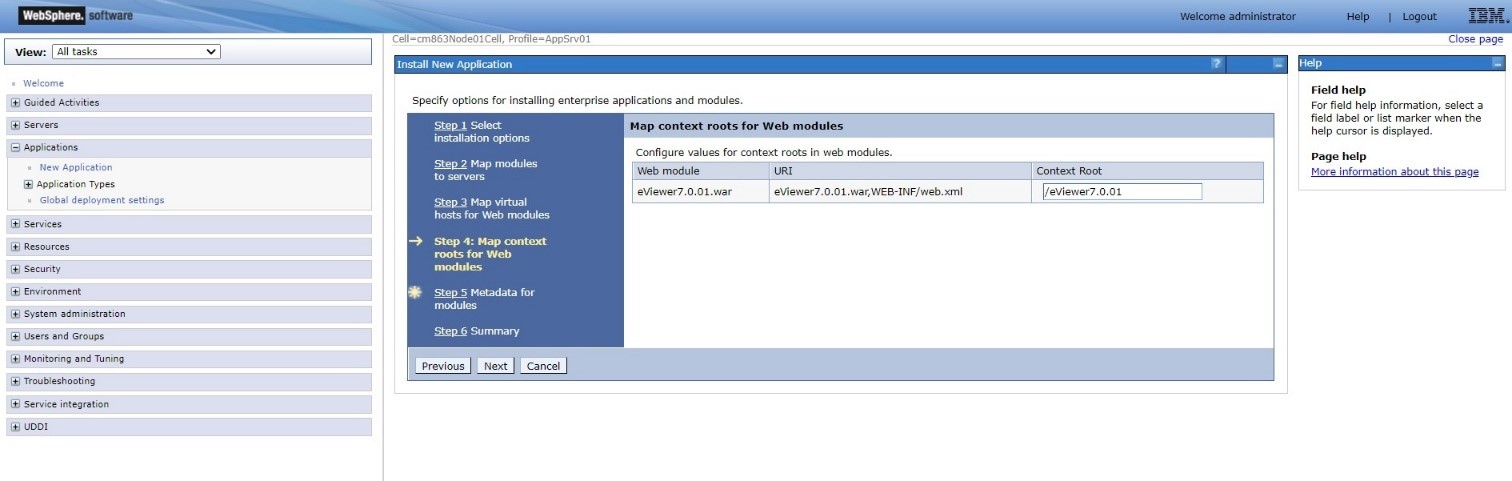
Step 9: Configure values for the context roots in web modules and select Next.
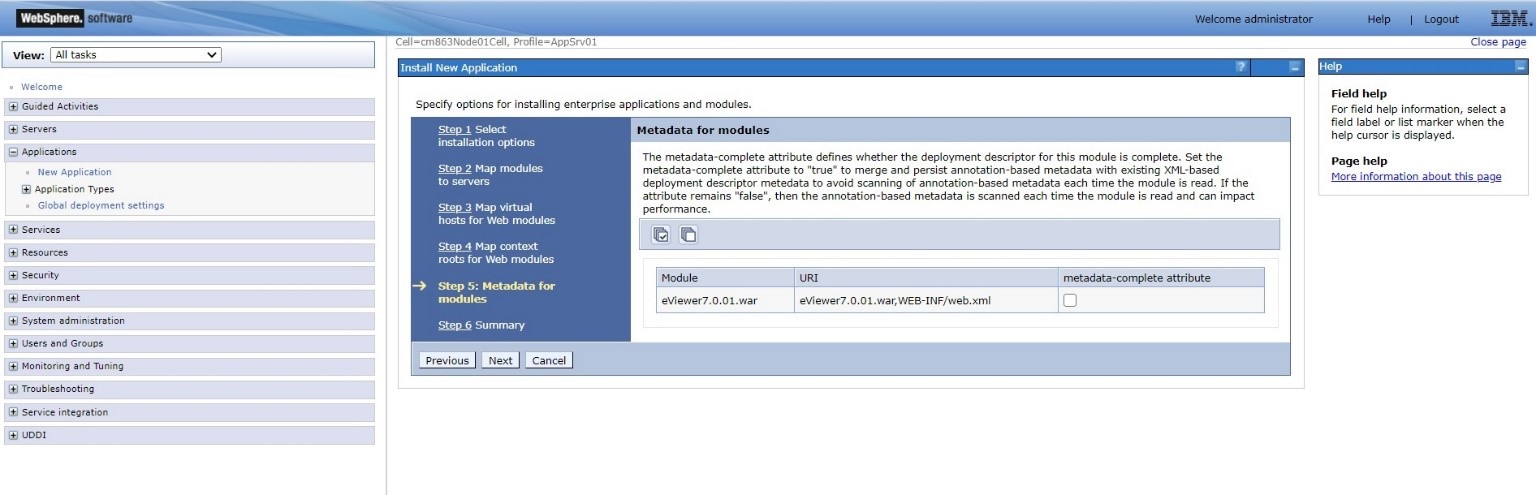
Step 10: Select the checkbox to enable metadata if needed and select Next.
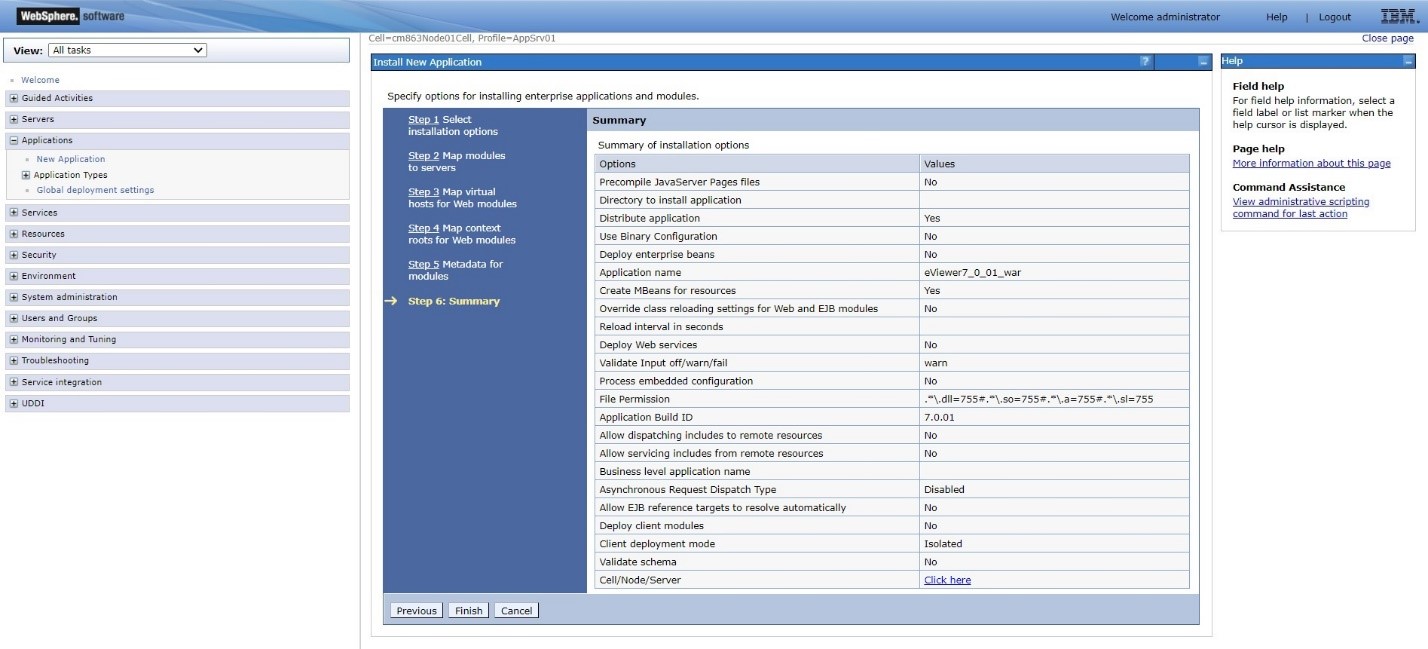
Step 11: Confirm the details in the Summary. If the details are correct, select Finish.
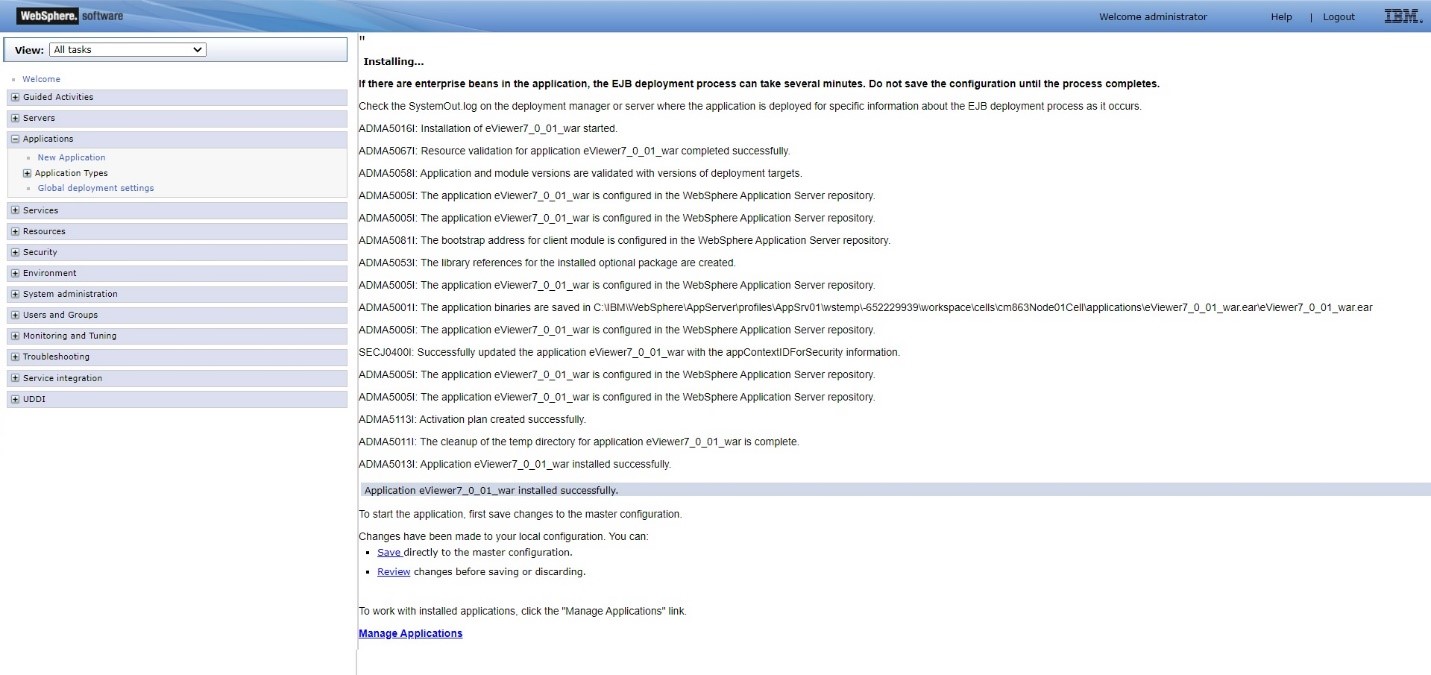
Step 12: Select Save for saving the final changes and finalize the deployment.
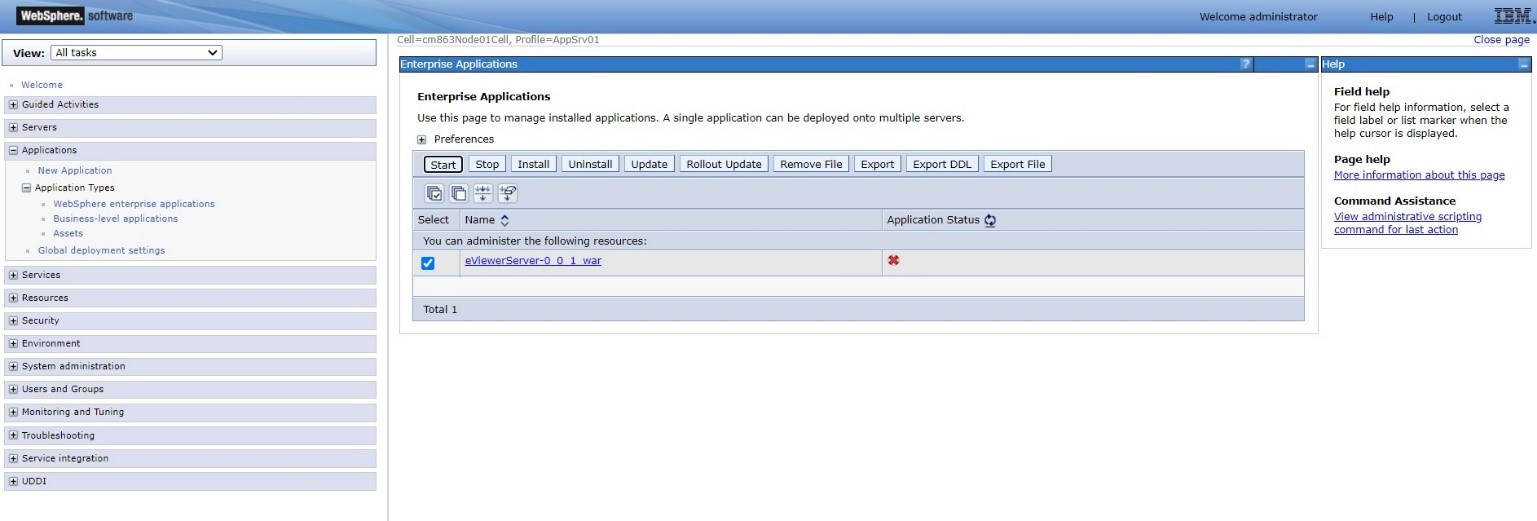
Step 13: To confirm the deployment of the WAR file, go to Applications>Application types>WebSphere enterprise applications, eViewer7_0_01_war application should be displayed.

Step 14: You can start the application by clicking the “Start” button.
Deployment of server component
This section details the creation and deployment of the eViewer Server WAR file on the IBM WebSphere.
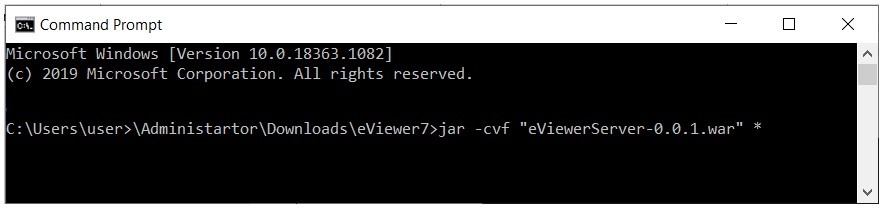
Step 1: jar –cvf “eViewerServer-0.0.1.war” *
Open the command prompt and navigate to the path of the eViewer7 folder. The enter in the command to generate a war file. For example:
Step 2: Access the IBM WebSphere console and log into WebSphere.
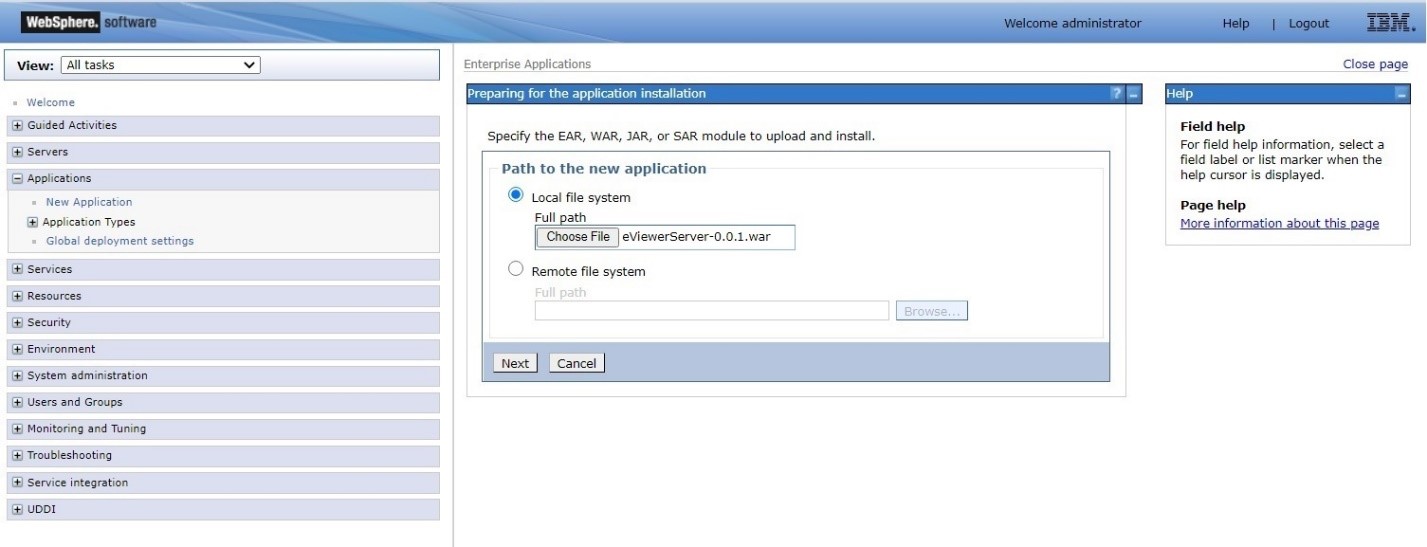
Step 3: Go to Applications and select “New Application”. Next, select the “New Enterprise Application” in order to deploy eViewer in WebSphere.

Step 4: Select the eViewerServer-0.0.1.war file from the folder and select Next.
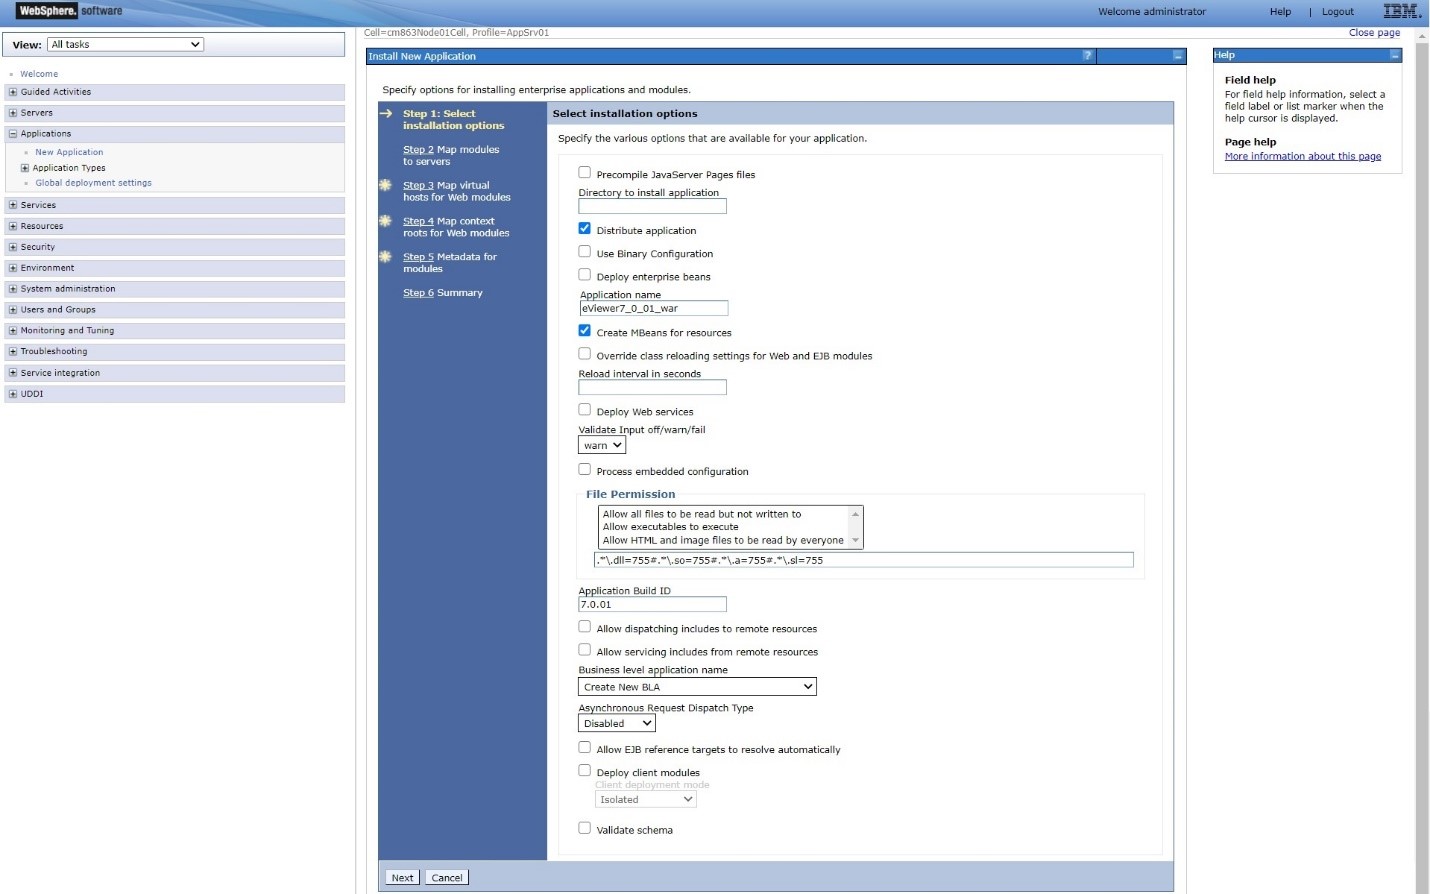
Step 5: Add and verify the installation details for the “Application Name” and “Application Build ID” fields, then click “Next” to go to the Step 2.
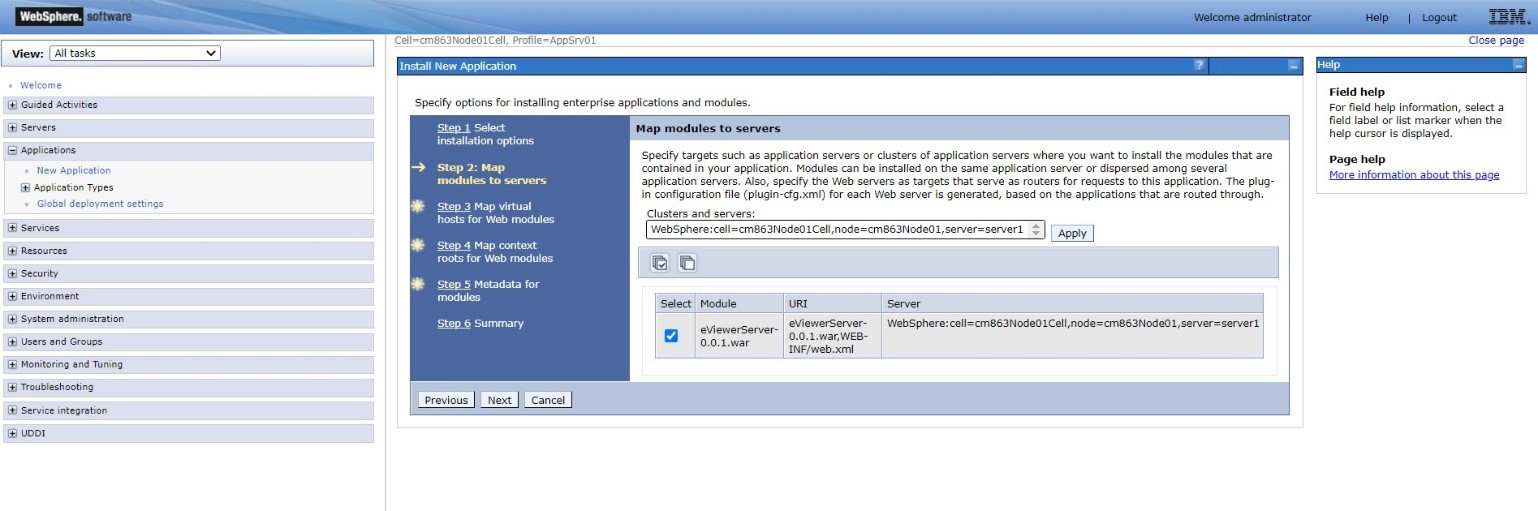
Step 6: For Step 2: Map modules with server, it will show all the modules which needs to be mapped with the IBM application services. Select the eViewerServer-0.0.1.war module and then select Next.
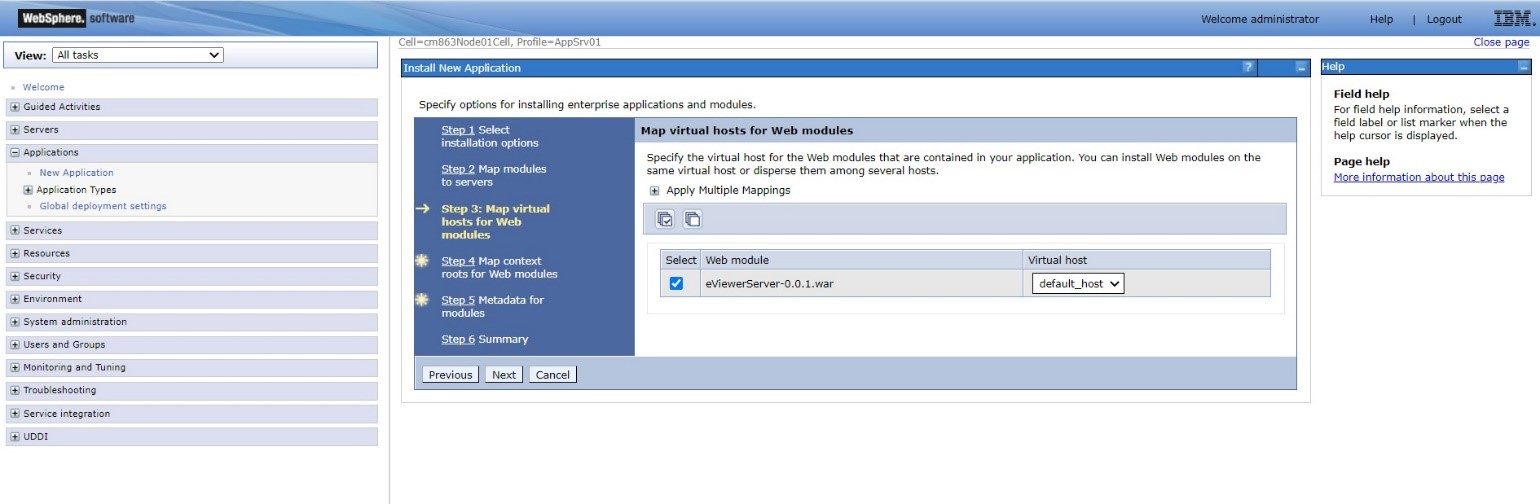
Step 7: Select the desired “Virtual host” from the dropdown menu and then select Next.
Step 8: Configure values for the context roots in web modules and select Next.

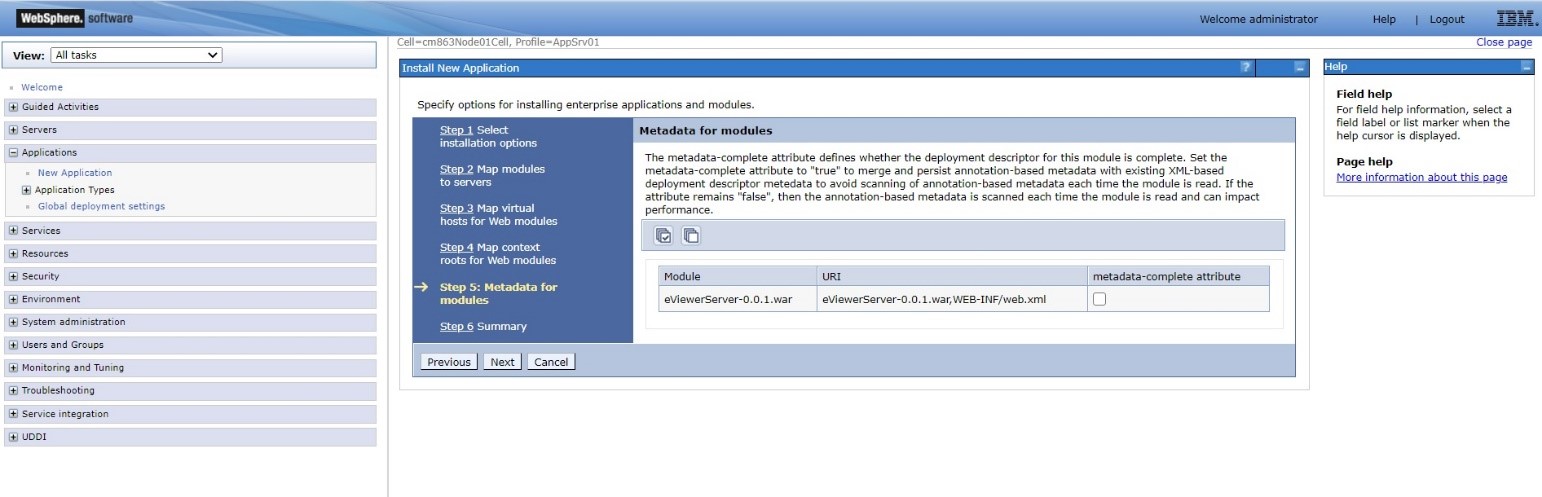
Step 9: Select the checkbox to enable metadata if needed and select Next.
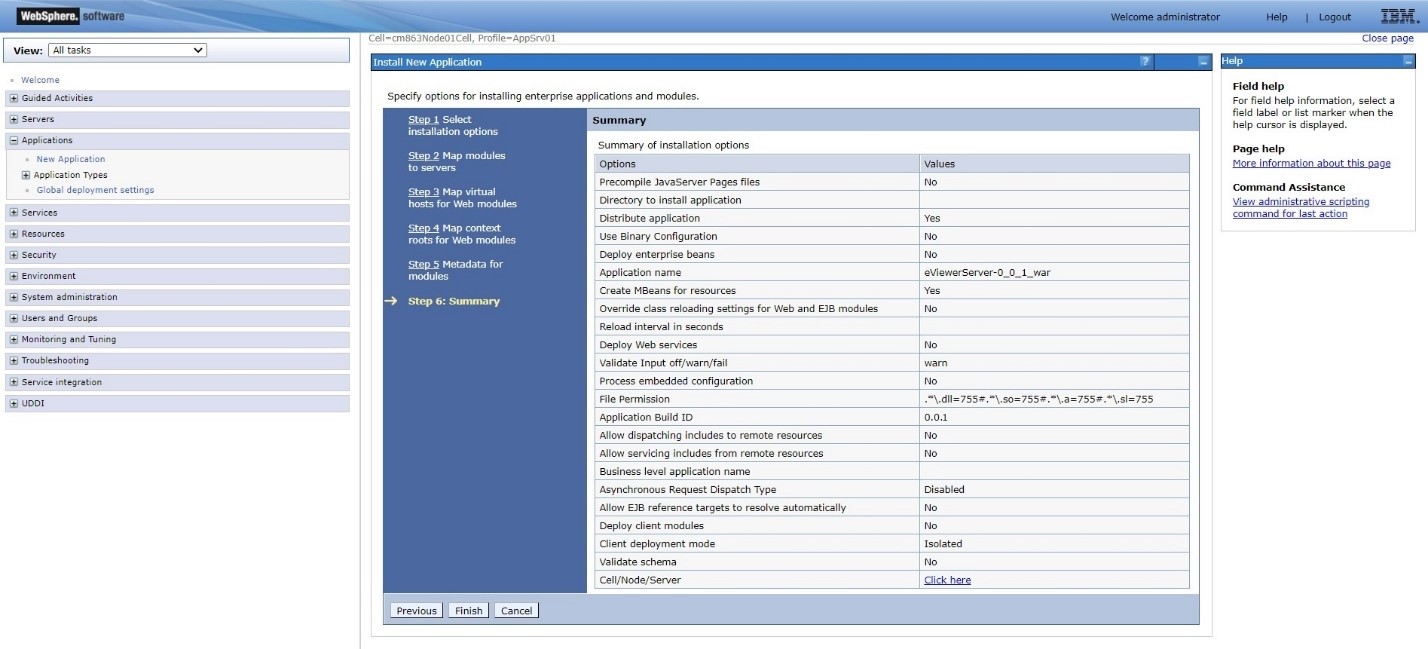
Step 10: Confirm the details in the Summary. If the details are correct, select Finish.
Step 11: Select Save for saving the final changes and finalize the deployment.
Step 12: To confirm the deployment of the WAR file, go to Applications>Application types>WebSphere enterprise applications, eViewerServer_0_0_1_war application should be displayed.

Step 13: You can start the application by clicking the “Start” button.
