Architecture Overview: Deployment over AWS App Runner
eViewer consists of multiple app services that can be deployed over the AWS infrastructure. In this guide, we will focus on deploying two specific services of eViewer: eViewer 7 and eViewer server
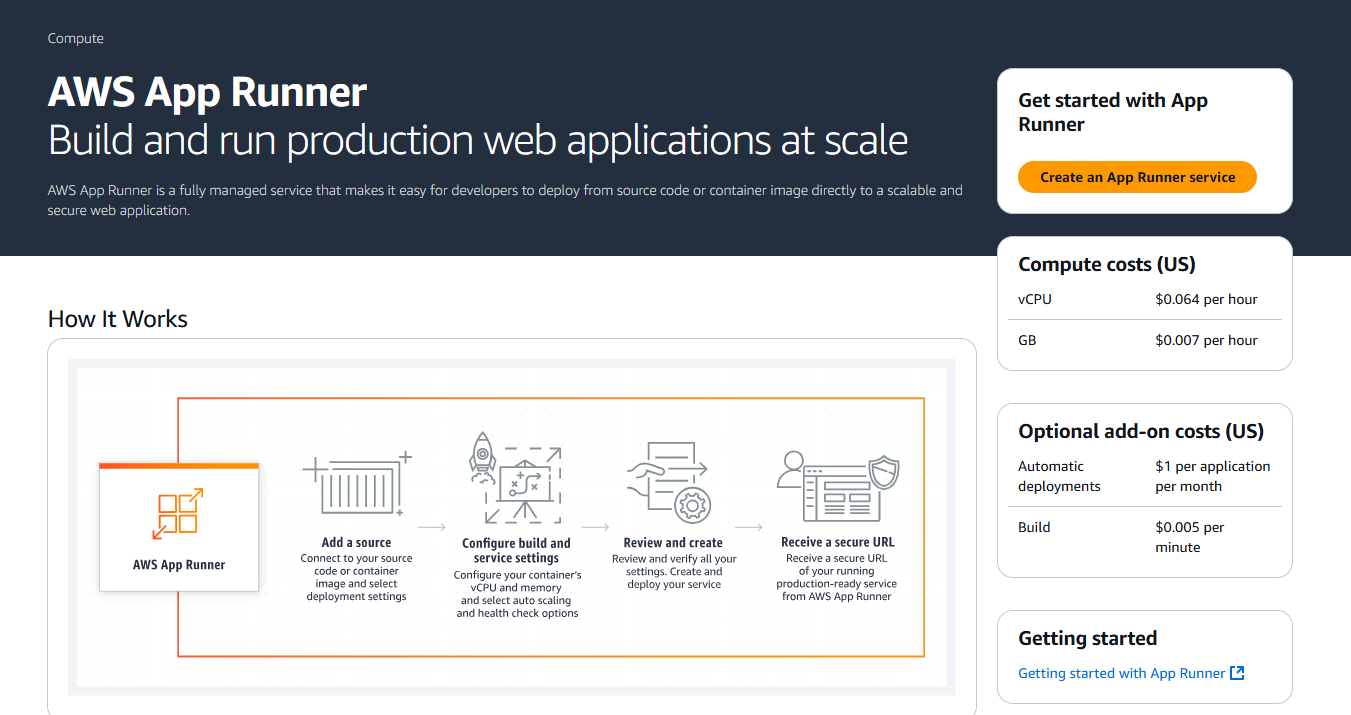
To begin, navigate to AWS Console and select AWS App Runner. Below are the services we will discuss how to deploy them step by step.
eViewer v7
- Purpose: The primary frontend service required for advanced document viewing, editing, and collaboration features. It allows users to view, edit, fill out PDF form fields, add watermarks, annotations, save documents, and more.
- Deployment: Runs in a Linux-based Docker container.
- Docker Image: For instance, the Docker image can be referenced as index.docker.io/mstechinc/eviewer7:<version_tag>
Deployment Steps:
Step1: In the AWS App Runner, click on ‘Create an App Runner service’ on the right side.
Step 2: Choose ‘Container Registry’ as a source, and provide the ‘public.ecr.aws/z7l1z8s2/mstechinc/eviewer7:<version_tag>’ in the container image URI.
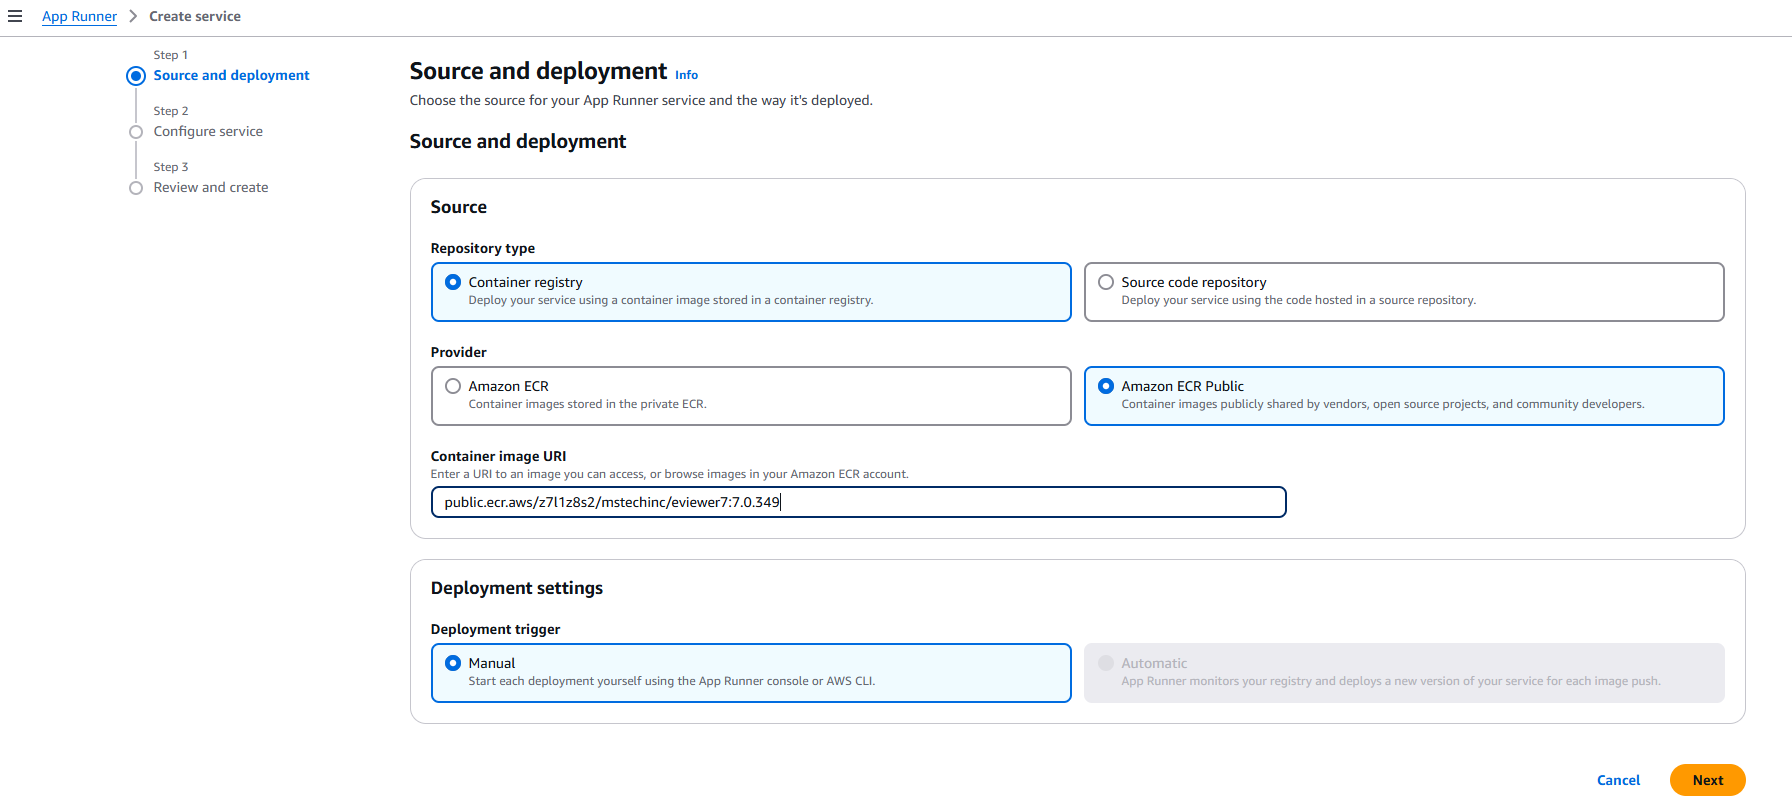
Step 3: Click Next.
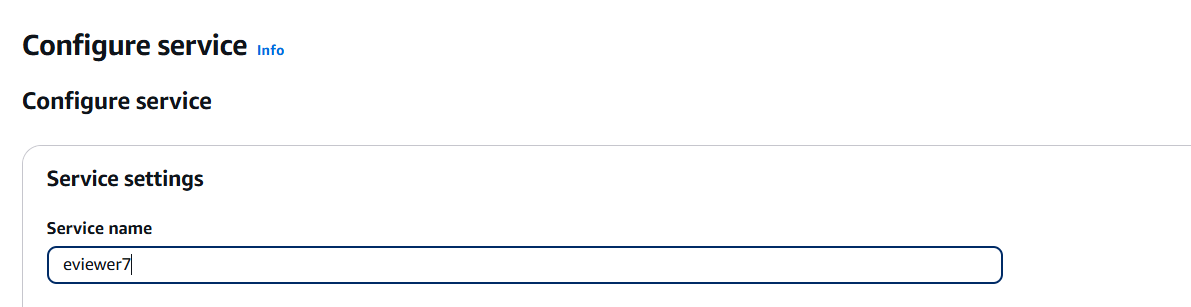
Step 4: Provide a name to the service. For example, eviewer7.
Step 5: Choose the Virtual CPU memory, eViewer requires a minimum of 2 GB.

Step 6: Create Next and select Create & deploy.
Step 7: Once deployed, access the resource. You can view the eviewer7 service running.
Step 8: Now, verify the URL in the Default domain field.
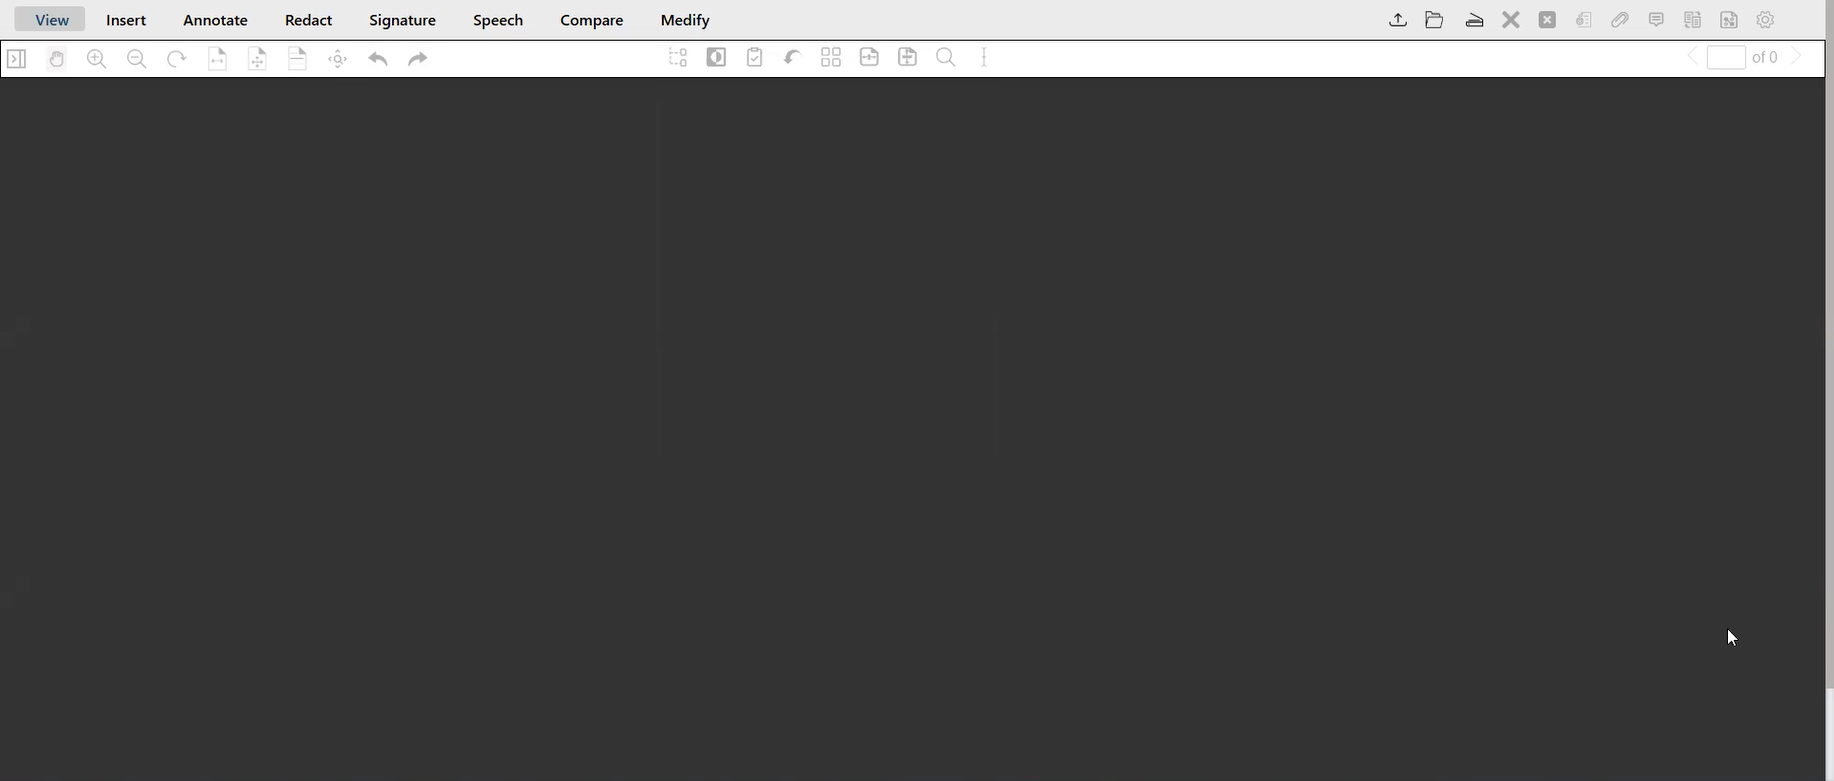
Step 9: Open the URL to ensure the viewer is rendered correctly.
eViewer Server
- Purpose: The viewer’s backend service requires the eViewer server to support advanced functionalities such as redaction, document comparison, digital signature, crop page, and office document rendering.
- Deployment: This service is optional and will be deployed using a Linux-based Docker container.
- Docker Image: For instance, the Docker image can be referenced as index.docker.io/mstechinc/eviewer-server:<version_tag>
Deployment Steps:
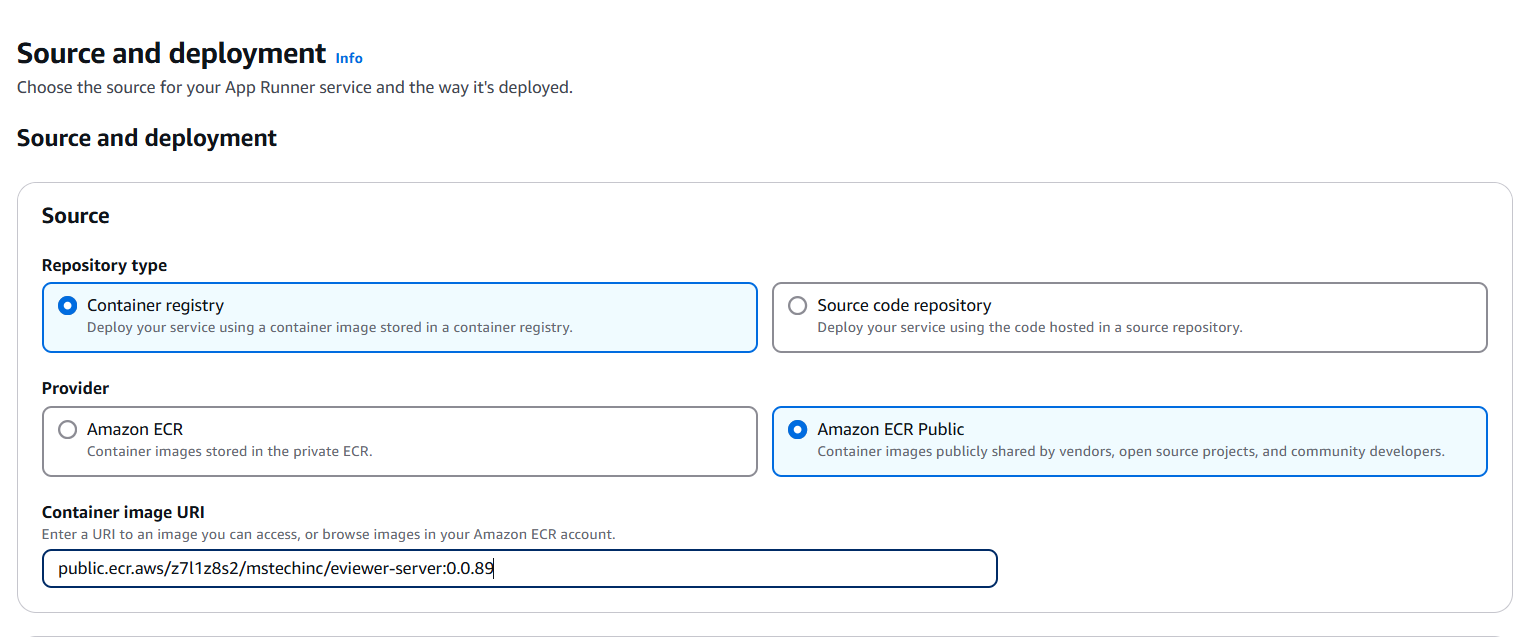
Step 1: In the AWS App Runner, click on ‘Create an App Runner service’ on the right side.

Step 2: Choose Container Registry as a source, and provide the public.ecr.aws/z7l1z8s2/mstechinc/eviewer-server:<version_tag> in the container image URI.
Step 3: Click Next.
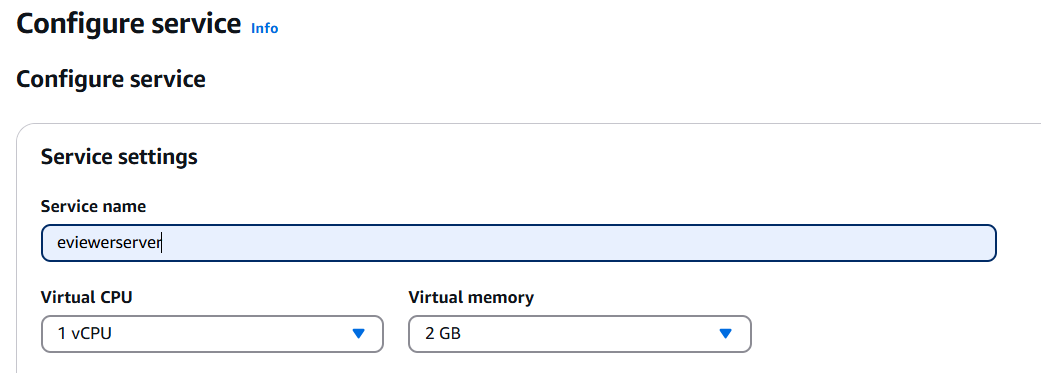
Step 4: Provide a name to the service. For example, eviewerserver.
Step 5: Choose Virtual CPU memory, 4 GB or higher is recommended.
Step 6: Add an environment variable for the license named: evSrvrLicenseKey

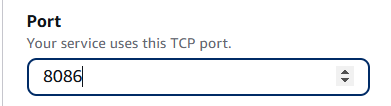
Step 7: Set port to: 8086
Step 8: Create Next and select Create & deploy. The deployment of eviewer7 will be completed successfully.
Step 9: Once deployed, access Resource, where you can view the eviewer7 service running.
Step 10: Now, verify the URL in the Default domain field.
Step 11: Open the URL in the browser with /api/v1/getCurrentTimeStamp. This will display the current date and time of the server.
By completing these steps, you can successfully deploy eViewer into AWS. This deployment will grant you access to advanced features for document viewing and editing capabilities, ensuring smooth and effective management of your documents.